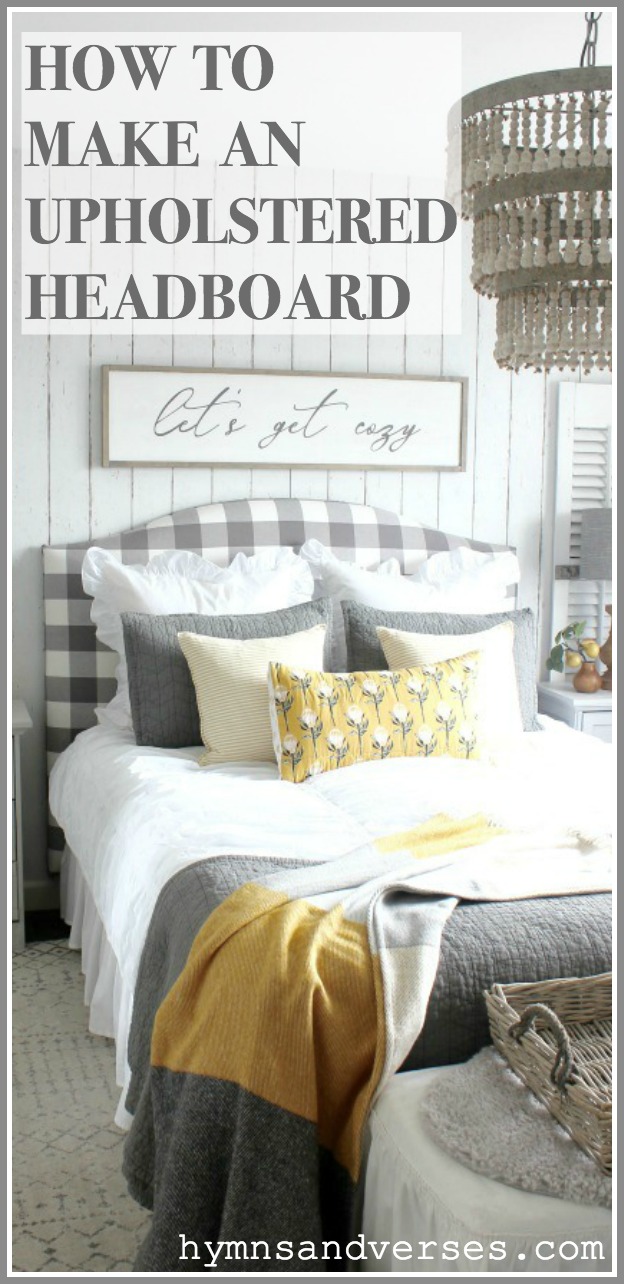
Today I want to share how Mark and I made our DIY headboard. An upholstered headboard is an easy DIY project that can make a big impact in your bedroom. You can find tutorials on Pinterest showing you how to make a button tufted upholstered headboard, but I decided to keep things more simple and skip the button tufting. And this style is a classic.
*This post contains some affiliate links for your convenience. Please see my full disclosure statement HERE.
SUPPLIES TO MAKE A DIY HEADBOARD
One 4 x 8 ft. piece of plywood, particle board or MDF
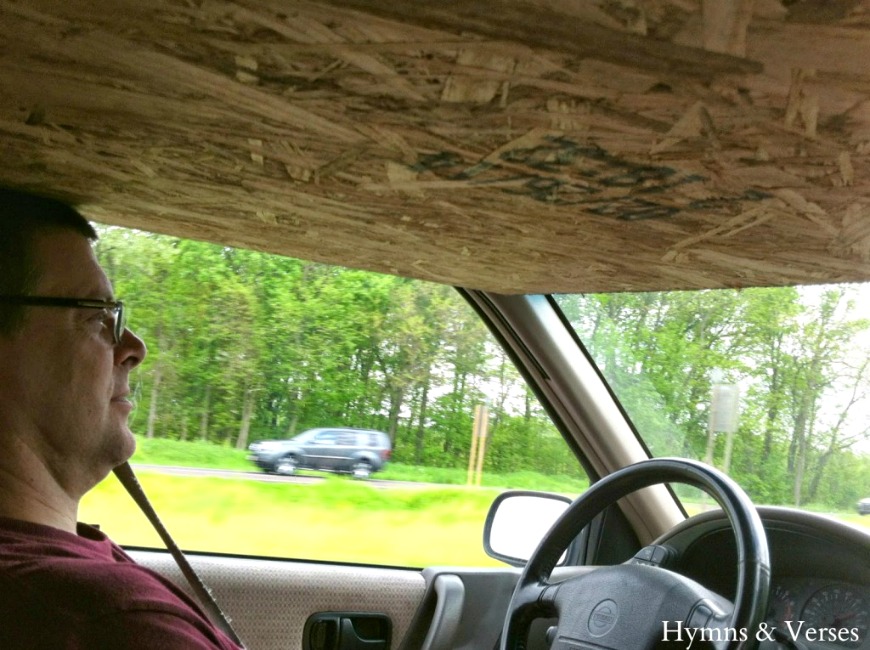
One thing to keep in mind when you are purchasing wood or plywood for a project – know what will fit into your vehicle! We got the particle board in the minivan, but had to duck under it to get inside the van, recline our seats and drive that way home! Here’s a picture of Mark driving with his seat reclined on our way home from The Home Depot!
The first thing you need to do is measure the width of your bed and cut your board to size. We made ours to be about six inches wider than our queen sized bed. Then, along the top of the board, draw the shape for the top of the headboard. I liked the shape and style of the Pottery Barn Raleigh Upholstered Headboard. To get the headboard shape symmetrical, just draw from the center point of the board to one side. Then use the jigsaw to cut out just that half. Now, take the piece that you cut off and place it on the opposite side and trace the same pattern in reverse. In the picture below, you can see the shape that we cut. It was taken after we had some of the project already completed.
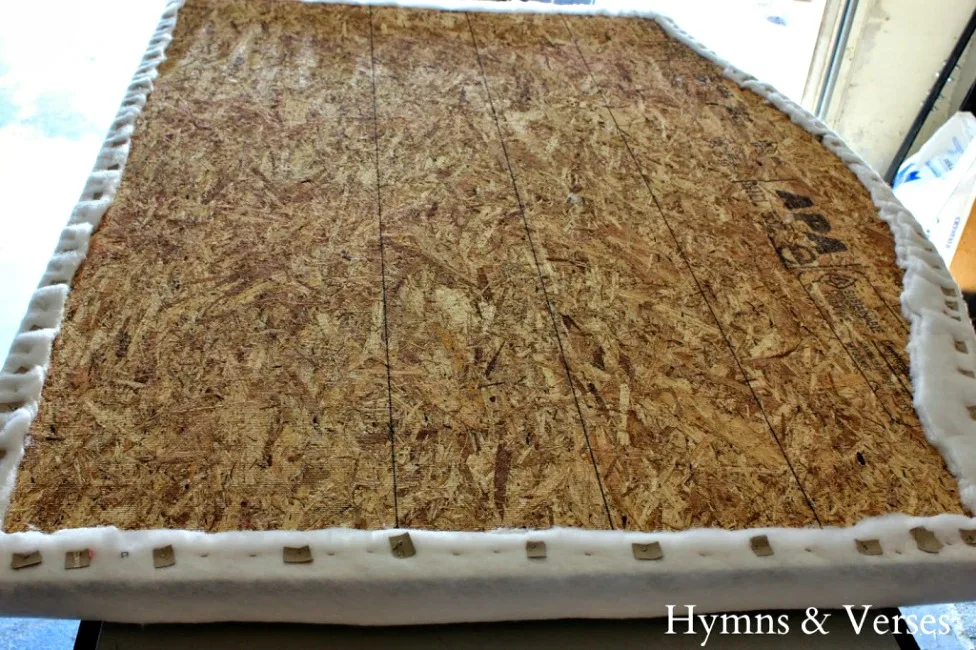
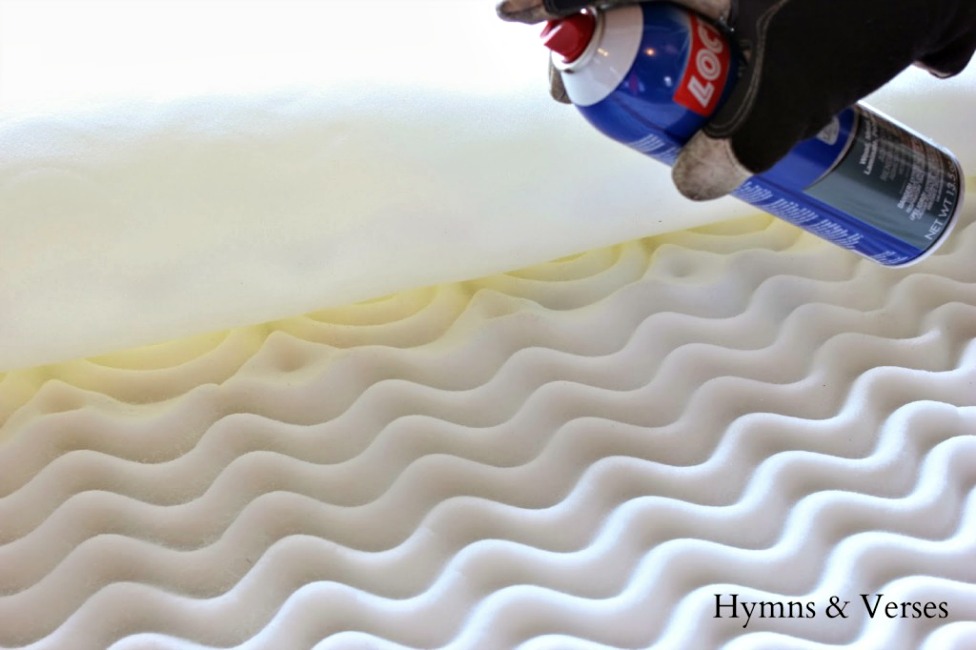
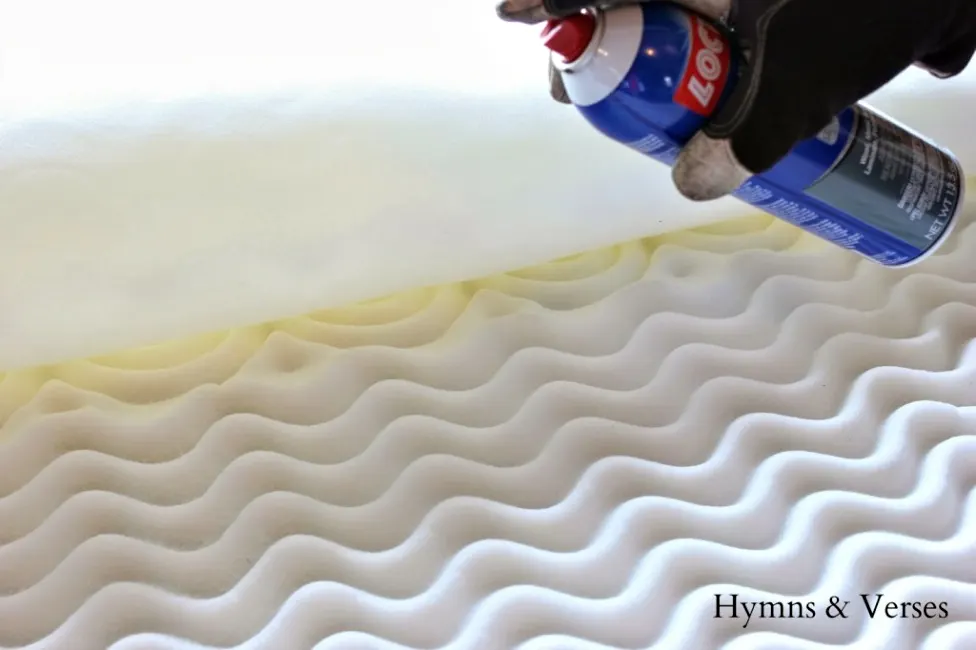
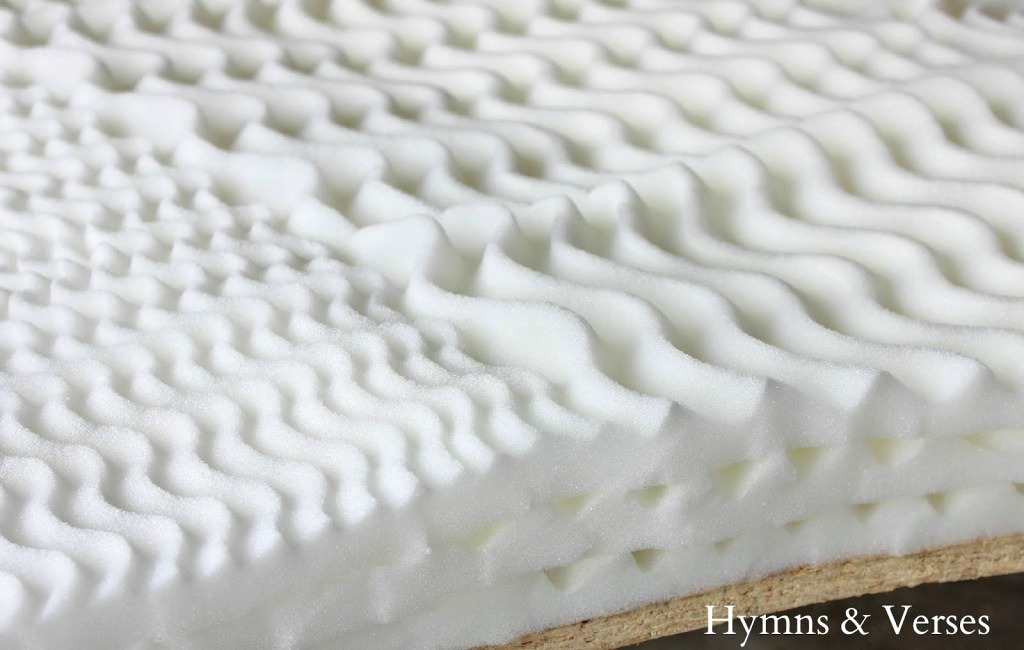
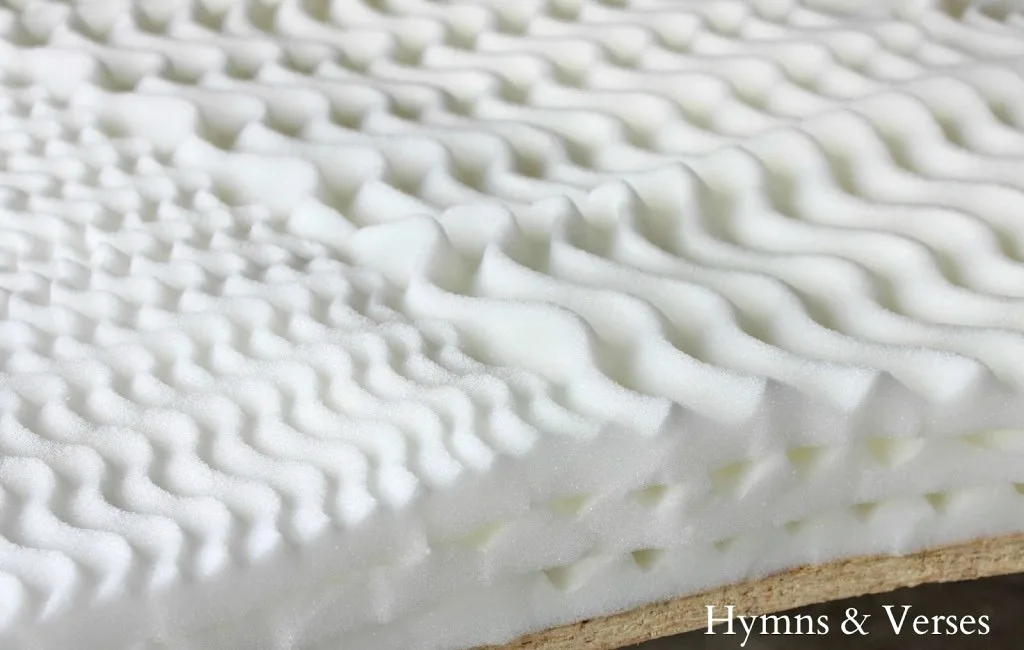
Now, it’s time to apply the foam to the board. We used a high performance spray adhesive on the board and then applied the foam. We pressed the foam down as we went along to make sure it was secured to the board with the adhesive. Once the first layer of foam was attached, I used basic utility scissors to cut around the foam using the board edge as my guide. Repeat these steps to apply the next two layers of foam.
Here’s the cut edge of foam with all three layers attached to the board.
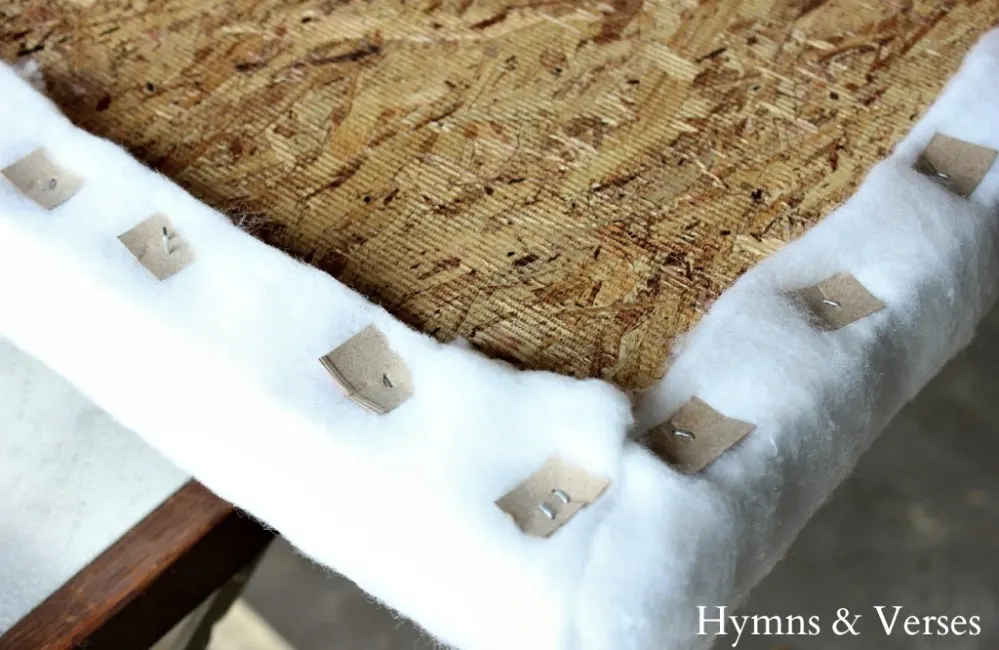
Now, it’s time to add the batting. There was enough batting in the package for us to keep it doubled and still cover the entire board. We spread the batting over the foam and then flipped the board over on top of our work table – so the back of the board would be facing up. Beginning at the top curved edge in the center, we pulled the batting over the wood edge and used the staple gun to apply a few staples to hold the batting. Then we went to the bottom opposite edge and did the same – pulling the batting tight and wrapping it around the bottom edge and stapling to the back of the headboard. We continued to work in this back and worth fashion to make sure the batting was tight all the way around the board. You can see that we used small pieces of thin chipboard to hold the staples in place. With a pneumatic gun, there is sometimes a tendency for the staples to be so tight that the fabric will pull through. The chipboard keeps this from happening. We just cut up pieces from a cereal box. You can see from the photo below how I folded the corner – like you would a present.
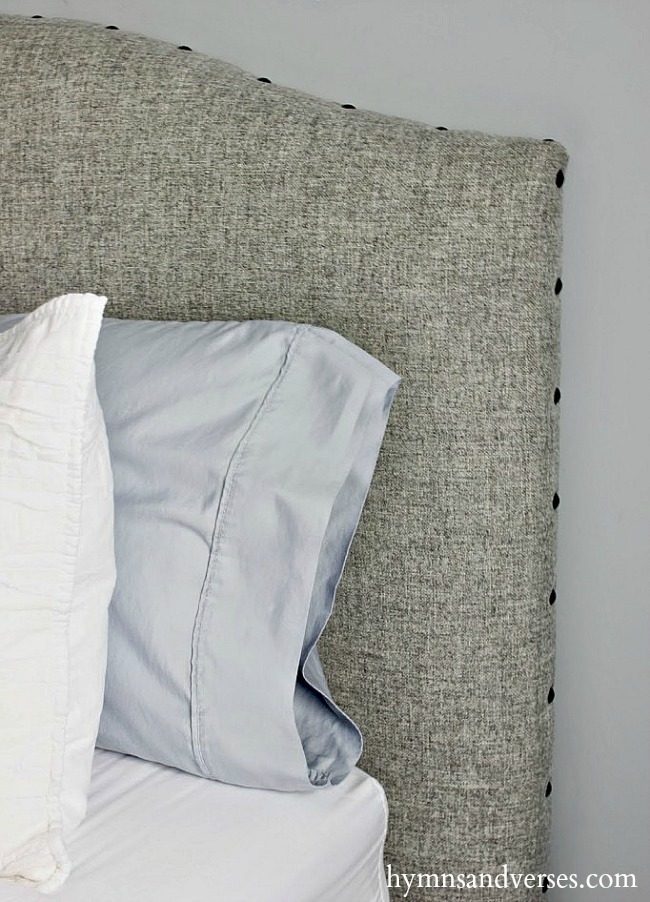
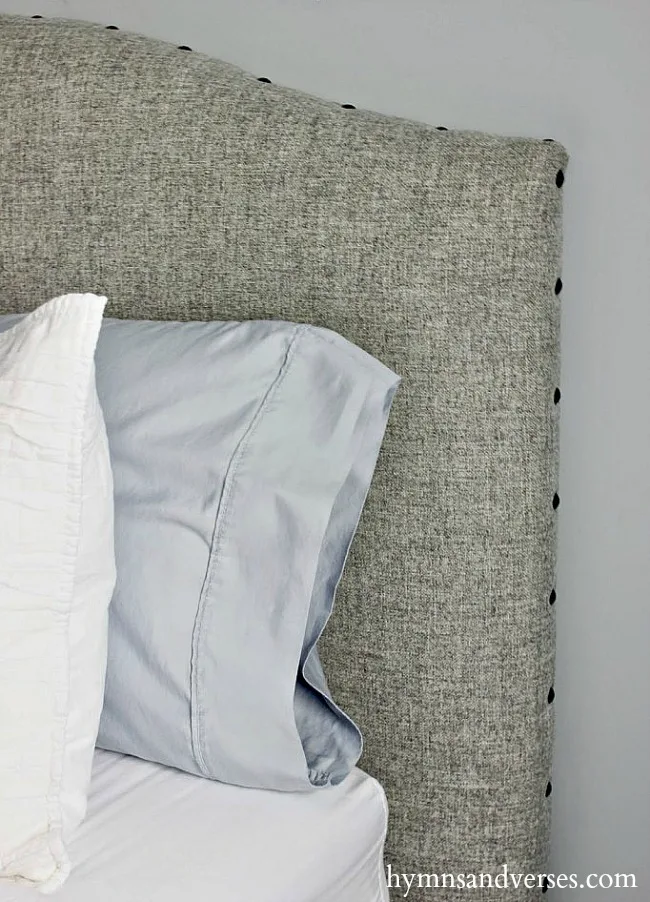
The final step is to attach the fabric in the same way you did the batting. If your fabric has a pattern, make sure it’s centered on the headboard before you begin to attach it. I would pull the fabric and Mark would staple and it seemed to go pretty fast. We would take occasional breaks and flip the board over to make sure we were getting a good result. I would say that the hardest part of this is getting the corners to look neat.
For this next step, I didn’t take any photos. I think I was too excited about how it was turning out and just forgot to take any pictures. Mark took the headboard to our bedroom and placed it behind the bed and I showed him how high I wanted it to be off the floor. Then Mark made legs to the size needed out of 2 x 4 wood and screwed the legs into the back of the headboard. He set the legs in a bit so they wouldn’t be seen behind the bed frame. Since they won’t be seen, we didn’t bother to cover them with fabric.
I used my tap hammer to add the decorative nail heads. I used a piece of cardboard I cut as a spacer to keep them equally spaced. The photo above shows the original gray tweed fabric when we first completed this project. Then, it was quickly changed to a white cotton canvas.
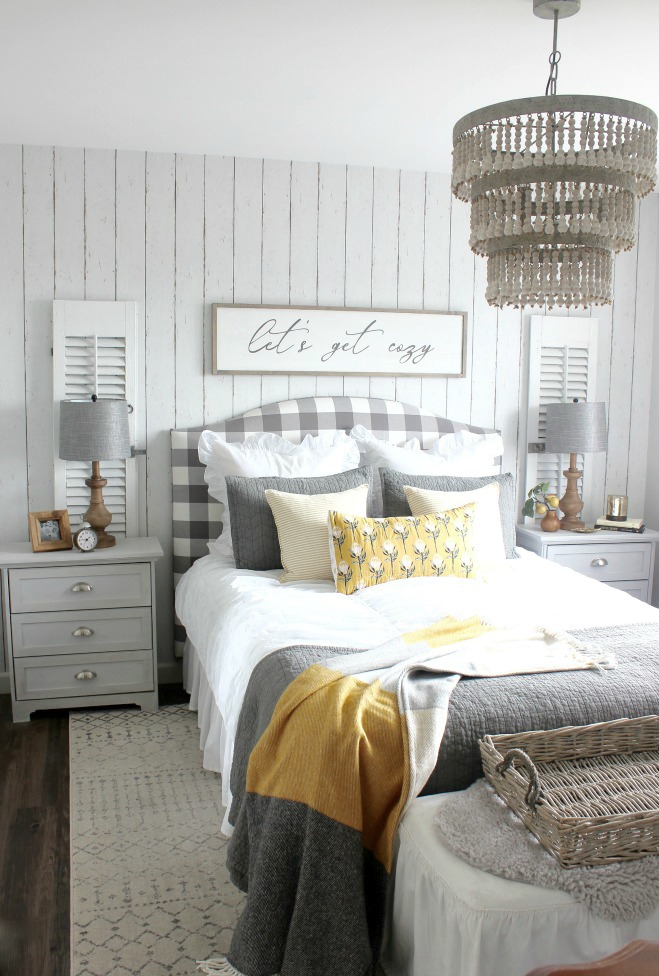
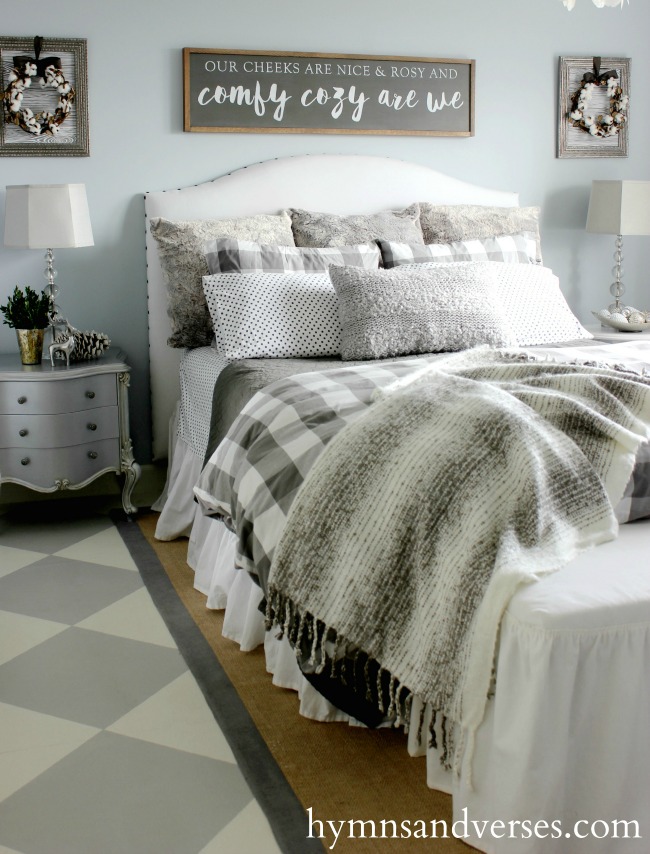
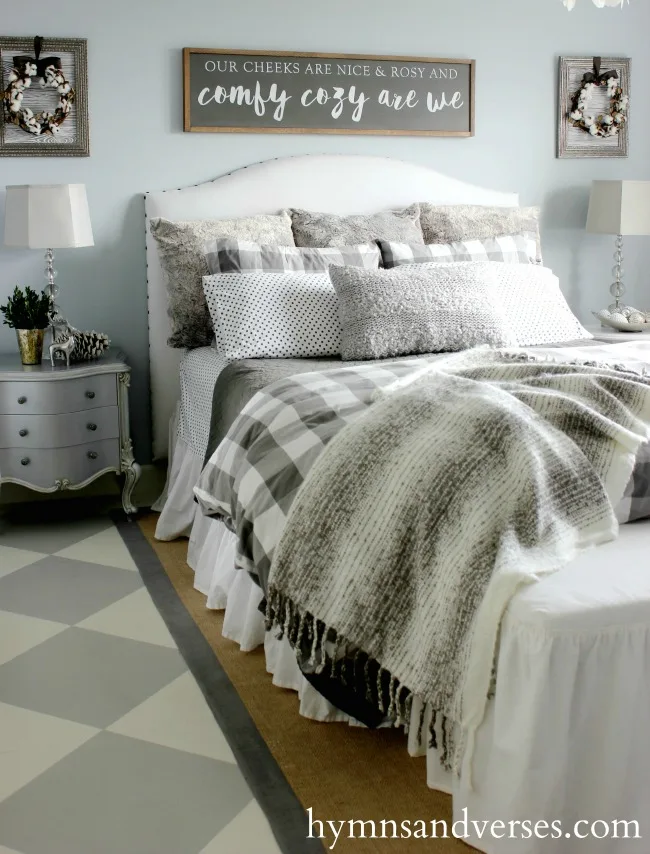
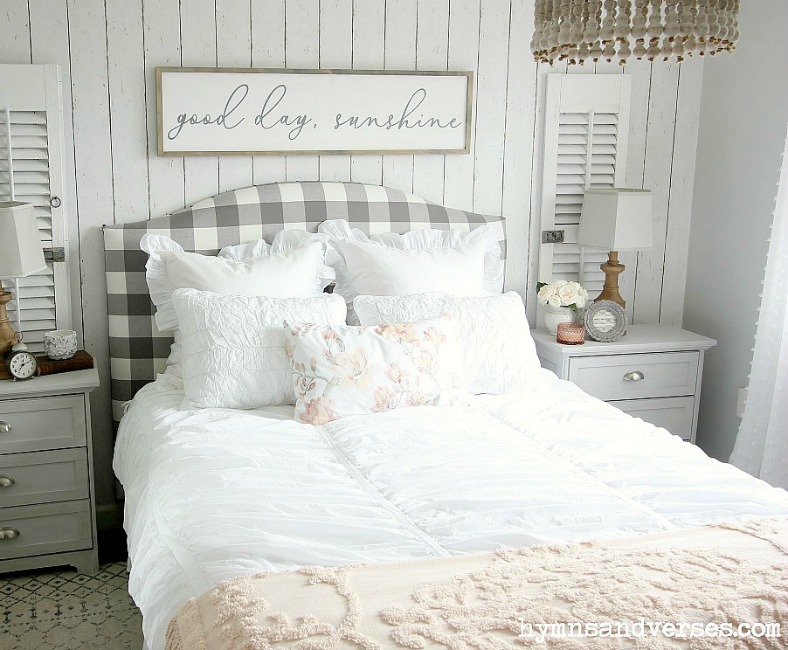
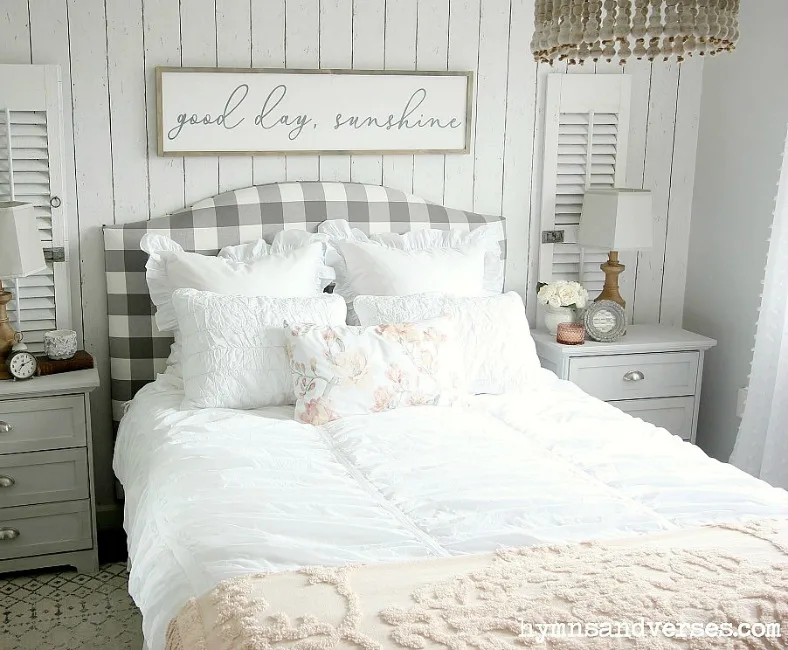
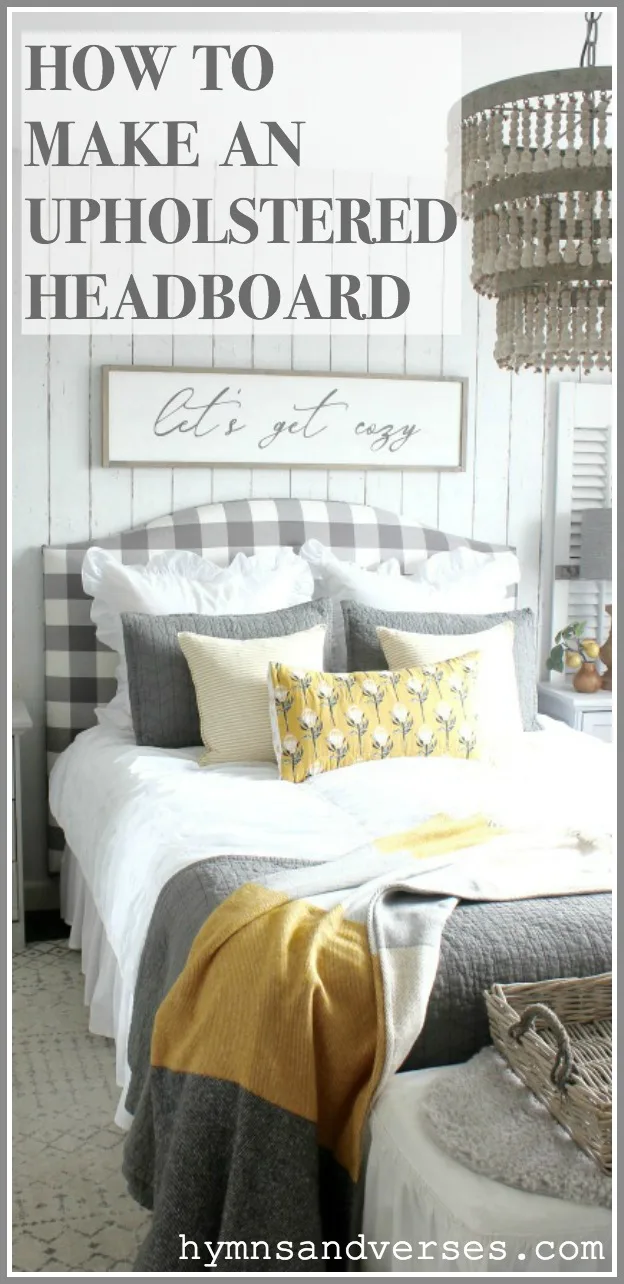
It stayed that way for a while and then came my favorite, the gray buffalo check! THIS is what I used for the buffalo check fabric. I initially had this as a duvet cover on our bed, but then decided I wanted to use the fabric for the headboard! I just used one layer and now have extra fabric for other projects.
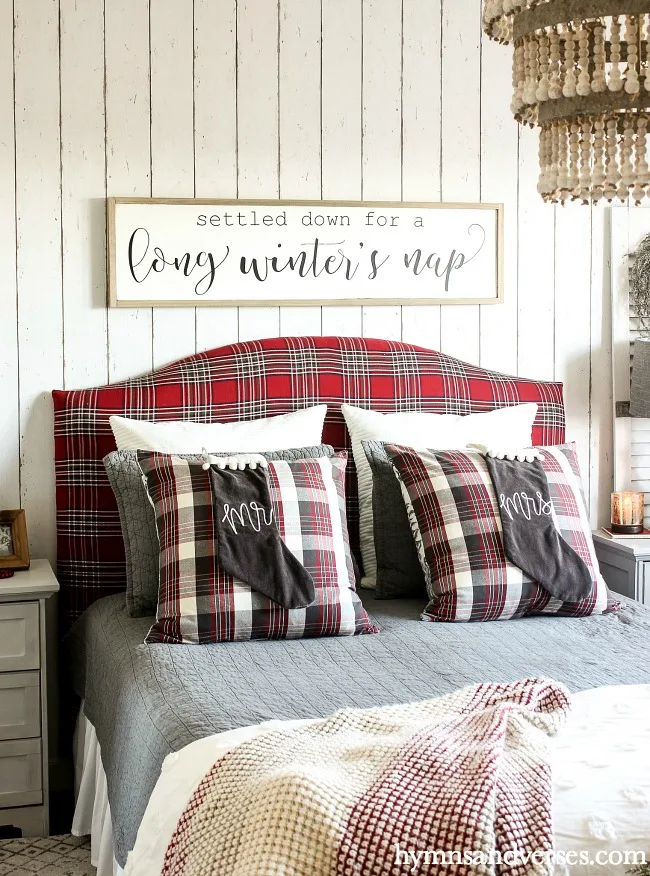
And, finally, I changed it up again at Christmastime to this red plaid! Can you believe this fabric was actually a woven cotton tablecloth! Don’t be afraid to find fabrics outside the fabric store!!!
As you can see, a DIY headboard is easy to change with some new fabric! With each change, we simply went over the previous fabric! As long as the previous pattern or color doesn’t show through the new fabric, it’s fine! Only you will know the layers of fabric under there and it’s just more cushioning! I hope you enjoyed seeing how we made this DIY headboard and how it has changed over the years!
I have just found your post and I was so excited .I have some lovely grey/blue check like yours so I am going to have a go at doing this project .Thank you for making it look so easy .
Doreen Cagno
Wednesday 18th of November 2020
I'm sure it will look terrific!!!
Good Day Sunshine - Summer Bedroom - Hymns and Verses
Friday 28th of June 2019
[…] If you’ve been following along here for a while, you know that those amazing wood planked walls are actually wallpaper! My sister-in-law was here last week and she could not believe it wasn’t real wood! She even went up and touched it!!! It is a dimensional (or blown) paper, which gives it a more realistic look than a flat wallpaper. You can find it HERE. I also get asked about my buffalo check headboard quite a bit. It’s a DIY project that goes way back on the blog. The headboard started out gray, then I changed it to white, and finally this buffalo check (my favorite)! Making your own upholstered headboard isn’t as hard as you might think. You can see how we made ours HERE. […]
Repurposed Cabinet Door Chalkboard - Hymns and Verses
Thursday 13th of June 2019
[…] Buffalo Check DIY Headboard […]
Stephanie
Monday 15th of April 2019
This is just what I'm looking for. I made a similar headboard several years ago and want to change the fabric. How do you remove the nailhead trim? Thank you!
Doreen Cagno
Monday 22nd of April 2019
Hi, Stephanie. Mine were just nailed in individually, not a strip. They were pretty easy to pull out by hand.
Crissy
Sunday 24th of February 2019
I just had to hop over from The Cottage Market to tell you how much I love the final photo of your room, with the subtle pops of mustard accents. It's beautiful. I had no idea that you had changed the look and feel of the bedroom over the years. How fun!


Scolie Simpson.
Wednesday 18th of November 2020
I have just found your post and I was so excited .I have some lovely grey/blue check like yours so I am going to have a go at doing this project .Thank you for making it look so easy .
Doreen Cagno
Wednesday 18th of November 2020
I'm sure it will look terrific!!!
Good Day Sunshine - Summer Bedroom - Hymns and Verses
Friday 28th of June 2019
[…] If you’ve been following along here for a while, you know that those amazing wood planked walls are actually wallpaper! My sister-in-law was here last week and she could not believe it wasn’t real wood! She even went up and touched it!!! It is a dimensional (or blown) paper, which gives it a more realistic look than a flat wallpaper. You can find it HERE. I also get asked about my buffalo check headboard quite a bit. It’s a DIY project that goes way back on the blog. The headboard started out gray, then I changed it to white, and finally this buffalo check (my favorite)! Making your own upholstered headboard isn’t as hard as you might think. You can see how we made ours HERE. […]
Repurposed Cabinet Door Chalkboard - Hymns and Verses
Thursday 13th of June 2019
[…] Buffalo Check DIY Headboard […]
Stephanie
Monday 15th of April 2019
This is just what I'm looking for. I made a similar headboard several years ago and want to change the fabric. How do you remove the nailhead trim? Thank you!
Doreen Cagno
Monday 22nd of April 2019
Hi, Stephanie. Mine were just nailed in individually, not a strip. They were pretty easy to pull out by hand.
Crissy
Sunday 24th of February 2019
I just had to hop over from The Cottage Market to tell you how much I love the final photo of your room, with the subtle pops of mustard accents. It's beautiful. I had no idea that you had changed the look and feel of the bedroom over the years. How fun!