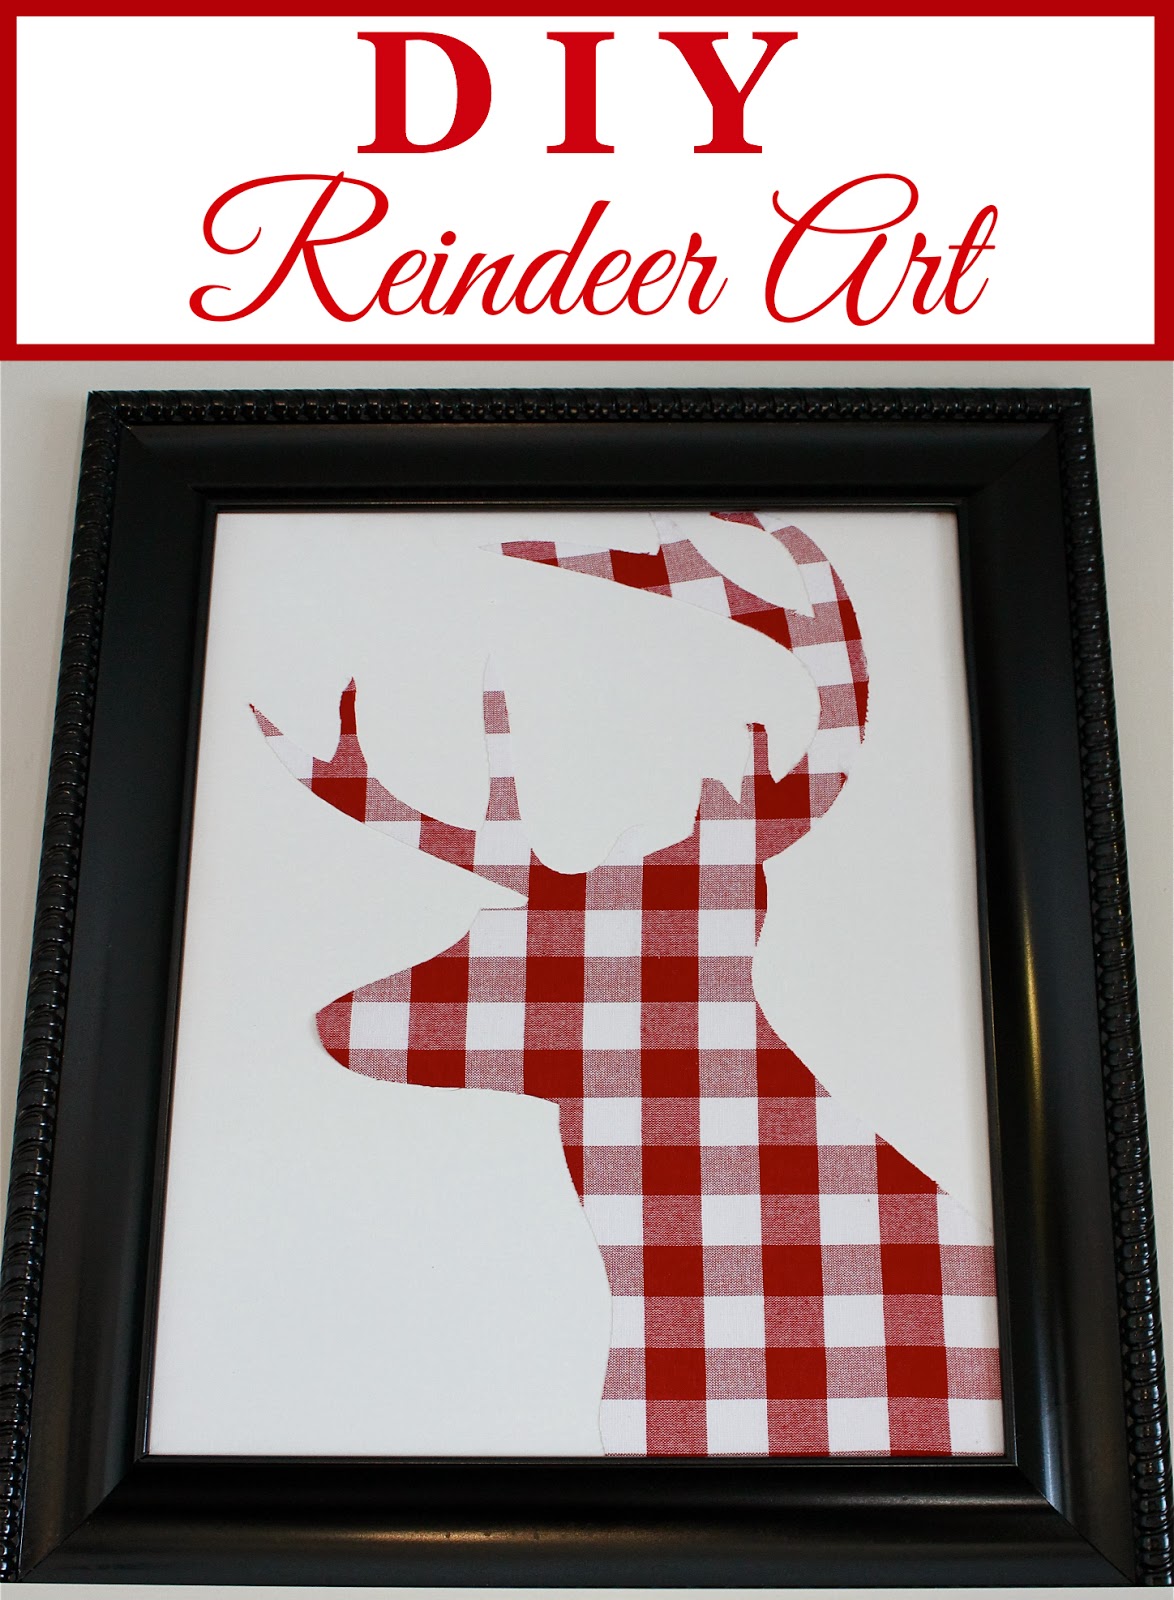
It all started with a red and white tablecloth that I found in the clearance aisle at Home Goods for $5.00! I had been searching the local fabric stores for the perfect red and white buffalo check with no success and then on a random stop to Home Goods – there it was! Sometimes you just need to think outside the box when you are looking for a fabric. In the past, I’ve used sheets to make curtains, napkins to make pillow covers, and drop cloth to make a slip cover for a chair.

This tablecloth was just what I was looking for to cover the seats of my dining room chairs. And, of course, I grabbed the matching napkins to use for my place settings. Once the chairs were recovered, I had some fabric left over and decided it should not go to waste!

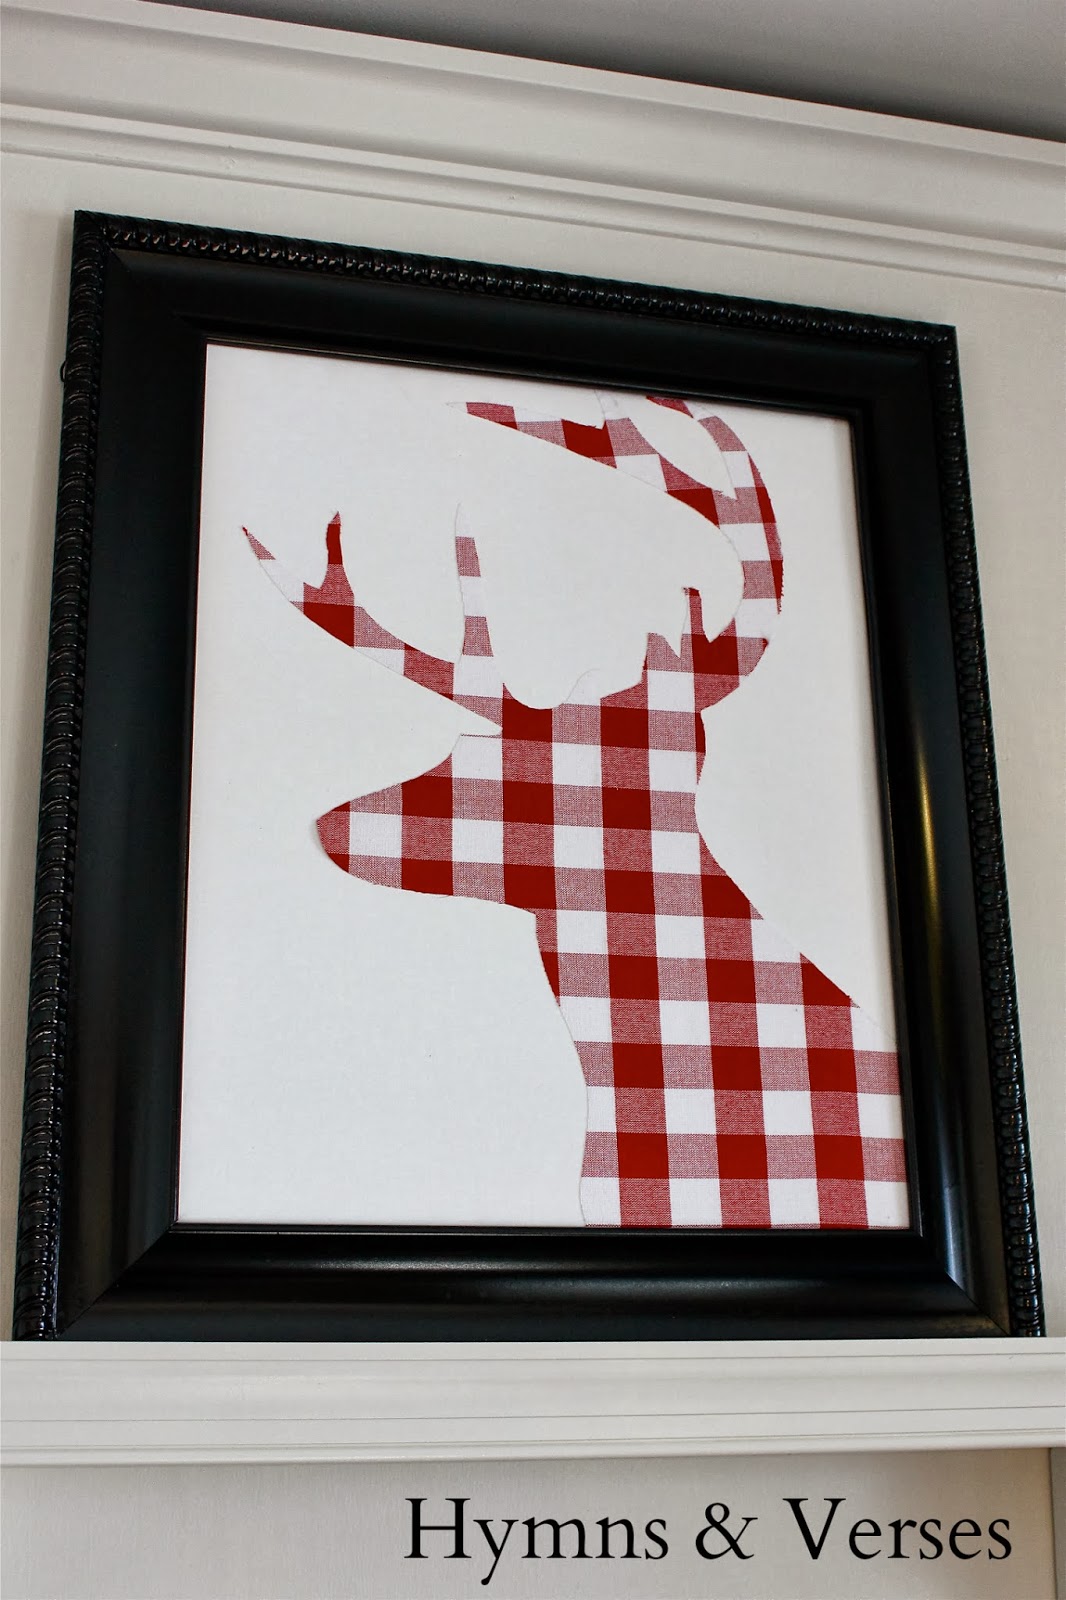
I had been seeing some amazing stag head art all over the internet. Many have been DIY projects by some of my favorite bloggers. So, I decided it was time that I make my own – with the remains of the $5 tablecloth!
Since my Holiday Home Tour, I’ve received so many requests to share how I made this, that I thought I would show you just how easy it was and that you can make one for your home!
Here’s what you will need:
One 16″ x 20″ art canvas (I got mine at AC Moore in a 2 pack)
Frame with a 16″ x 20″ opening (remove the glass or buy one without glass)
Fabric of choice – be creative
Light Weight Heat and Bond (found in the fabric department at Walmart)
General Purpose Spray Adhesive (that allows for repositioning)
Stag Head Template – enlarged to fit the 16″ x 20″ canvas
1. Follow the instructions on the package of Heat and Bond and apply to the reverse side of your fabric. This will give you a clean edge when you cut out your design and help prevent fraying.
2. Once your template is enlarged to the size you need, cut it out and trace the design onto your fabric. Cut out.
3. Spray the reverse side (the side with the Heat and Bond) with spray adhesive and carefully place onto your canvas. Press and make sure you don’t have any air bubbles or wrinkles.
4. Place your art in the frame and hang it!

I hope you will give this a try. It really is an easy project, but gives a lot of impact. Of course, you could just use the template the size it is and make it as an 8″ x 10″. That would be even easier!
We have another weekend snowstorm heading our way, so I’m off today to try to get some Christmas shopping done and stock up with some holiday movies and food for a few days! It’s nice to be snowed in once in a while – especially this time of year! It forces us to slow down and enjoy our family and be thankful for a warm home!
34 DIY Buffalo Check Christmas Decorations Ideas - VCDiy Decor And More
Tuesday 19th of November 2019
[…] DIY Buffalo Check Reindeer Art […]
100+ En İyi DIY Buffalo Noel Dekor Fikirlerini Kontrol Edin - Dekor
Monday 4th of November 2019
[…] üzerinden İlahiler ve Ayetler […]
Karen
Friday 11th of November 2016
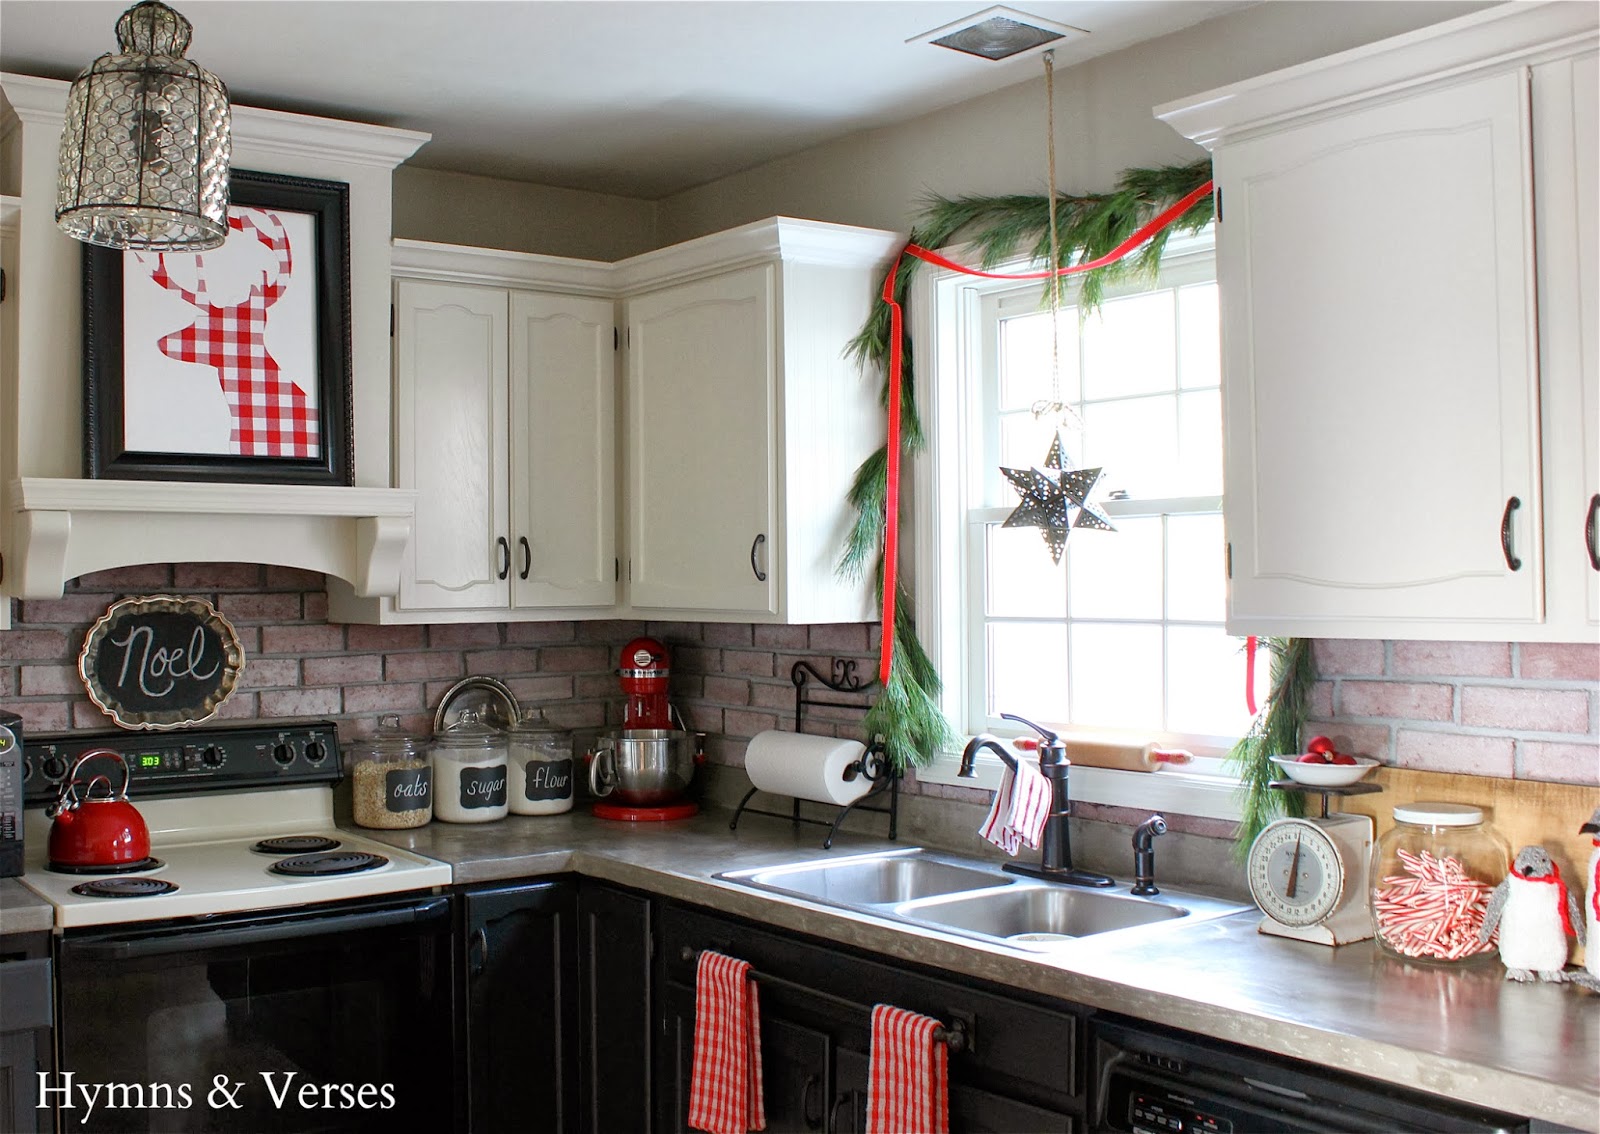
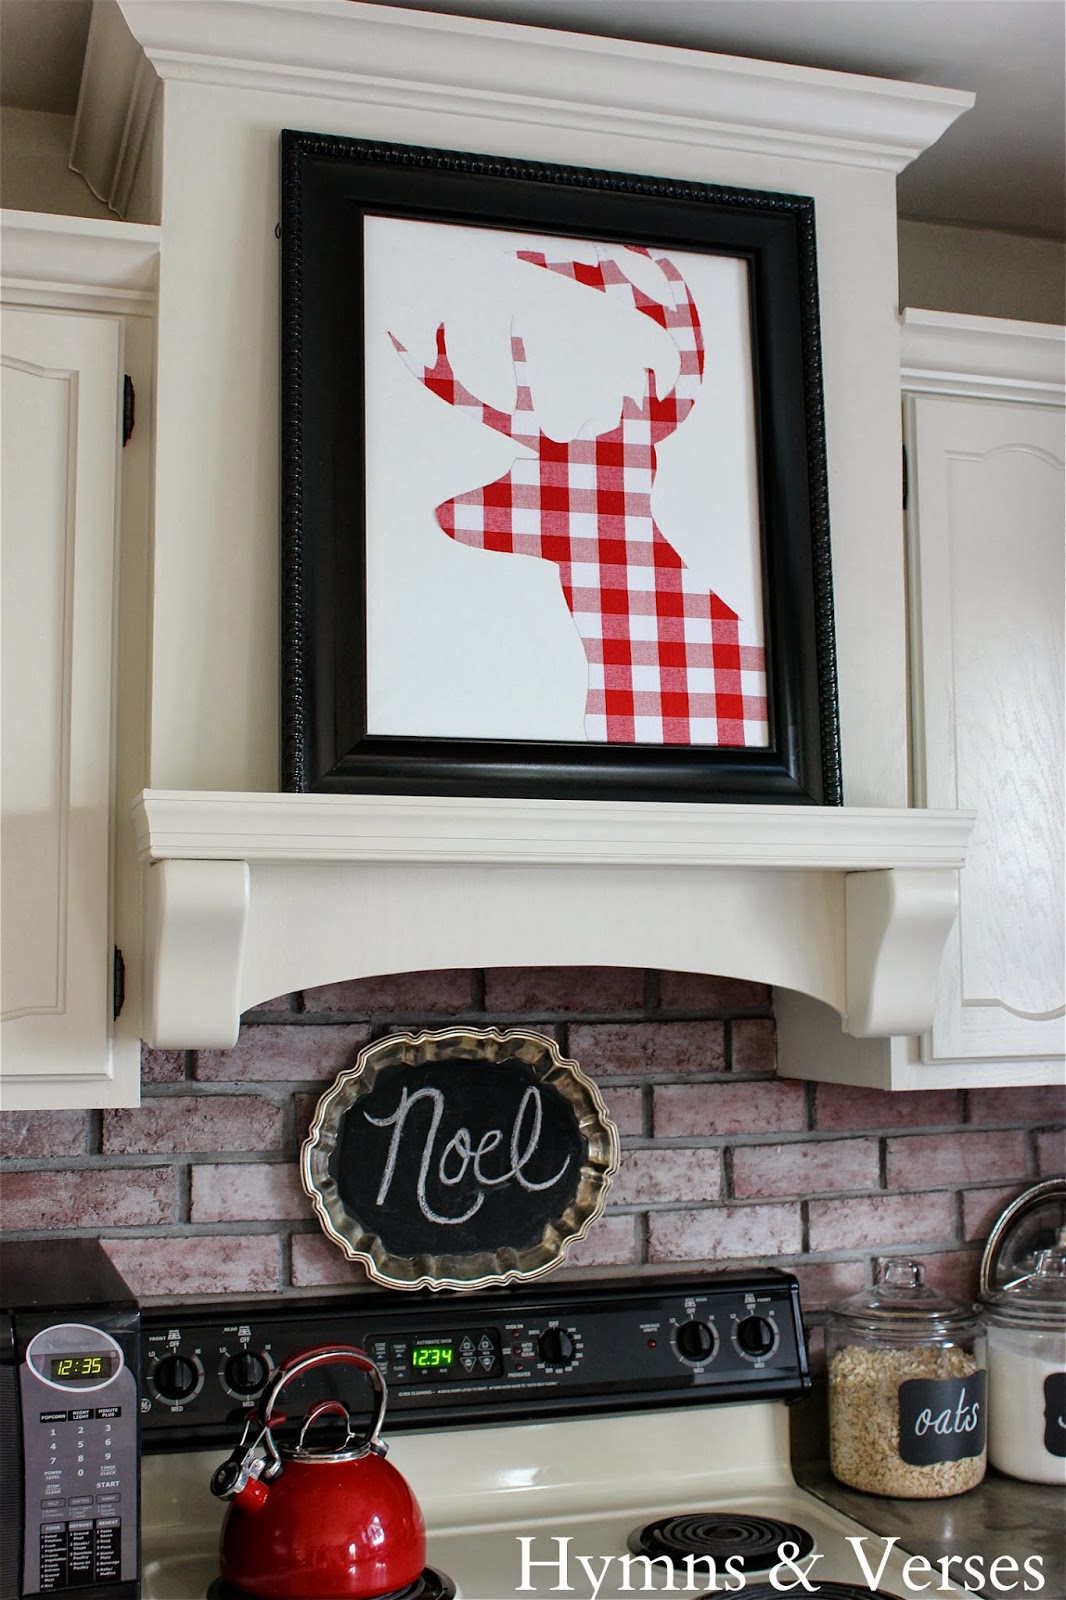
You have inspired me Doreen! I love the reindeer silhouette and must get to work on my own immediately! Your kitchen and dining area are just fabulous :)
Christmas Dining Room & Kitchen - Hymns and Verses
Thursday 10th of December 2015
[…] Yes, the red and white checked reindeer silhouette art is back for a third year – see THIS post to make your […]
[email protected]
Tuesday 15th of September 2015
I just found your blog this morning via pinterest and love your home. We just moved and have an endless list of home updates. But your kitchen appears to be the same layout as mine. Nice to see the possibility! Looking forward to viewing all your posts.