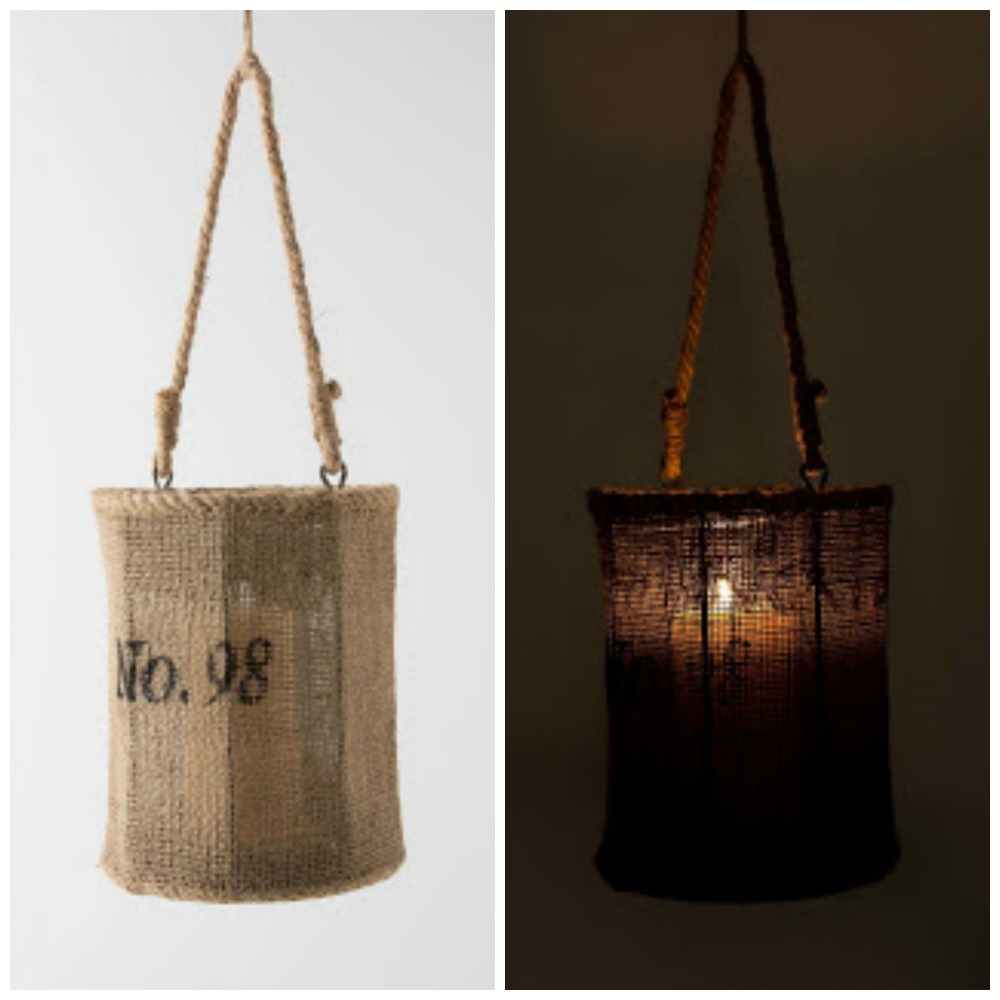
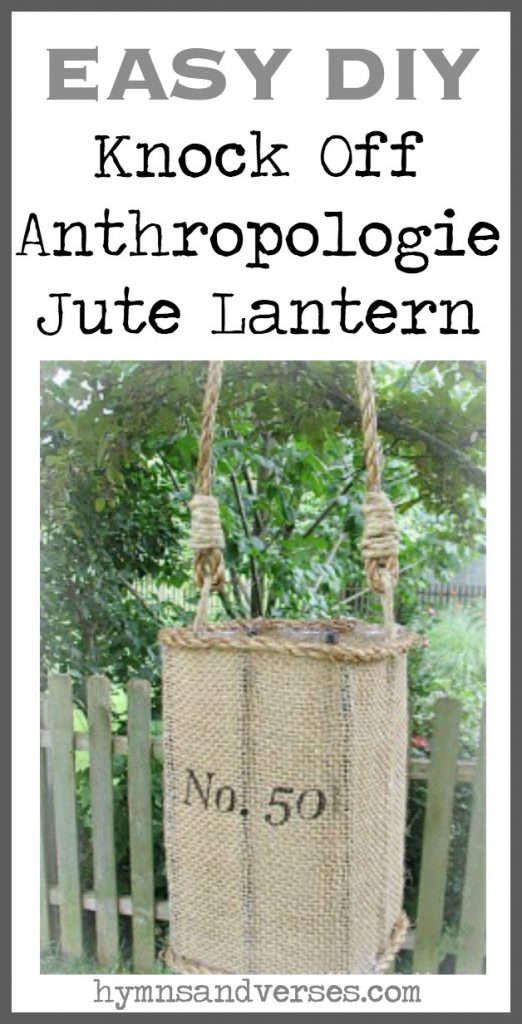
Don’t you just love Anthropologie! I do, but my budget doesn’t! But, I do love to visit the Anthropologie website to get inspiration for a project! I’m always looking for something that I can recreate – or make myself! So here’s my inspiration for today’s DIY project! This Anthropologie jute lantern is meant for hanging outdoors and several would really make a statement for an outdoor dining space! But, buying several would really be cost prohibitive! So, I made mine with things I had on hand – so free works for me!
*This post contains affiliate links for your convenience. Please see my full disclosure HERE.

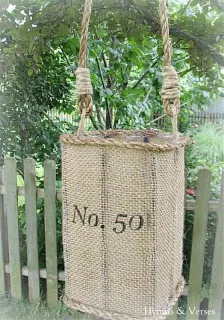
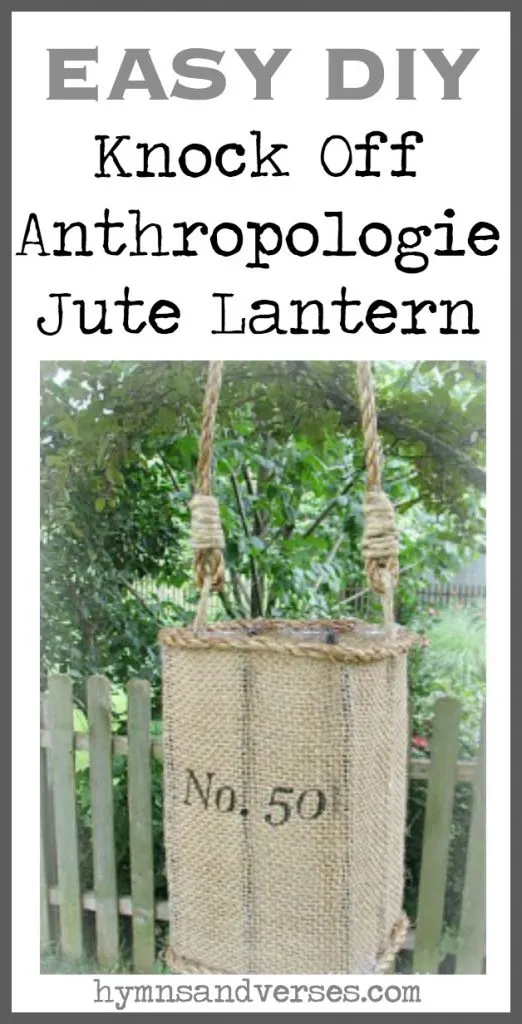
Now, here’s what my finished knock off version looks like!

SUPPLIES for DIY Jute Lantern
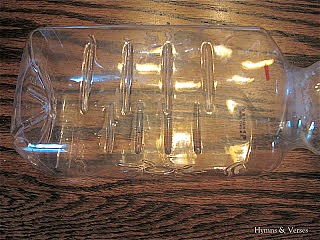
Empty Turkey Hill Sun Brew iced tea container (any square shaped clear container would work)
black cord
number stencil
black craft paint


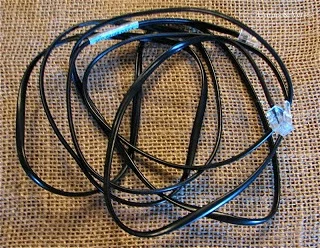
My family has a large sealed container that is the graveyard for all random cords/adapters. Between my husband and three older boys, we have accumulated quite a few gadgets over the years! We’ve also accumulated a lot of extra cords that I would like to throw out, but they won’t let me because they may need one some day!!! Sooo, I decided to invade their supply and put one of these cords to good use! If you don’t have any random cords at your house — lucky you!!! You could also use some upholstery cording, pipecleaner, whatever.

DIY Jute lantern tutorial
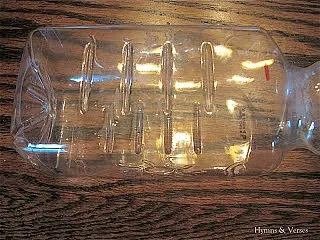
step 1
Remove the label from the iced tea container. I used Goo Gone. Then, cut the top off the container as shown by the red mark.
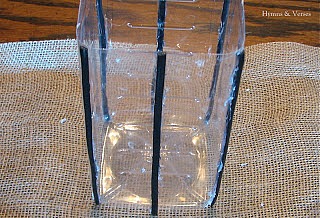
step 2
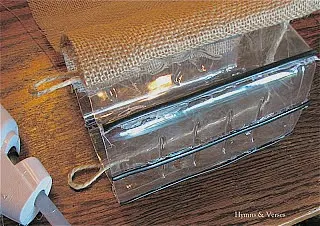
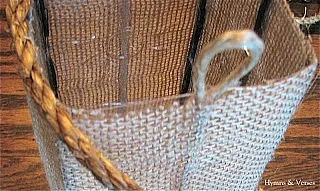
The original Anthropologie hurricane appears to have a metal frame. To replicate the look, I used the black cord. Cut six pieces of cord to fit the height of your container. Run a bead of hot glue (I used the low setting) down the length of the first corner and apply the cord. Repeat with all the corners. Then in the middle front, add another piece of cord. Repeat for the middle back. Do not add black cord to the middle sides.

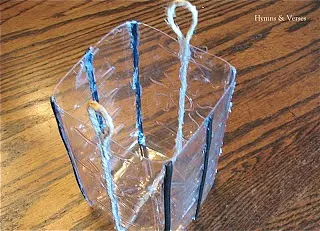
step 3
Start on the left side and create a loop with your garden twine and glue at the top. Then continue to glue the twine down the side, across the bottom, up the other side, and end by creating another loop at the top.

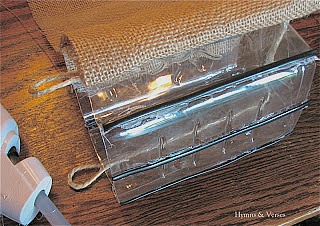
step 4
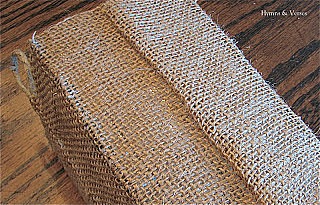
Take your burlap and cut to the approximate size needed to cover the container. Line up the burlap along the top edge of the container and leave enough at the bottom to fold over. Run a bead of hot glue down what will be the middle back piece of cord and attach the burlap. Use your finger and thumb to run over the burlap covered cord. This will accent the cord even more to create a ridge and give the appearance of a metal frame. Continue to the next line of cord and repeat the process the whole way around to your starting point at the back.
step 5
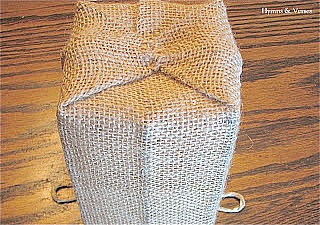
When you get back to your starting point, cut off any excess burlap and fold over to create a clean seam and glue.

step 6
At the bottom, simply fold and glue down the burlap like you would wrap a present.
step 7
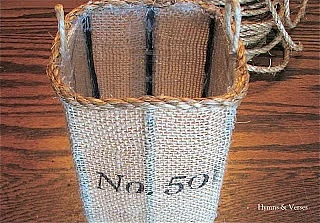
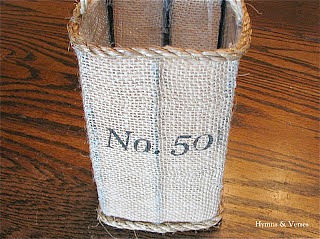
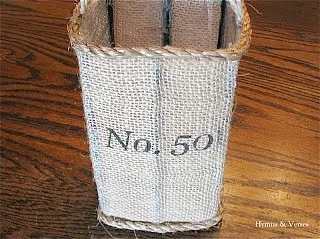
I made my own stencil with Contact paper and my Silhouette Cameo. You could also use a rubber stamp or even just write on the burlap with a black Sharpie. I chose the number 50, because that is our house number. I think a monogram would be great for this project as well. Center your stencil on what will be the front of the lantern and fill in with black acrylic paint.


step 8
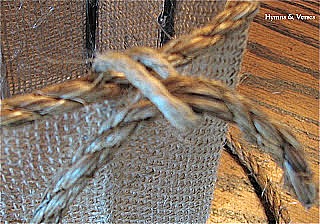
Next, glue the jute rope to the very top edge of the container. This will cover up your container cut line and burlap raw edge. Start at the middle back of the container where your seam begins and work your way around gluing a little at a time.

This is what it will look like with the rope glued to the top edge.

step 9
Repeat the process for the bottom.
step 10
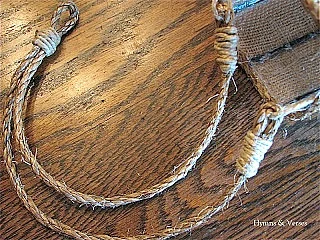
Cut a piece of jute rope to the length you would like for hanging. Insert the rope through the twine loop. Take the end of the rope up about an inch, pinch the rope together, and secure with glue. Repeat on the other side with the other end of the rope.

step 11
Use your garden twine and wrap around the glued edges of the rope ends. I used glue to start wrapping and then glued the end of my wrapped twine. At the top, I created another loop for hanging by simply squeezing the rope together and wrapping again with the garden twine.

step 12
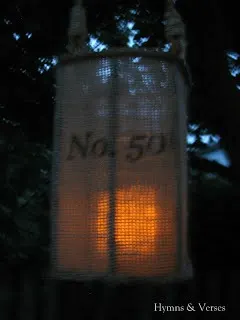
Add a battery operated candle and there you have it, a knock off Anthropologie jute lantern. I know it seems like a lot of steps, but it really didn’t take long and it was free! Here’s how it looks hanging from a tree branch at night!

I hope you’ll give this easy DIY jute lantern a try! I’m going to make a lot of these for my next summer picnic! They’ll look so pretty hanging from the trees in the yard!

Jann Olson
Friday 19th of April 2013
Doreen, I saw this on Hometalk. Love, love it! I have a link party, Share Your Cup Thursday. Would love if you shared sometime.hugs,Jann
ritajoy
Thursday 21st of March 2013
Thanks for sharing this great tutorial. It's beautiful!
Bettina Lynn
Monday 25th of June 2012
This is fantastic! I can't wait to make a few!!!Thank you for sharing!!
Jenifer
Thursday 21st of June 2012
Awesome project Doreen ... love how yours turned out & definitely feel inspired to try this for some mood lighting by the pool :~)
Charm Bracelet Diva
Wednesday 20th of June 2012
So cool. I have this stuff on hand, too. Hhhmmmm...always good when you can knock-off Anthropologie!