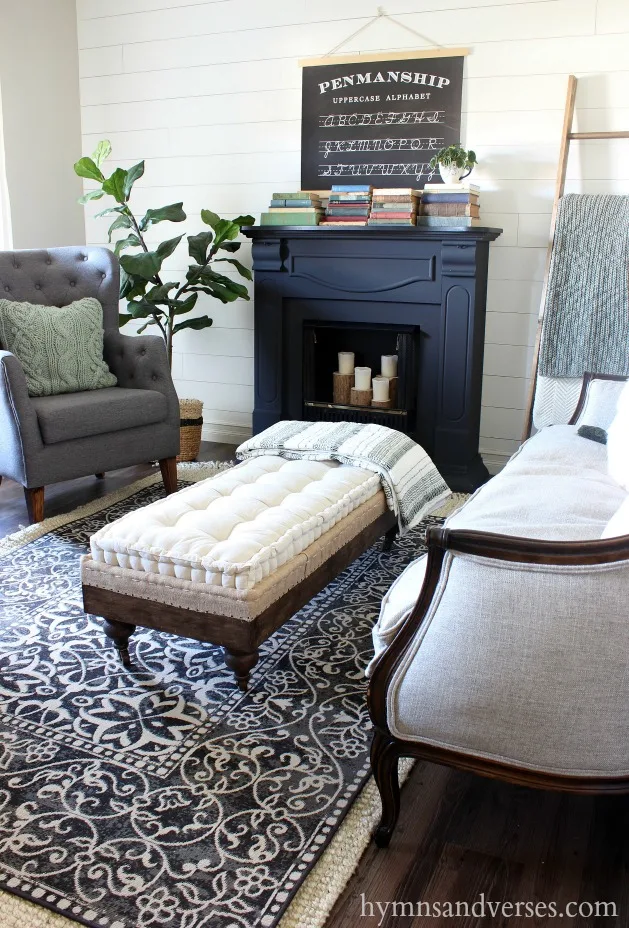
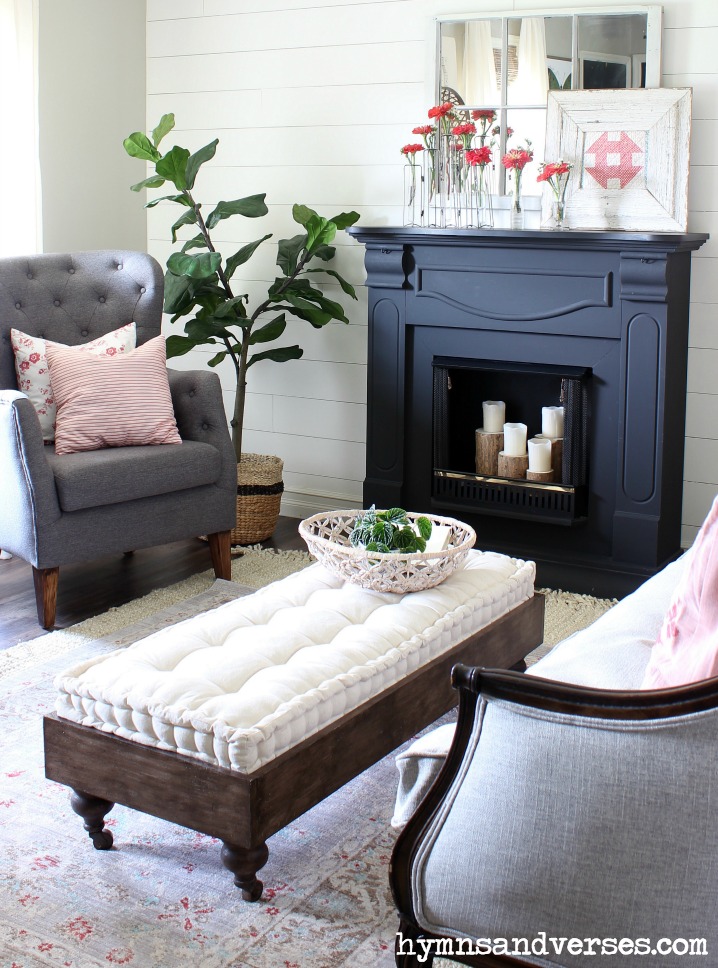
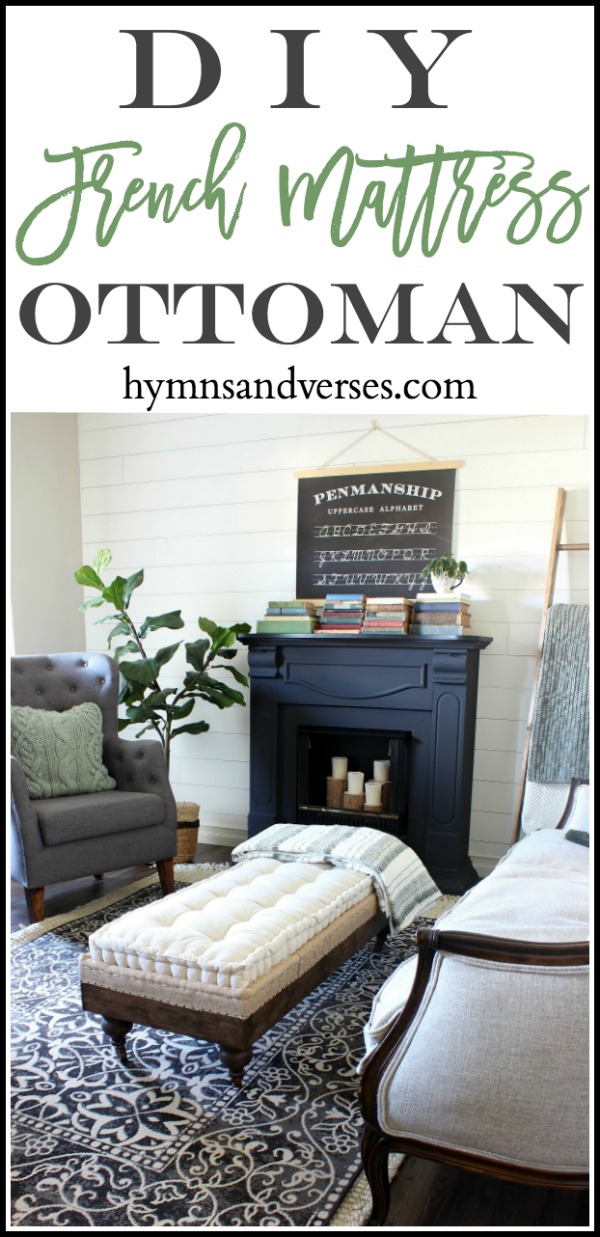
Today I’m sharing a DIY that I began before my spring home tour and with my fall home tour just a little over a week away, I thought it was high time that I finished this project and share it with you! I was inspired by THIS deconstructed ottoman from Restoration Hardware. It retails from $1295 – $1795, depending on the fabric you choose. You might remember that I was considering a deconstructed look when I was reupholstering my vintage sofa. You can see that post HERE. In the end, I decided against that look for the sofa, because I think that look is probably just a trend and I decided to stick with something classic. But, I do like the deconstructed look and have had a fondness for this Restoration Hardware ottoman for quite a while, but I am not willing to spend that amount of money for an ottoman. So, I showed the picture to Mark and he said he could build me the basic ottoman frame. For the cushioned part, I decided to purchase THIS 48″ bench cushion from Pier1. It is constructed like a French mattress and I love it! I could have purchased foam, batting and fabric to make a cushion more like the inspiration piece, but the price would have been similar and this way I have a pretty French mattress cushion that I can use in other ways too.

*This post contains some affiliate links for your convenience. Please see my full disclosure statement HERE.
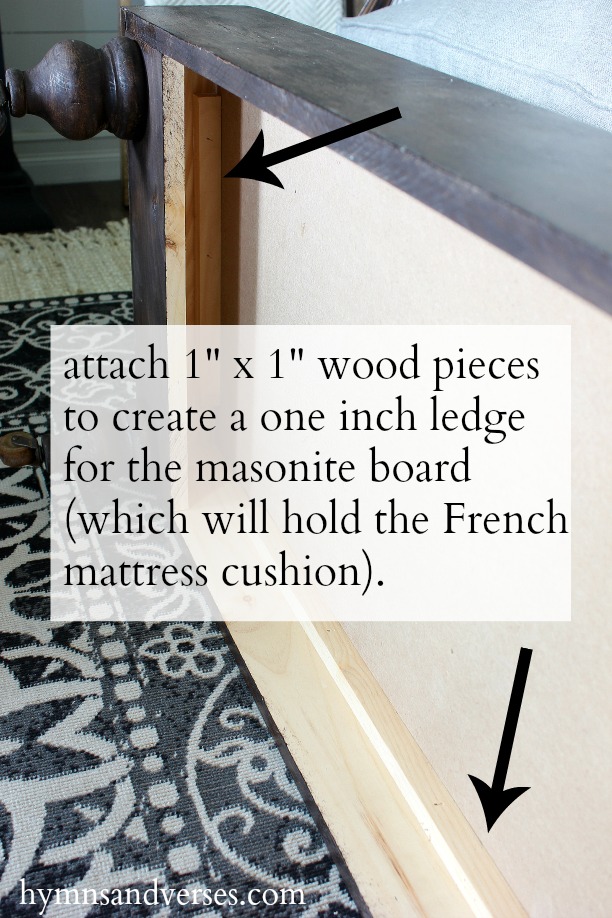
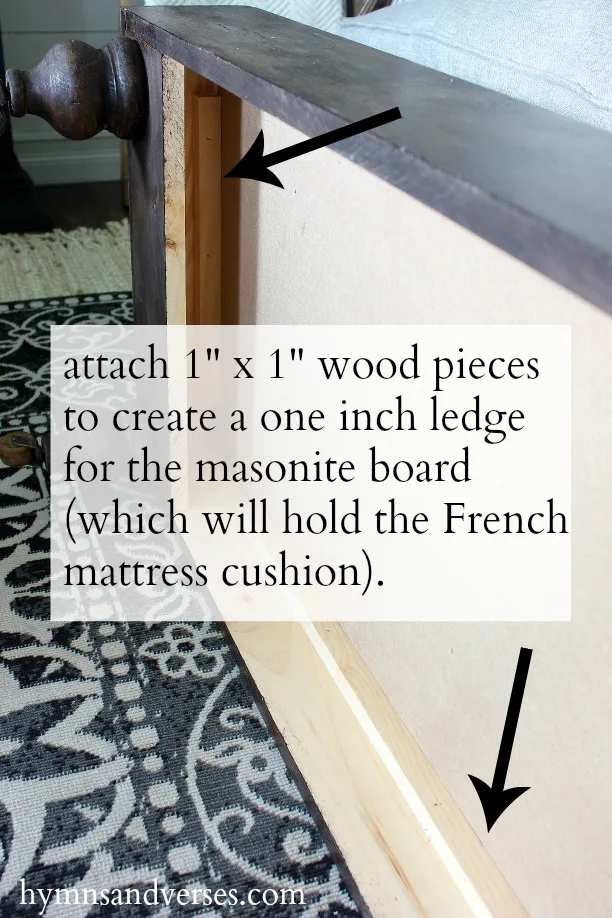
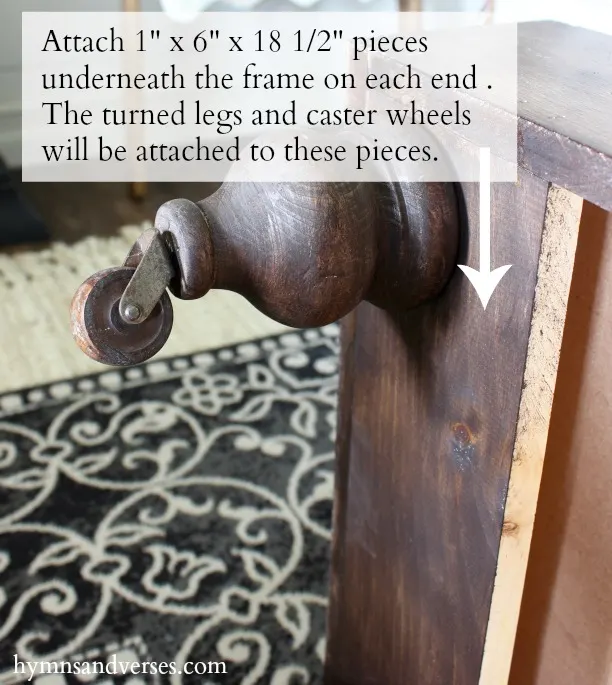
We based the size of the ottoman on the size of the French mattress cushion from Pier1. Below you will find the basic wood pieces and sizes you will need to make the frame.
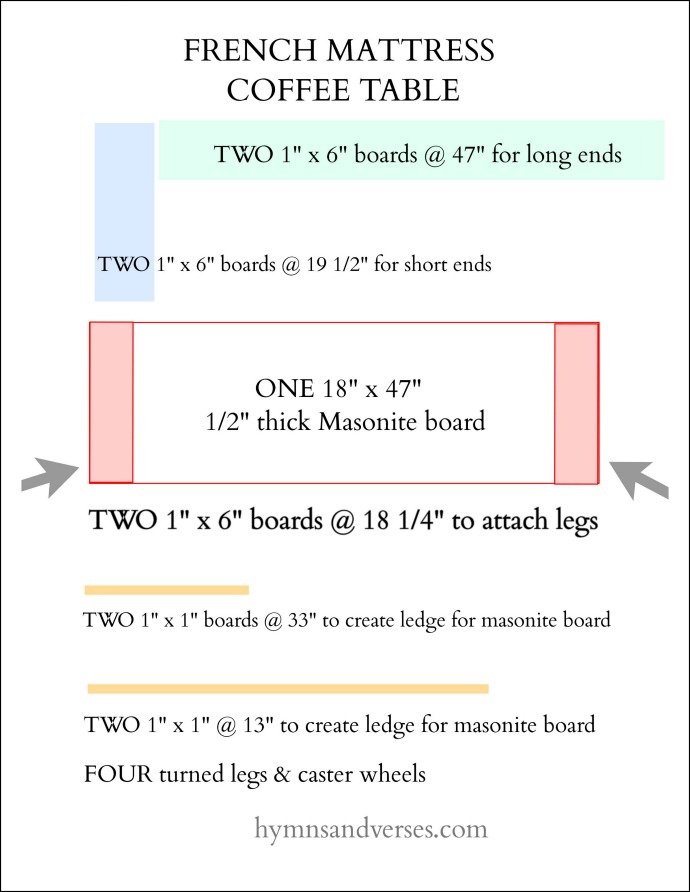
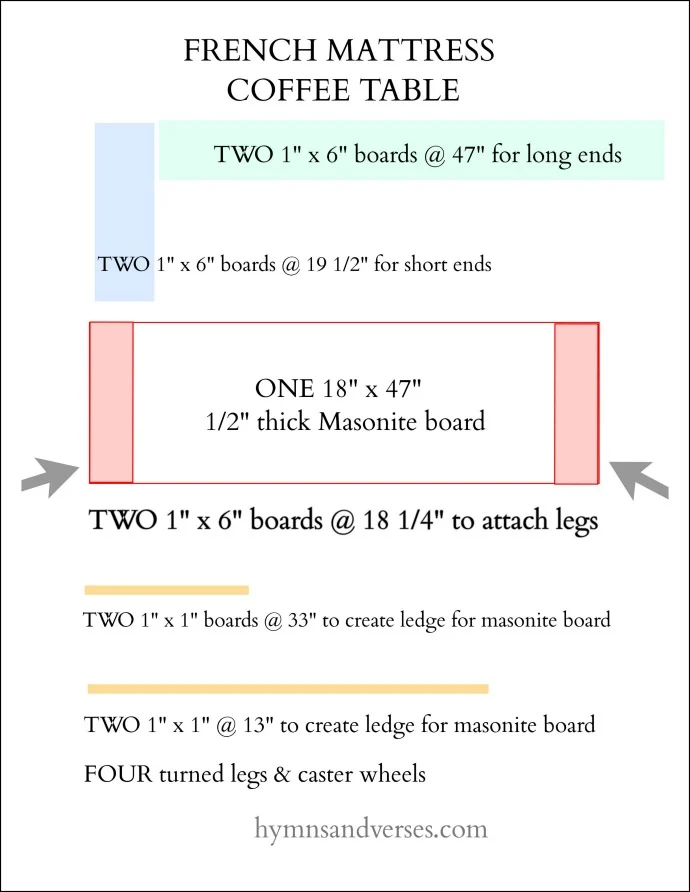
HERE are the turned legs that I used for this coffee table.
HERE are 1 1/4″ Caster Wheels that are the same size as the vintage wheels I used.
For this build, Mark kept it super simple and just used wood glue and his pneumatic nail gun to assemble the frame. It’s a pretty basic design and I think with the following images and the above measurements, you should be able to put one together yourself.
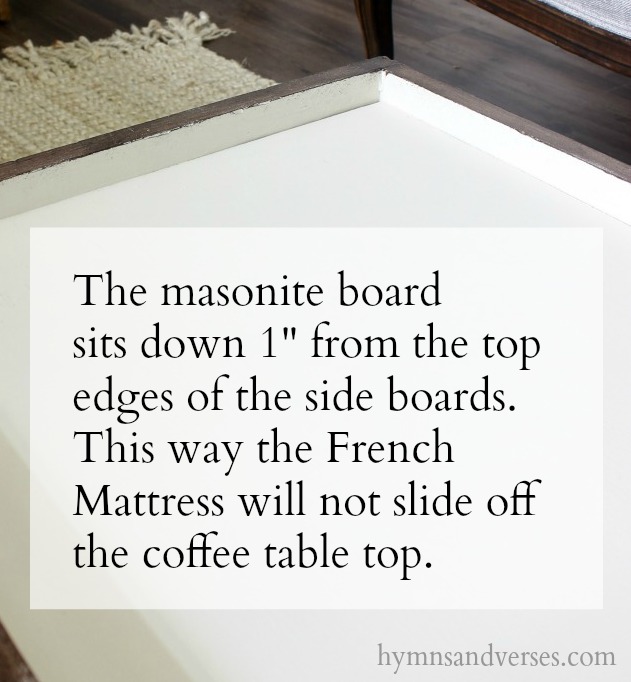


For the wood finish, I used Minwax Wiping Stain in dark roast. This is the same gel stain that I used on the frame of the sofa. For the sides of the frame, I used a little different technique to get a more rustic look. I first painted all four sides and the masonite board in an off white satin finish paint. Any brand will work. Once the paint was dry, I used a paint brush to apply the dark roast wiping stain over the painted sides. So, there is a little bit of the white peeking through. Not a lot, but it definitely gives it a more rustic look than just staining the raw wood. For the underneath wood pieces that hold the legs and the legs themselves, I just used the gel stain alone. Make sure the stain is completely dry before placing the French mattress inside the frame.

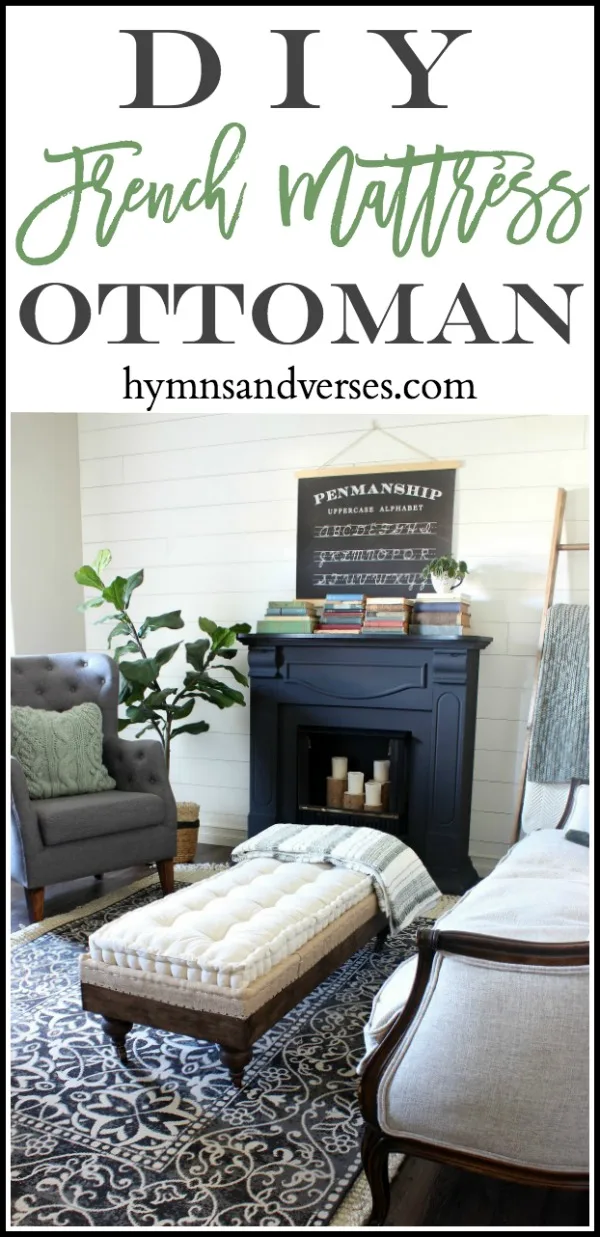
The above picture is from my summer living room and was taken a little over a week ago. I’ve had it this way since spring because I wasn’t sure about adding the rolled burlap piece. But, I finally decided to go for it and I’m so glad I did! I think that part really completes the look. For this part you will need.
Hot glue gun
The first thing I did was cover the four yards of welting cord with the burlap. Place the cord at the top edge of the burlap. Then roll the burlap fabric around until the cord is covered plus two inches. Then, I used the large sewing needle with the jute cord as my thread and created a large running stitch directly under the burlap covered cord, securing both sides of the burlap and encasing the cord. I left a little bit of the burlap overhang the end of the cord to join the start and finish of the covered cord once it was attached to the wood frame. I started in the middle of one end of the ottoman and began gluing the burlap roll to the top edge of the wood frame. I began gluing about one inch from the end of the burlap roll. Once I reached the end and was back to my starting point, I folded over the raw edge of the extra burlap at the end and used a tiny bit of hot glue to secure the fold. Then I joined the end of the roll to the beginning and used the extra burlap to cover the joined seam. This was a little tricky, but I just took my time and worked through the process.

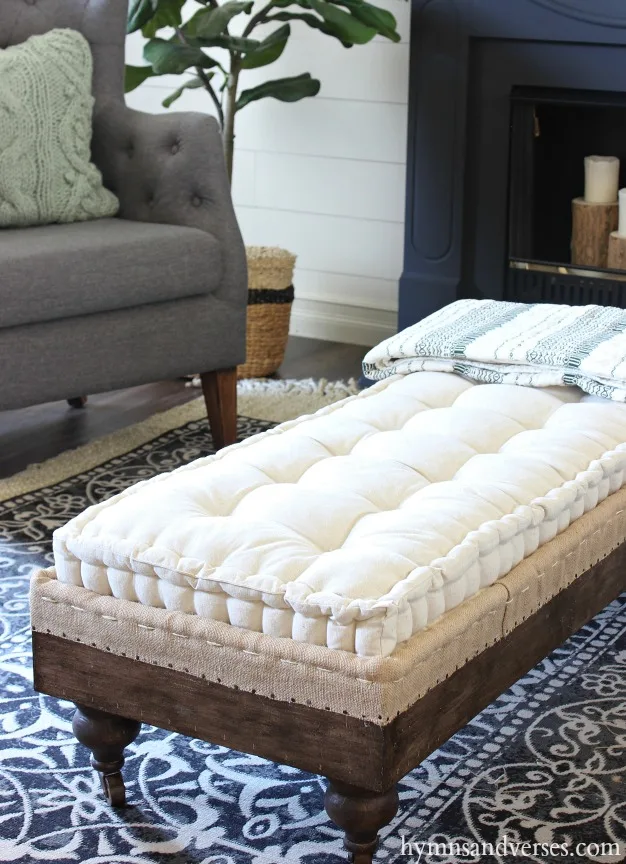
Once the top roll is attached the whole way around, I then went back and glued the bottom edge of the burlap to the sides of the wood frame. Once the bottom edge was attached with glue, I then hammered in the upholstery tacks about 1 inch apart. I know this sounds kind of complicated, but it really wasn’t that bad. I just took it one step at a time and I watched some TV while I hammered in all of the tacks!
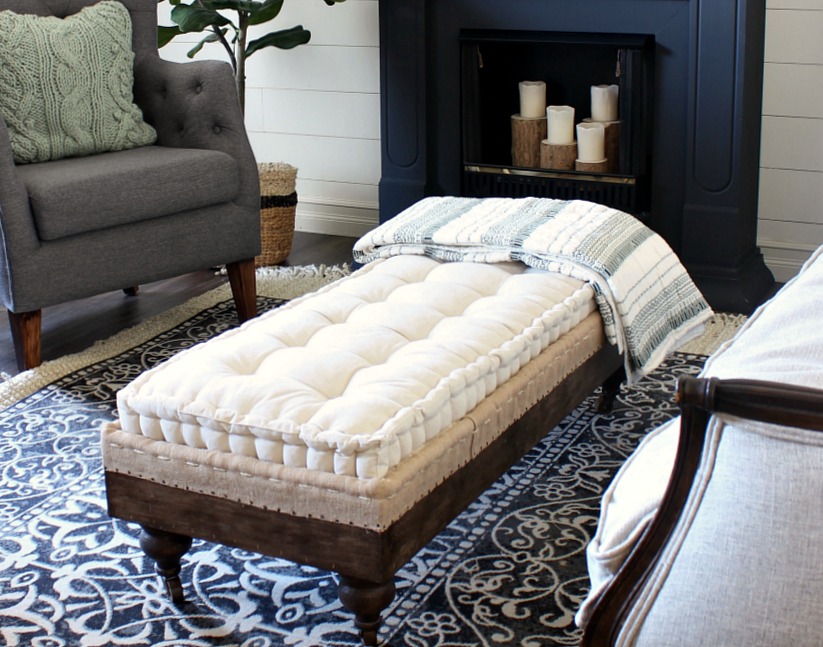
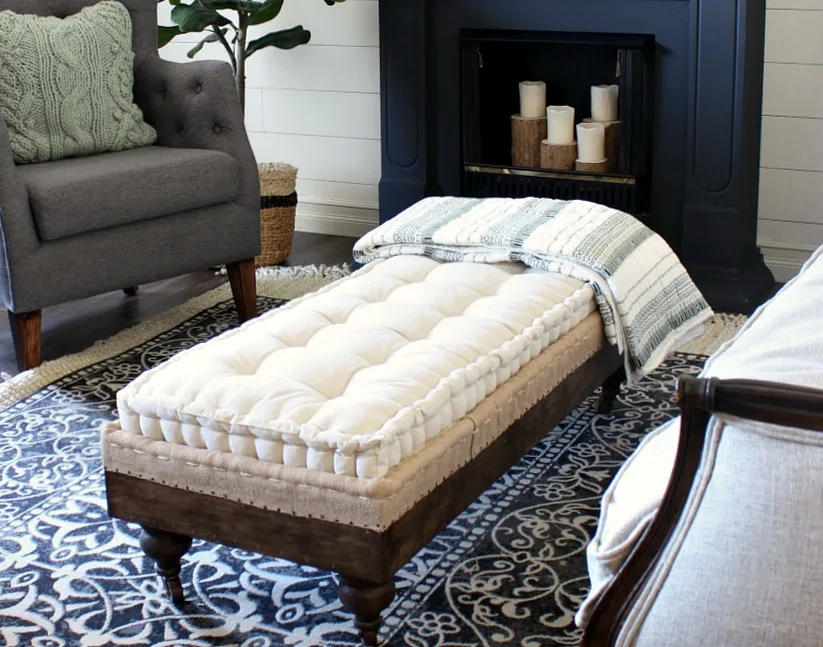
I’m really happy with the finished ottoman! The total cost to make it was under $150 and that’s quite a savings from the price of the inspiration ottoman from Restoration Hardware!
You might also like these DIY projects:


French Mattress Ottoman
Tuesday 28th of May 2019
[…] Ottoman is something I came across & instantly fell in love! The original post is here at Hymns & Verses. She provides a wonderful step by step tutorial. Go check her out! She was inspired by a […]
Best of 2018 at Hymns and Verses - Hymns and Verses
Monday 31st of December 2018
[…] 5. French Mattress Ottoman. I am always inspired by the furniture at Restoration Hardware, but just can’t afford to pay the $$$$ pricetag! So, I used an ottoman that I loved and made my own version. You can see the tutorial and the inspiration ottoman in this post. […]
Katie Mansfield
Tuesday 4th of September 2018
What a great savings. Your ottoman is gorgeous. You and your husband are quite a team. I can't wait to see more of this in the tour. I spy a Magnolia Home for Target throw. I have the same one and I love it.
Lyn Wooley
Friday 31st of August 2018
Wow!!! Have wanted something like this, and you have made me see that I might could actually make this!!!! You did a beautiful job!!!! Thank you so much for sharing the instructions and details!
Doreen Cagno
Saturday 1st of September 2018
Thanks so much and I hope you do give it a try!!! Let me know if you do!!!
Gwen
Friday 31st of August 2018
I had noticed this piece on your summer tour. It turned out so well! I love the burlap addition. It adds the dimension that takes it up that extra notch!! I hope you don’t change out this piece too soon!! I liked the book changes and the throw and pillows for this transition time. You’re such a hard worker!!!