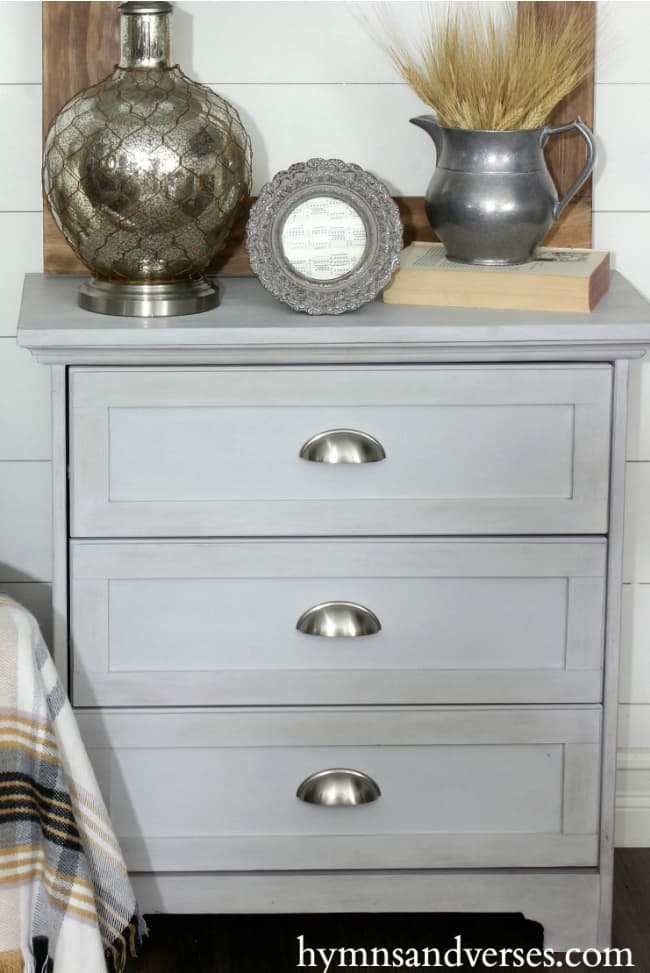
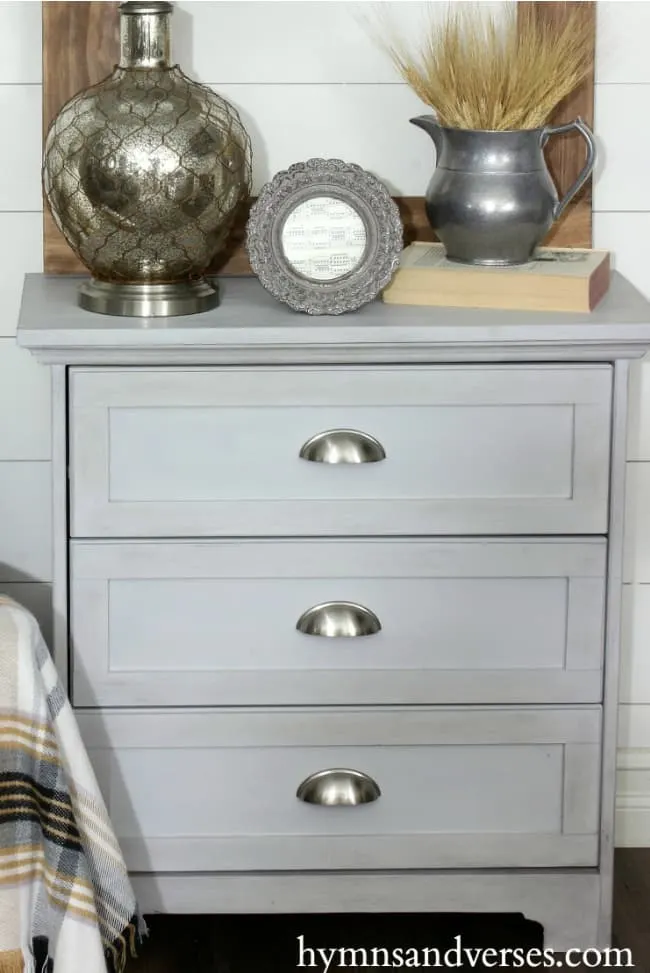
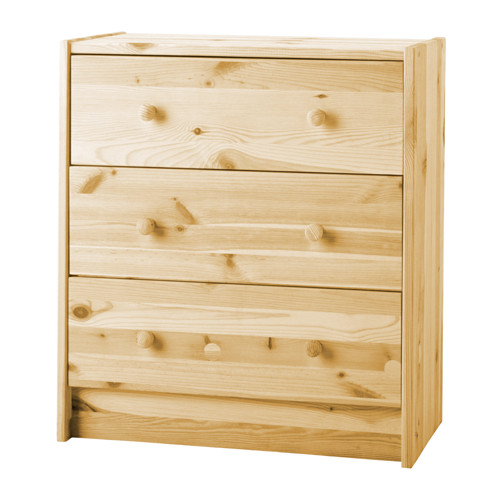
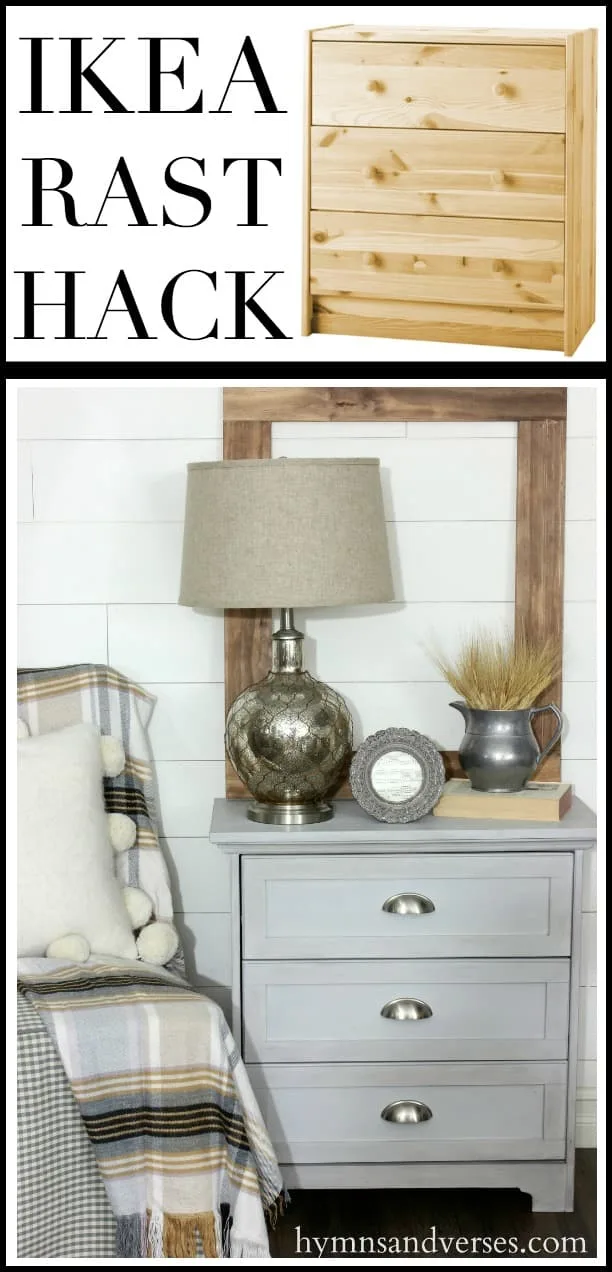
I’m here today to share the building plans for our Ikea Rast Dresser Hack that we are using as nightstands in our bedroom. Here’s a look at the finished nightstand and then I’ll show you how we transformed the basic Ikea Rast to get this look using this simple and effective Ikea Rast Hack.
After reading and following along with this tutorial, you’ll be able to turn your boring Ikea dresser into a beautiful dresser, nightstand, or whatever plan you have for it. With just a few materials, some paint, imagination, and this helpful image heavy tutorial, you’ll be able to take that plain Jane rast chest of drawers and turn it into the piece of furniture of your dreams.
Oftentimes I find that I seem to like the most expensive piece of furniture out there when we are looking. It’s like I can magically pick the most expensive one without even trying. So, that’s one inspiration for this Ikea Rast Makeover. We can take a cheaper piece of furniture that I don’t LOVE, and with a little effort, turn it into an Ikea Rast nightstand that I am proud to show off to family and friends, all while saving some money!
Prep Step: Purchase necessary materials from hardware store
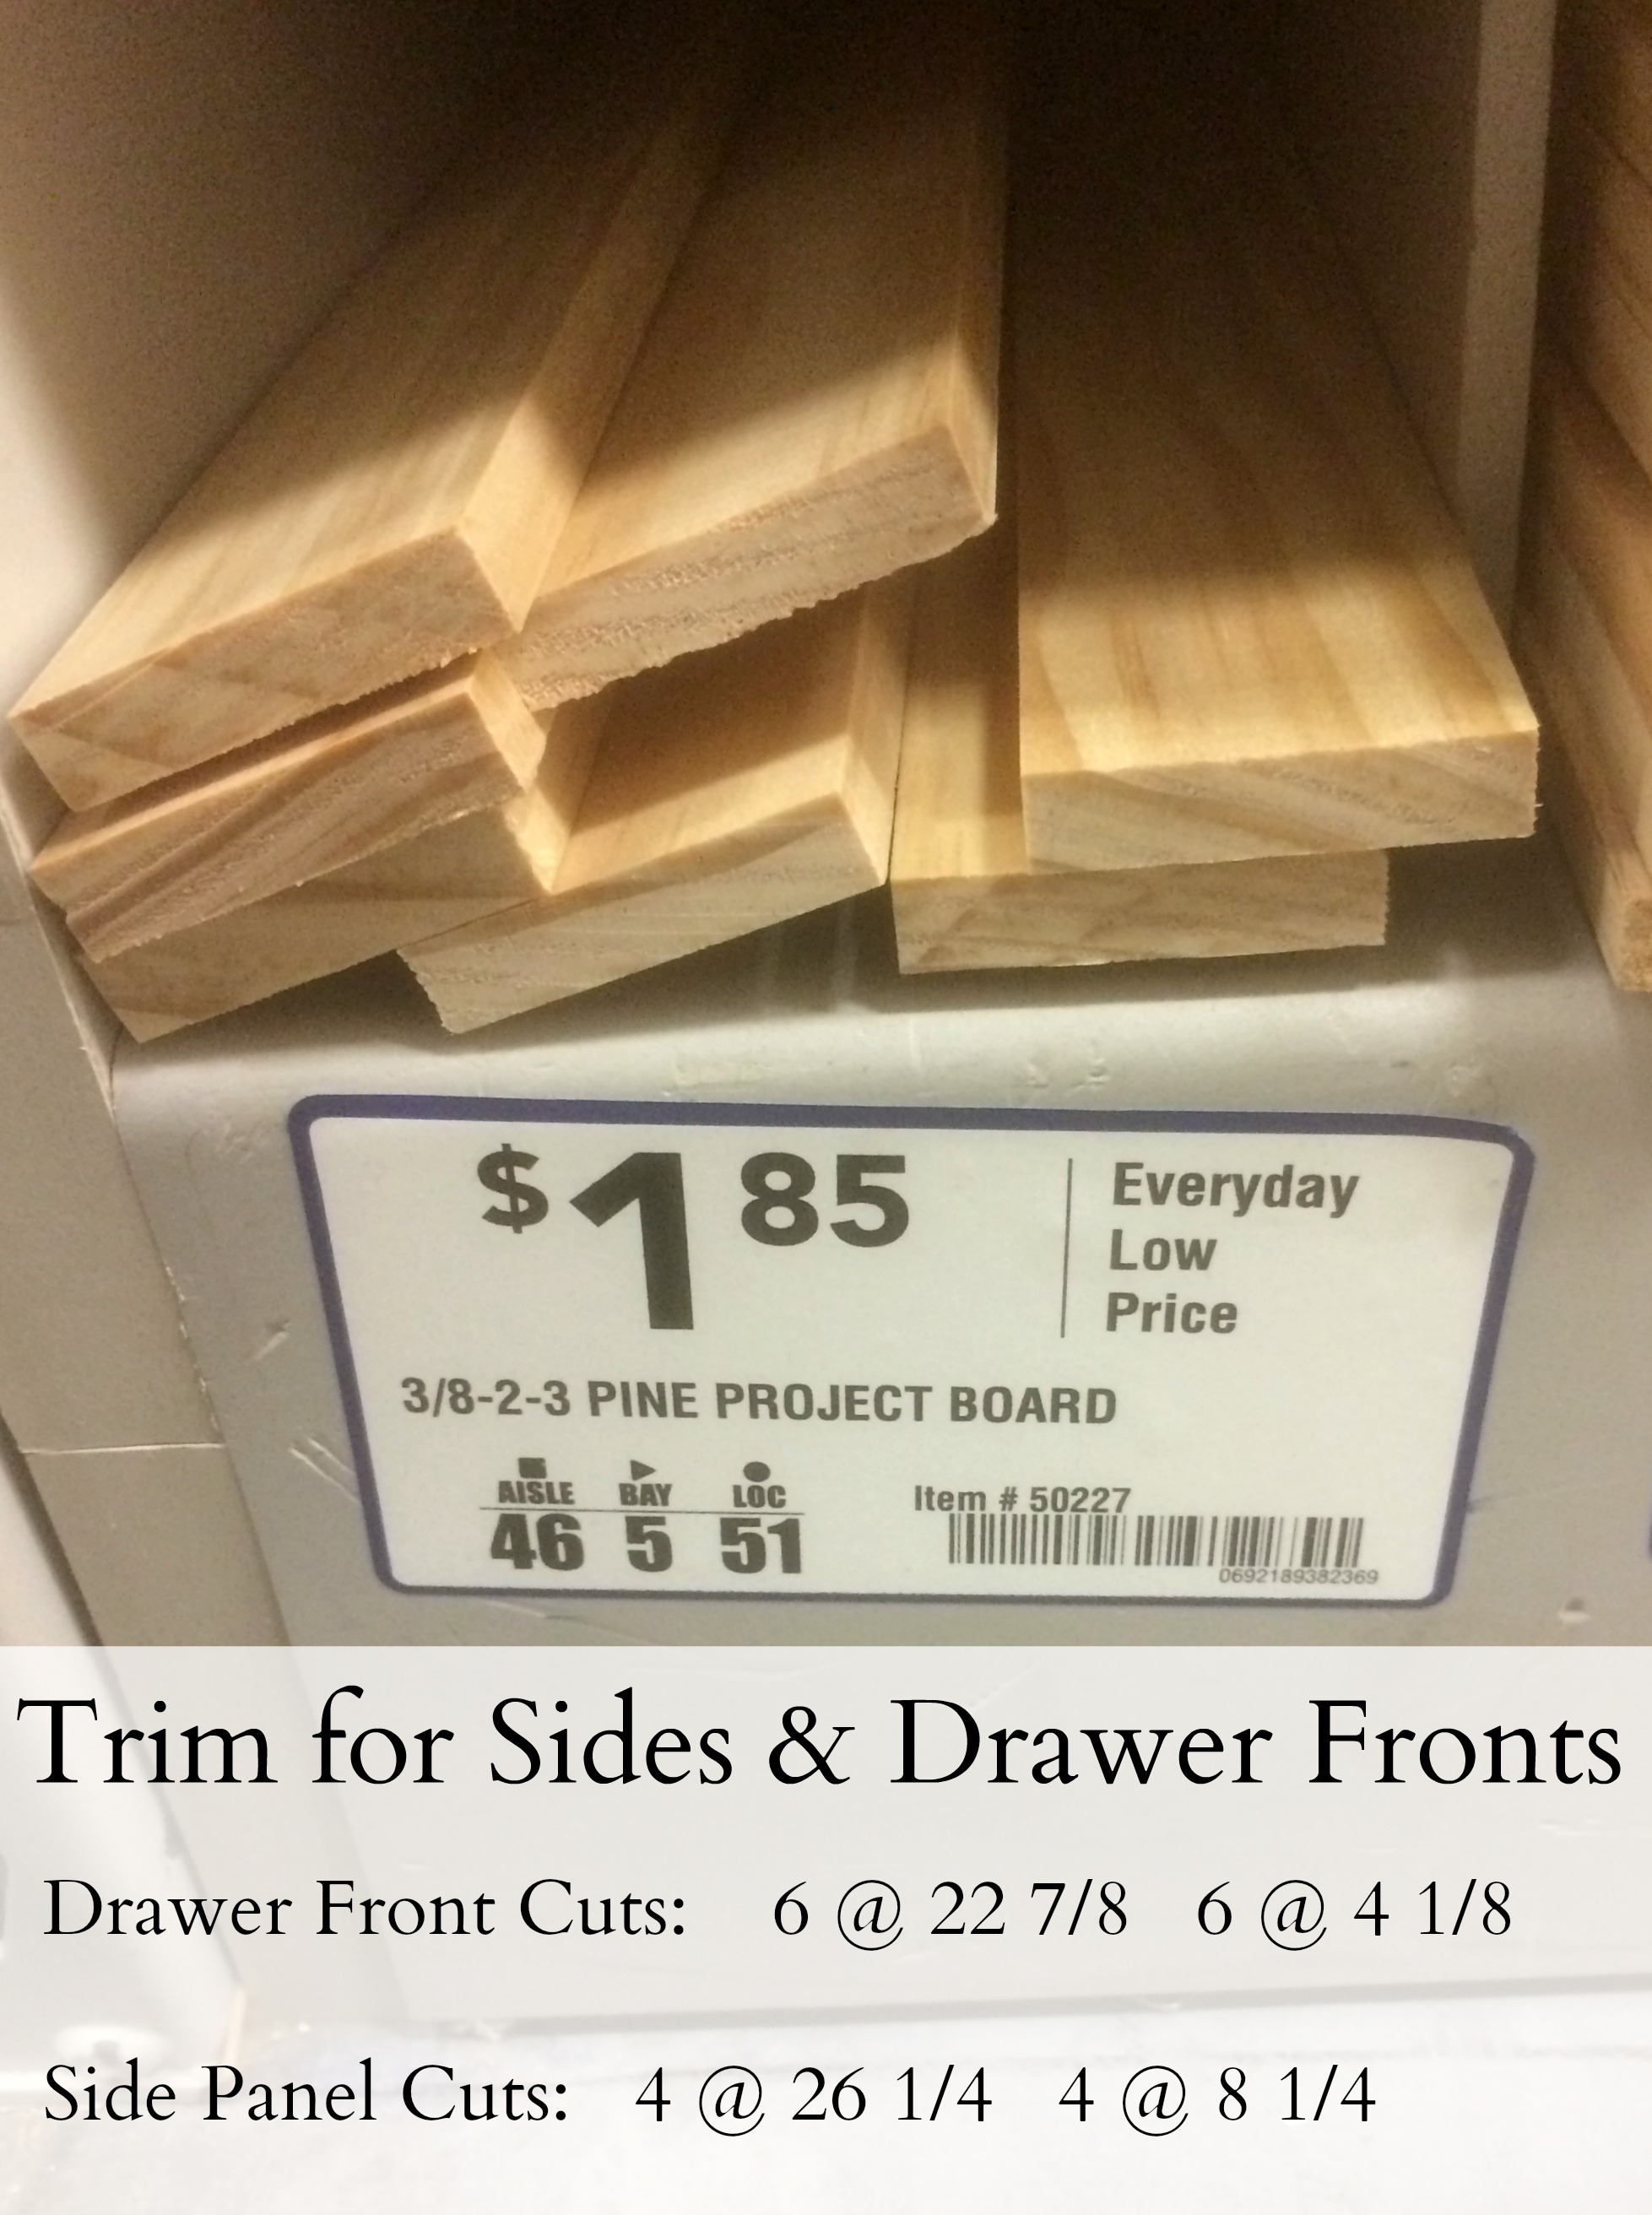
You can purchase your dresser from Ikea (or get from a thrift store or off a swap and sell place like Facebook Marketplace). Then you need to figure out what wood pieces you need. You can get them at your local hardware store like Lowe’s, Home Depot or any other store.
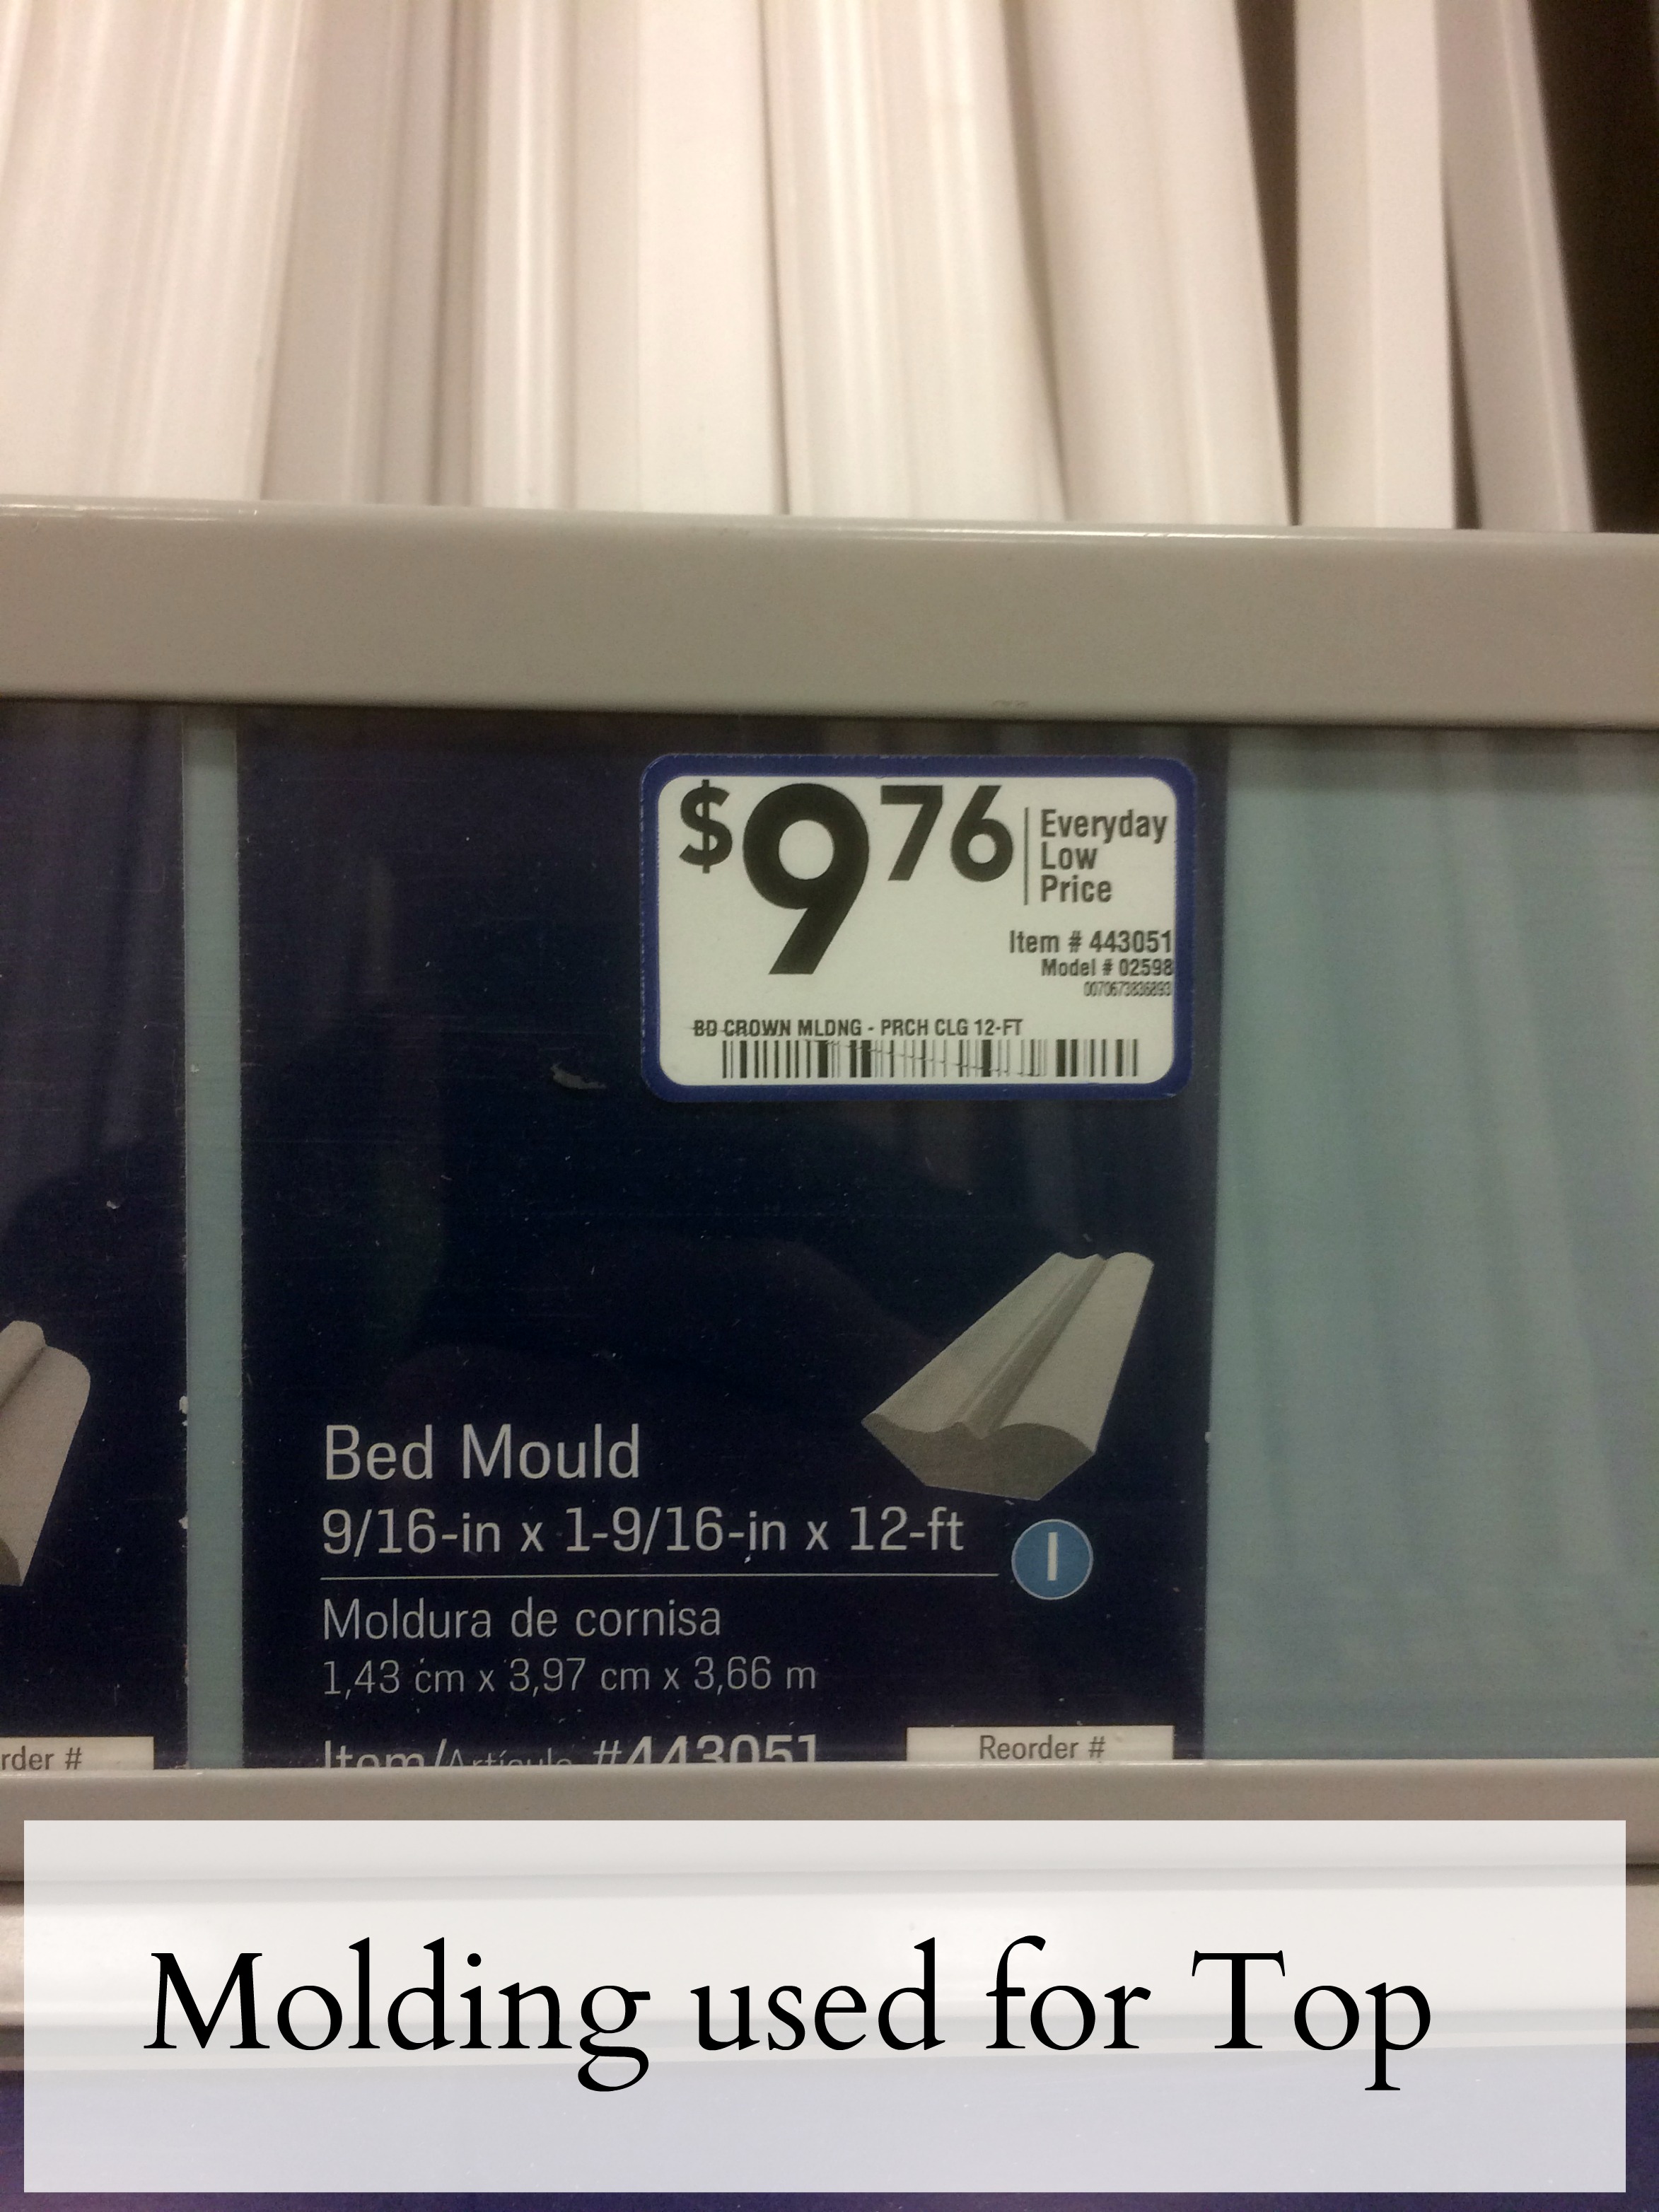
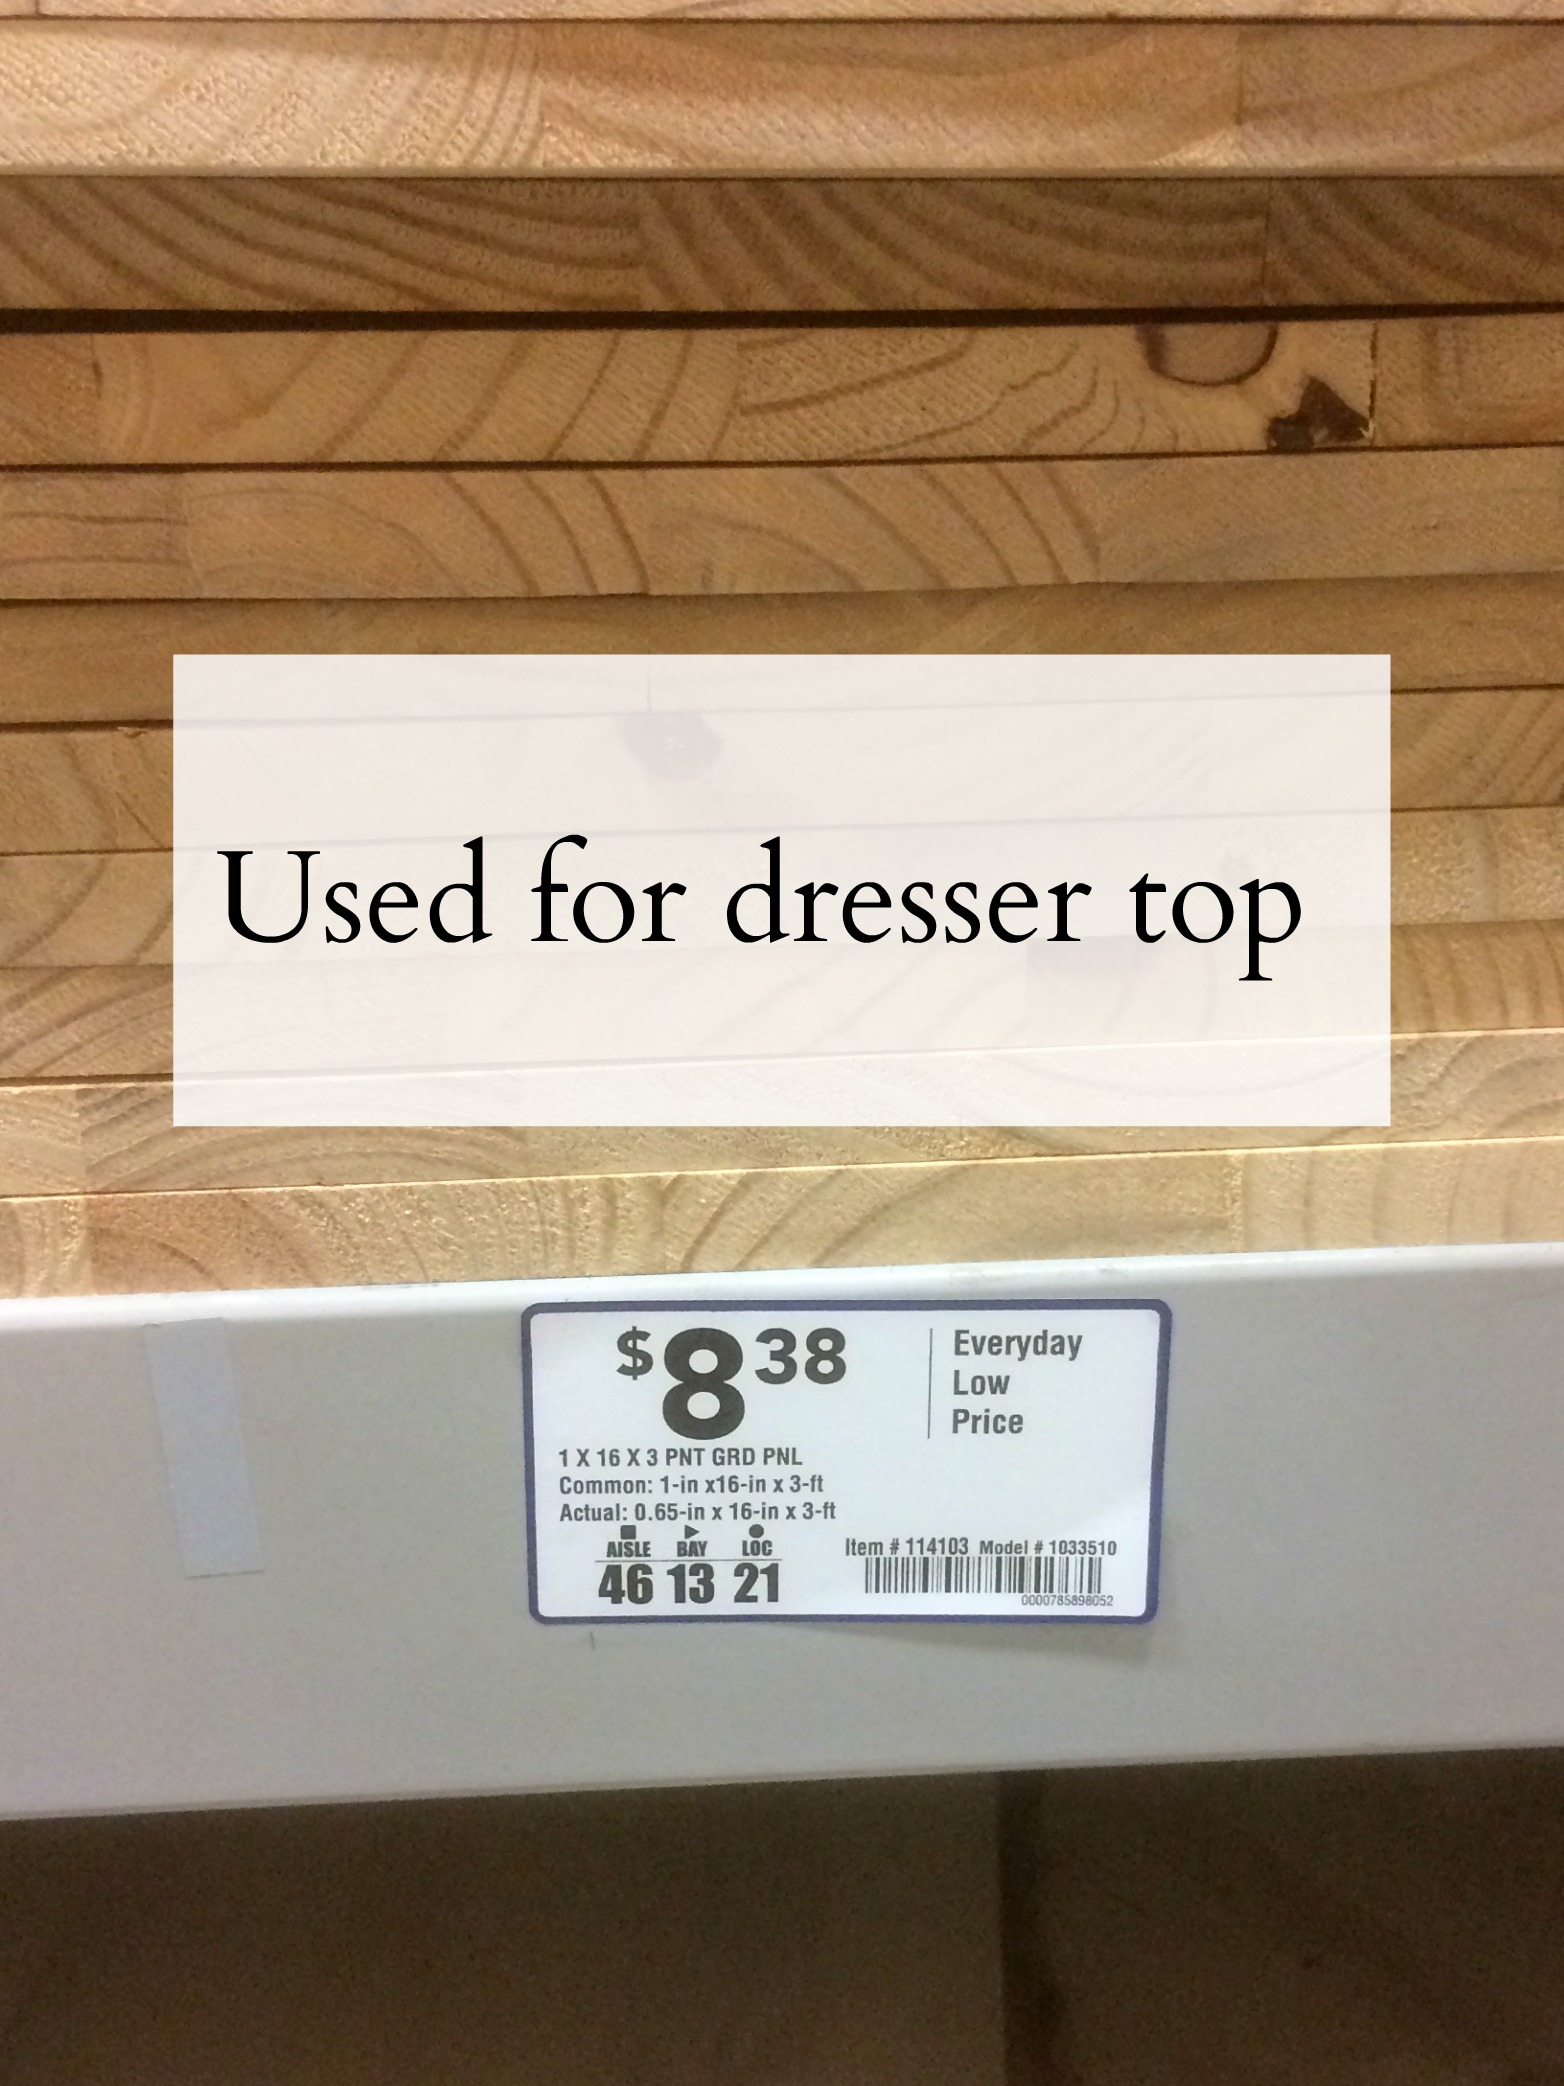
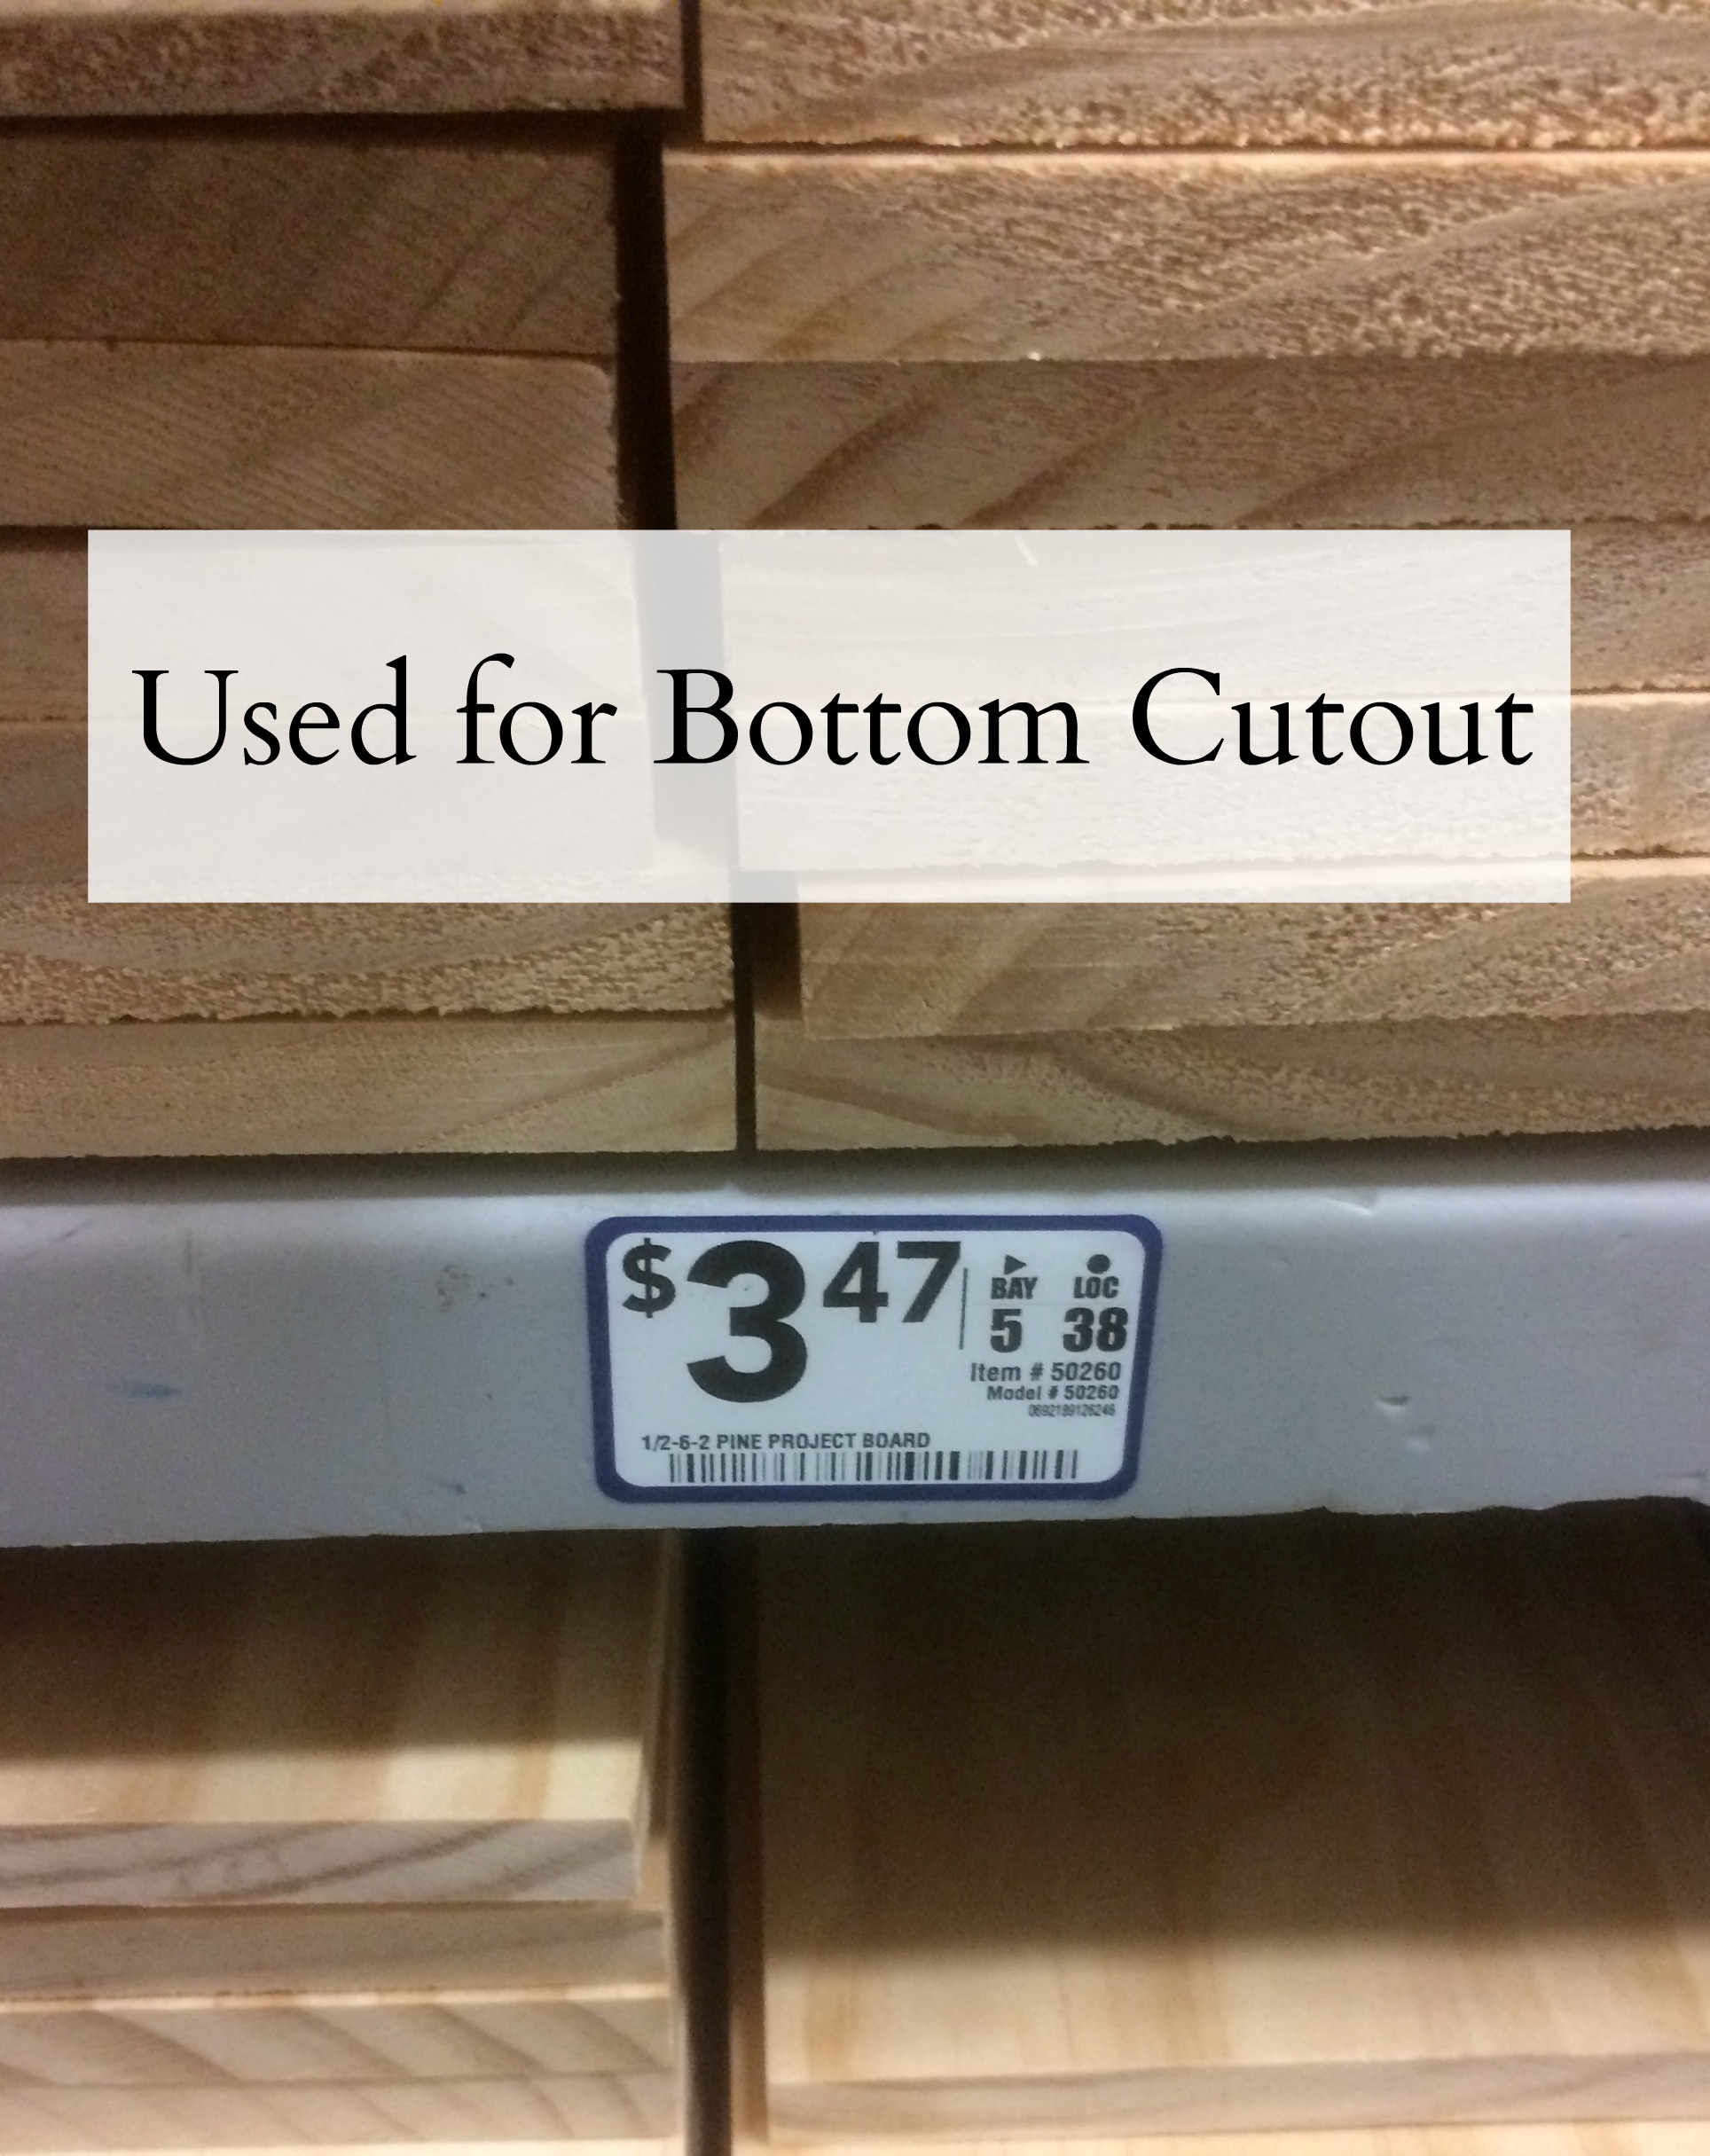
We purchased all of the wood trim pieces we needed from Lowe’s. Below you will find pictures of the pieces on the racks at Lowe’s. The information for cuts and where we used the pieces are on each photo.
Wood and Cuts for Ikea Rast Hack
Ikea Rast Hack Tutorial
Step 1: Assemble the Ikea Rast 3-Drawer Dresser
You have to put your dresser together. We know the infamous Ikea instructions aren’t always as helpful as you would like but this night stand or dresser isn’t as hard to put together as you may fear.
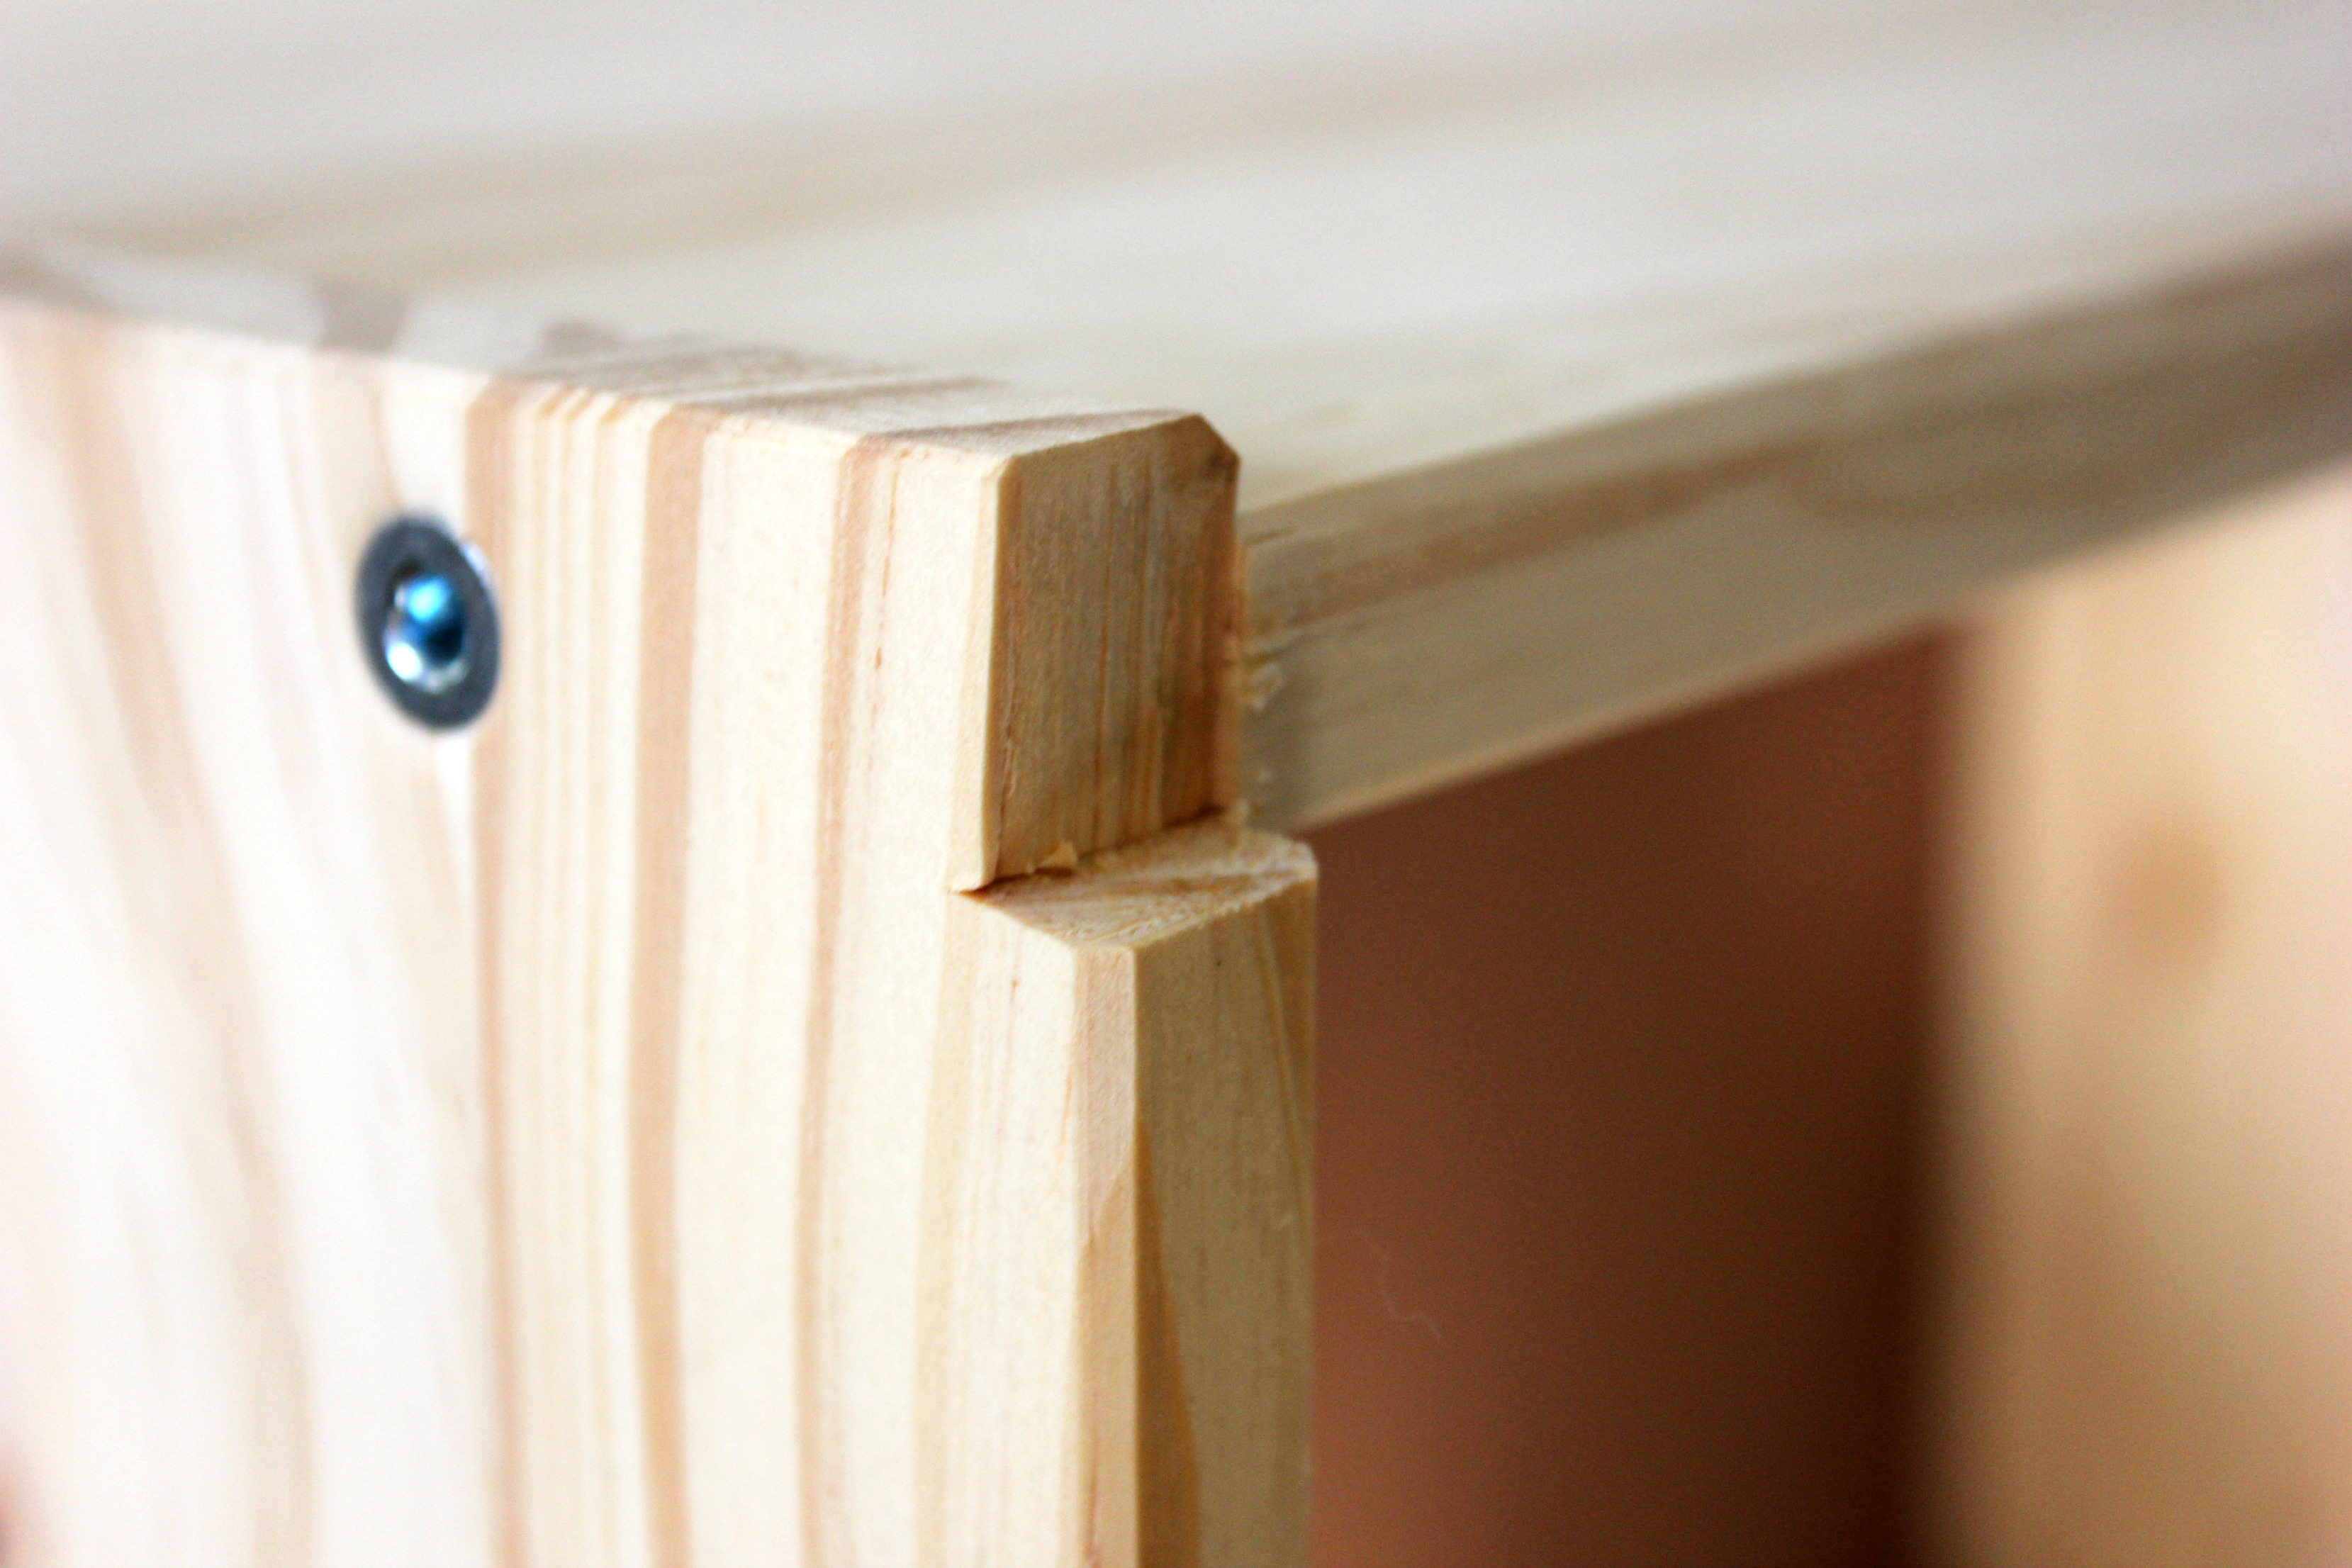
Step 2: Cut the top notch out of the dresser
The first thing we did was cut a notch in the top of the dresser corners to attach the molding. As you can see, the wood cut easily with a utility knife.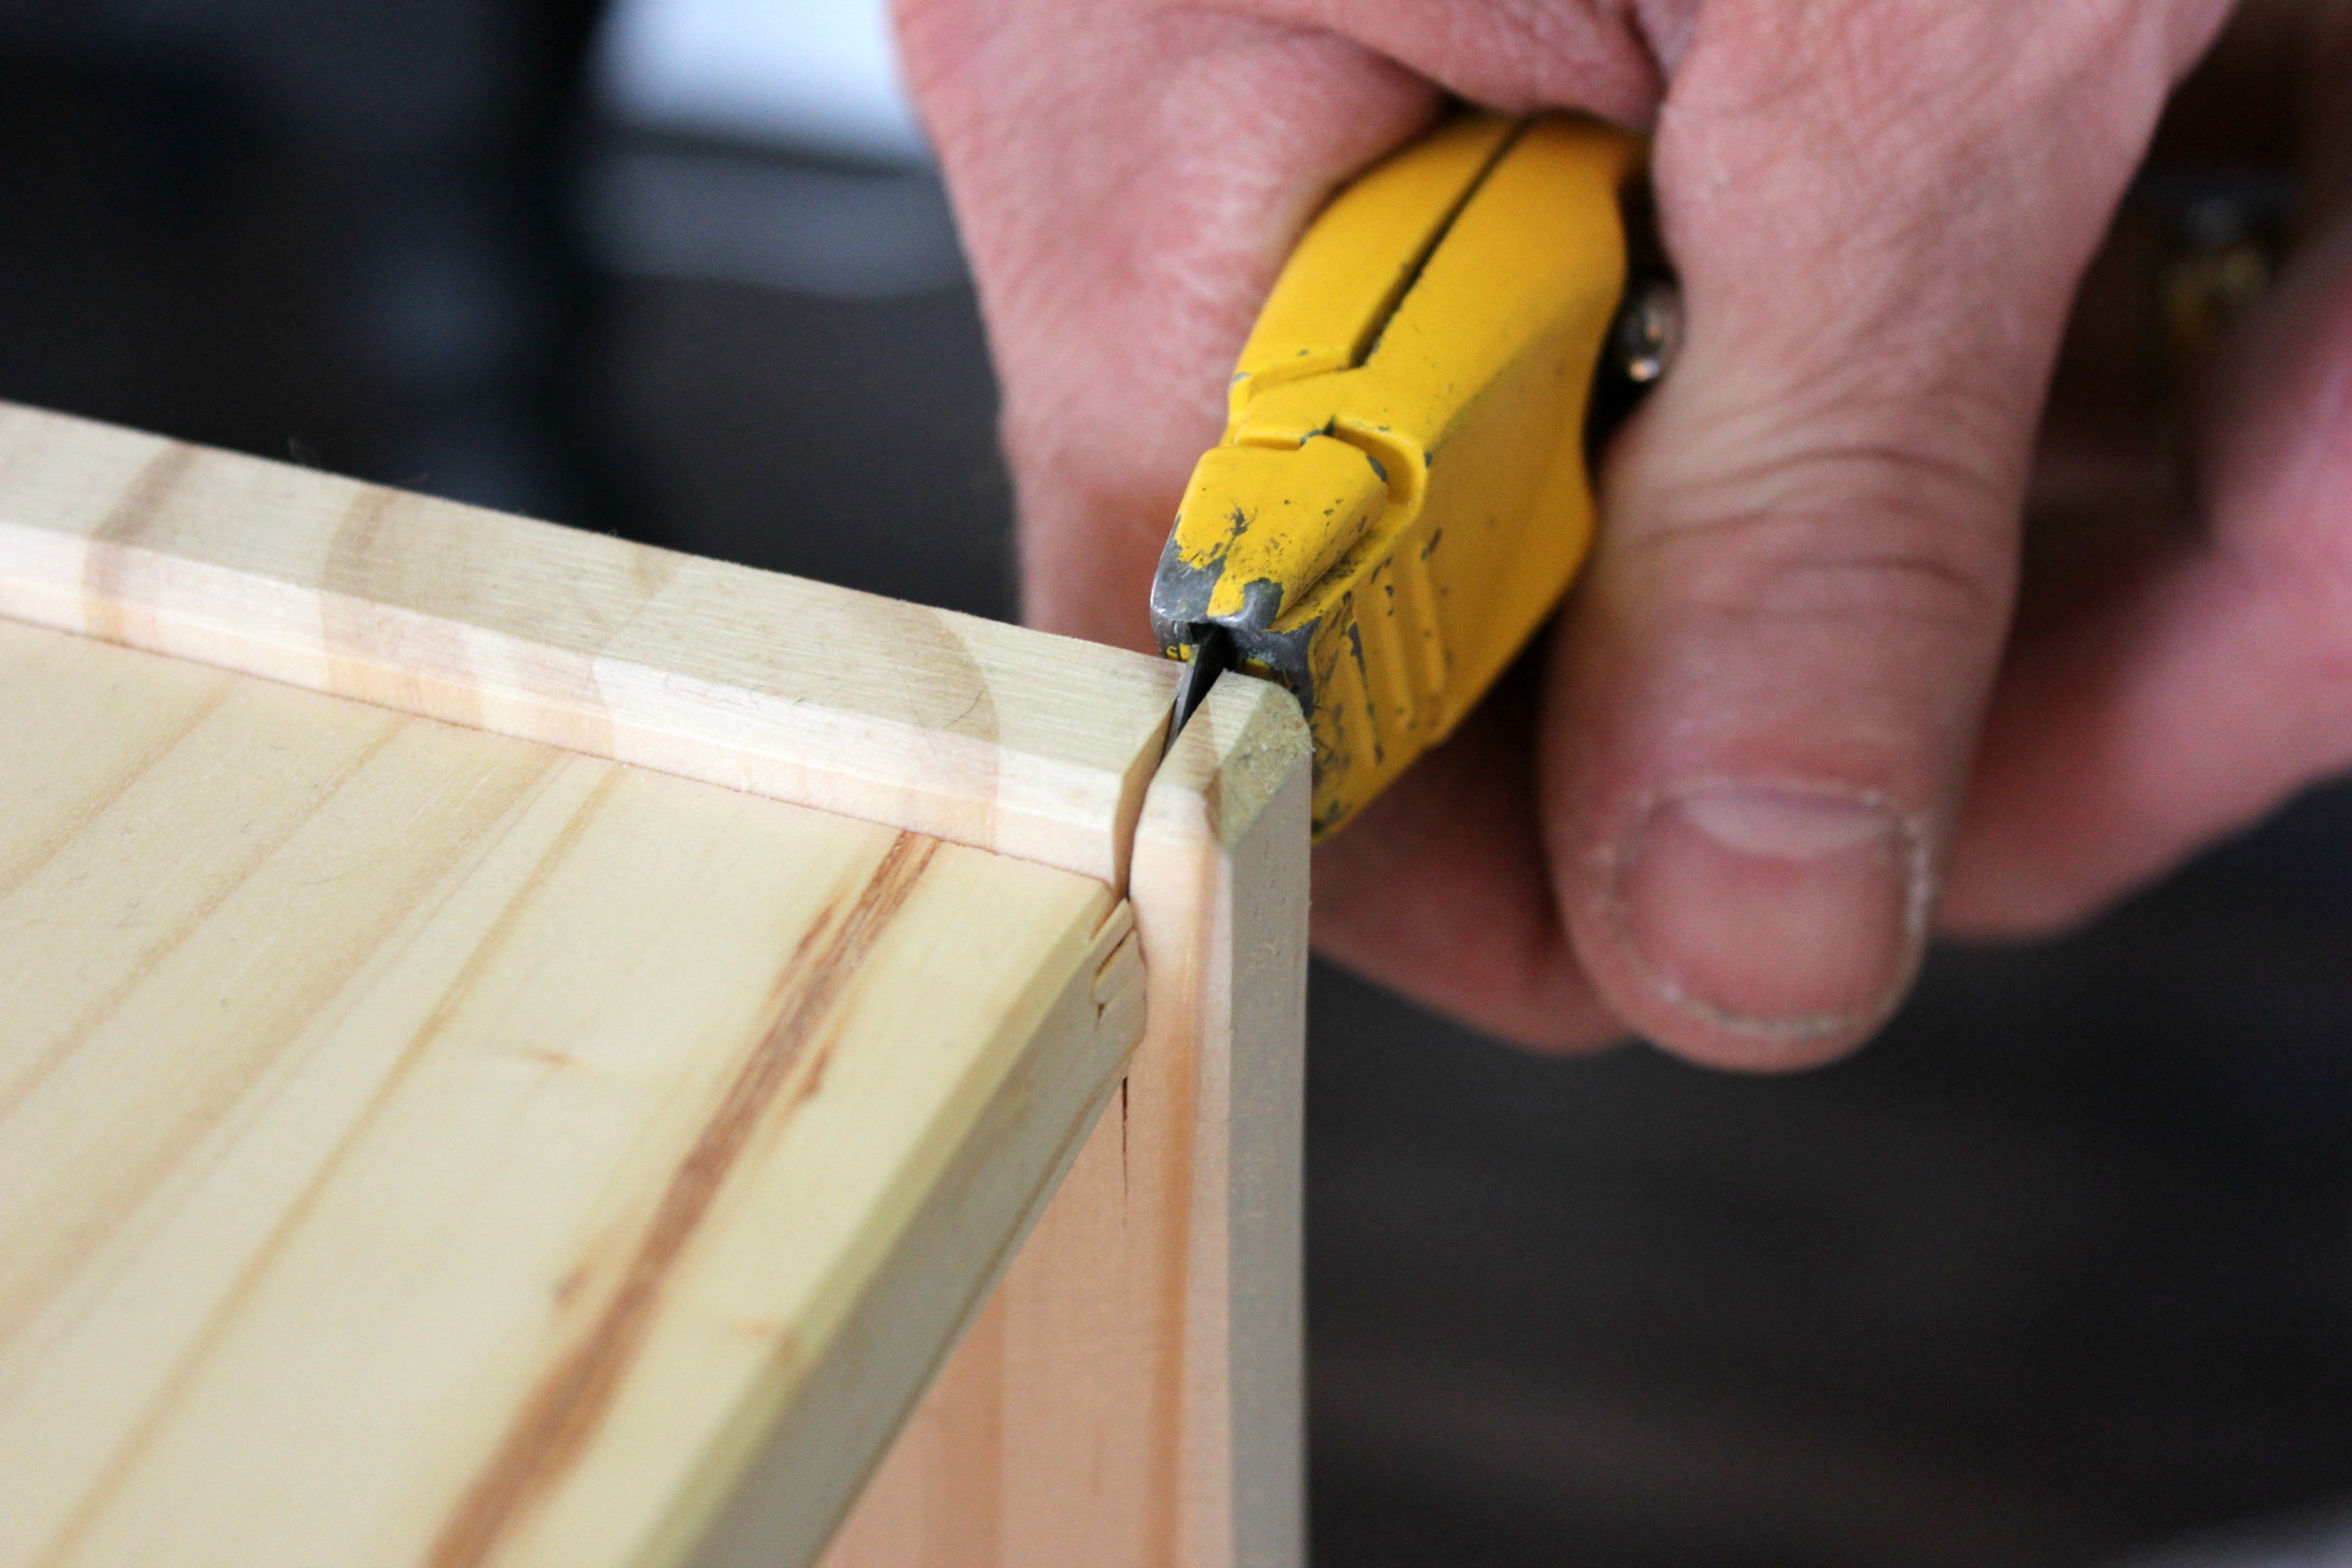
Step 3: Cutting the molding
This next part is probably the most difficult. You will need a miter saw to make these cuts. What you need to do for this part may vary depending on which molding piece you chose.
Once the pieces were cut to fit the top, we used wood glue to attach them and some finish nails for extra support. Here’s how it looks.

What do I do if my cuts aren’t perfect?
Don’t worry! As long as they’re workable, we can easily make them nice!
Wood filler is a wonderful thing and made it look perfect in the end!
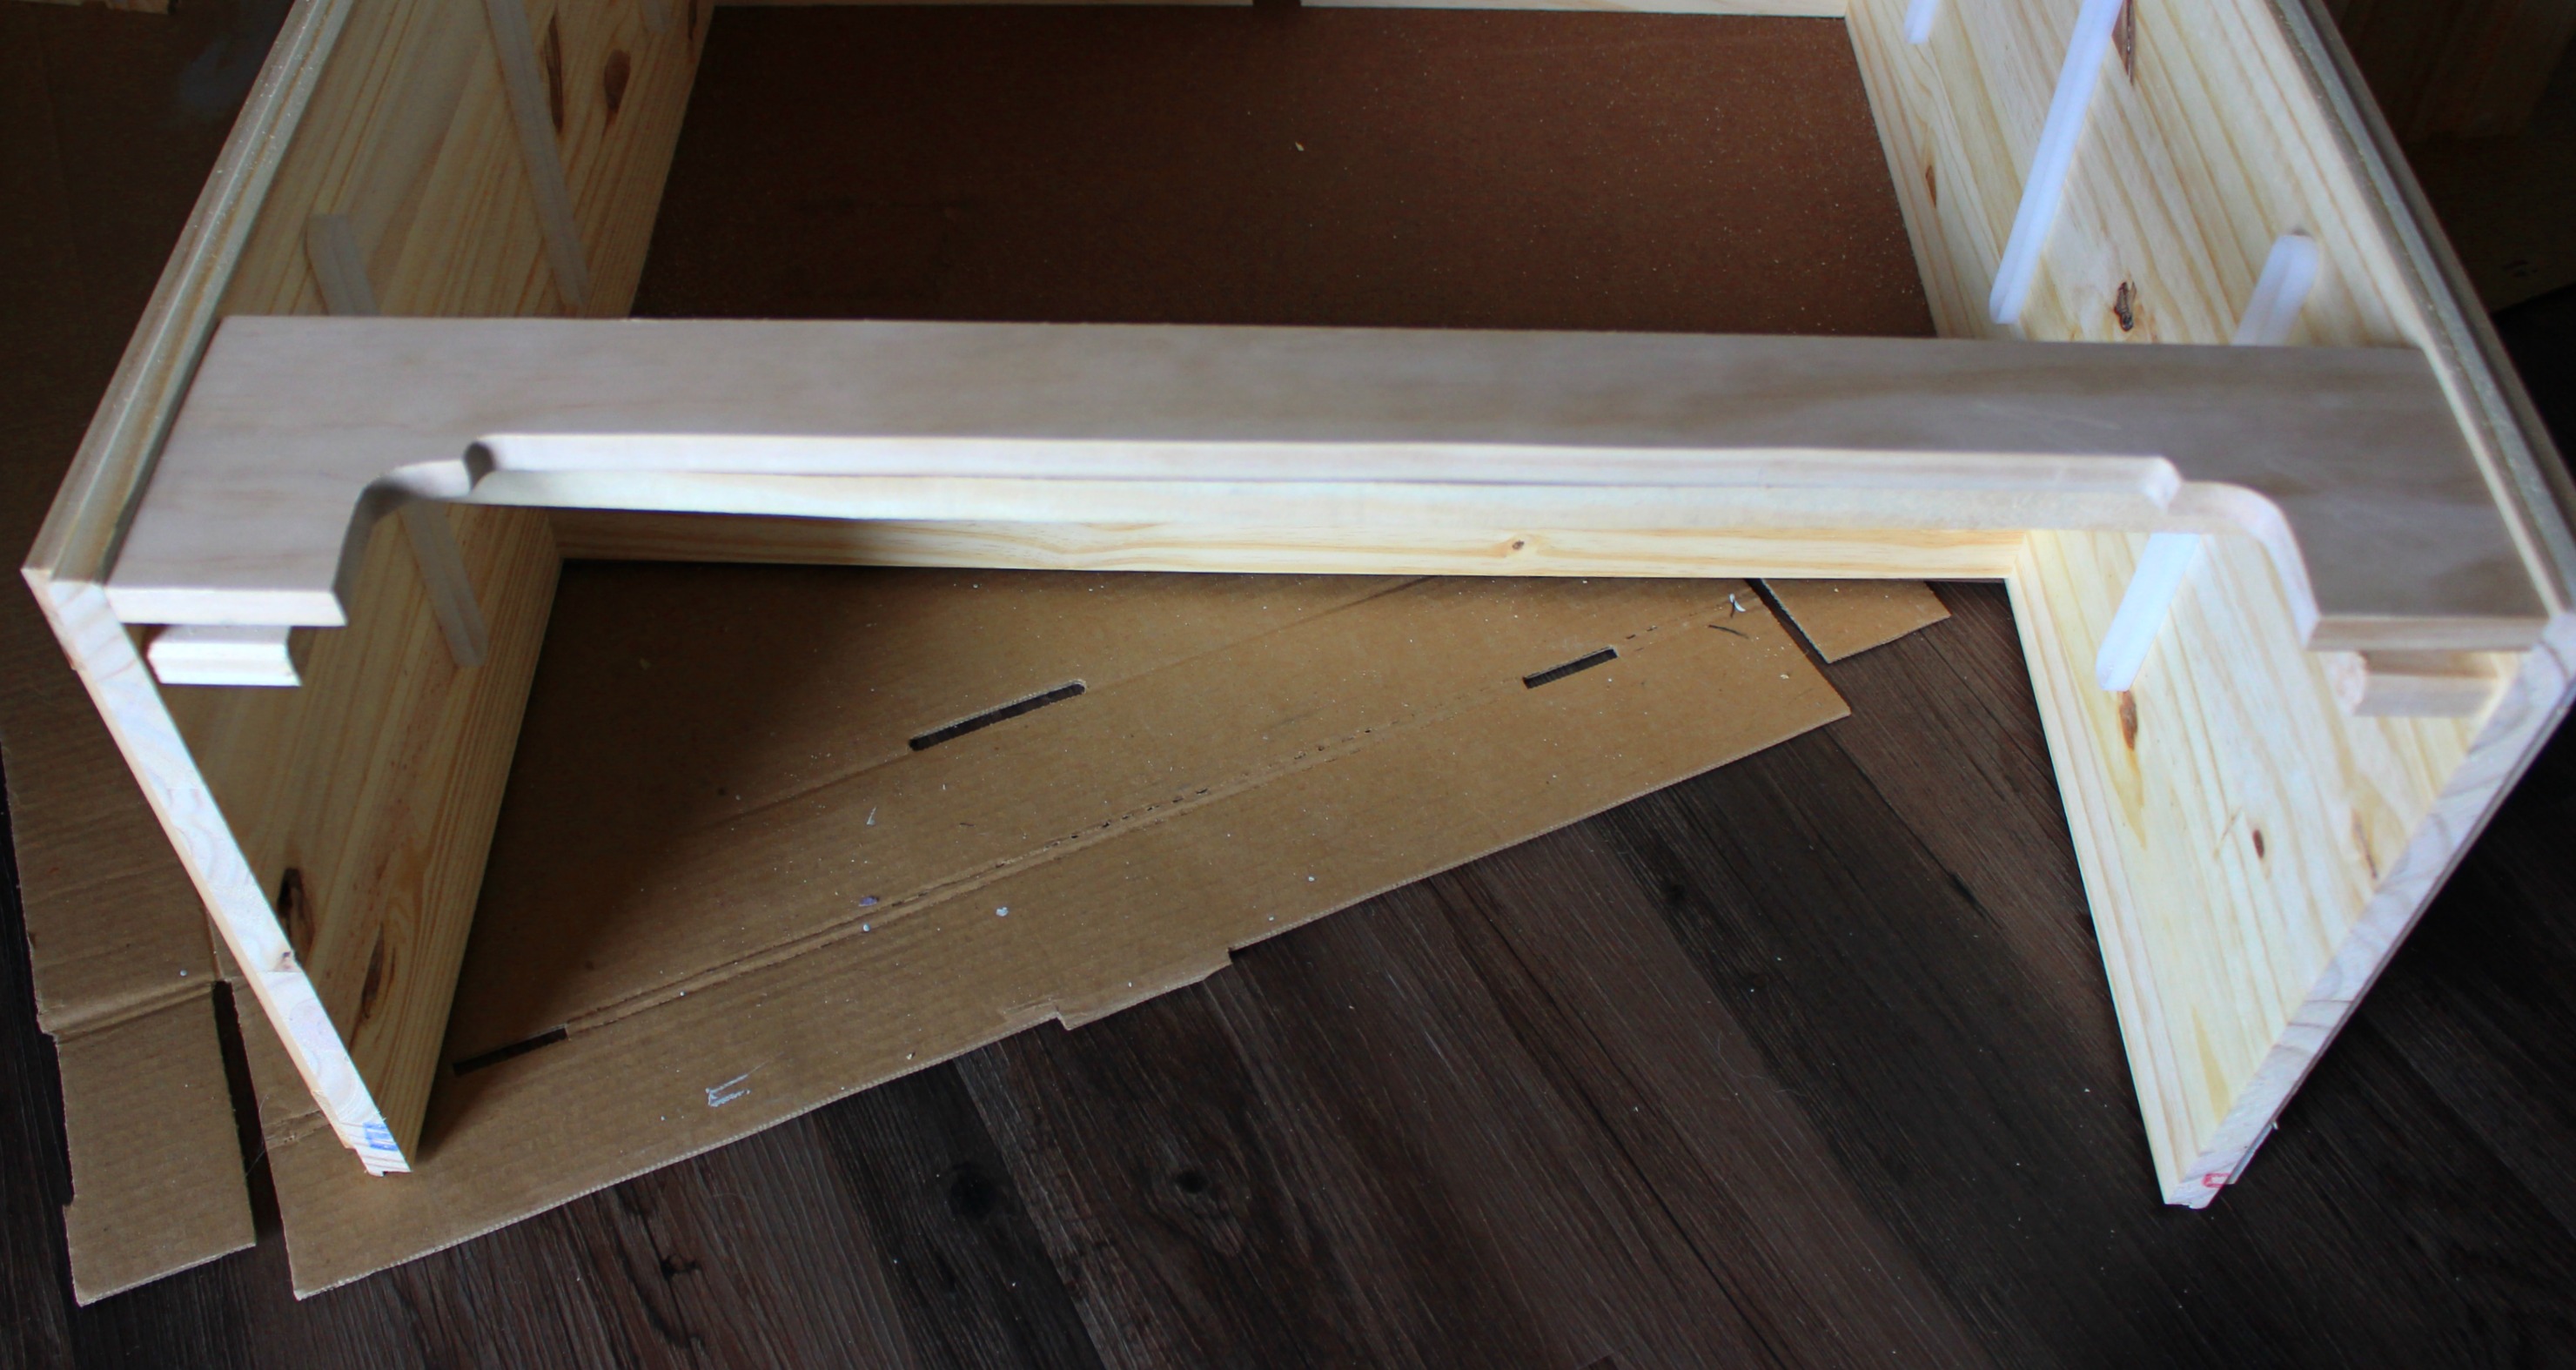
Step 4: Cut the top board
Once you have the molding attached, you can cut the top board to fit.
We overlapped the molding by about 1/4 inch all around because we liked the look. But, you can cut your top board to the size you like.
As you can see in the above photo, there is a height difference between the top of the dresser and the molding.
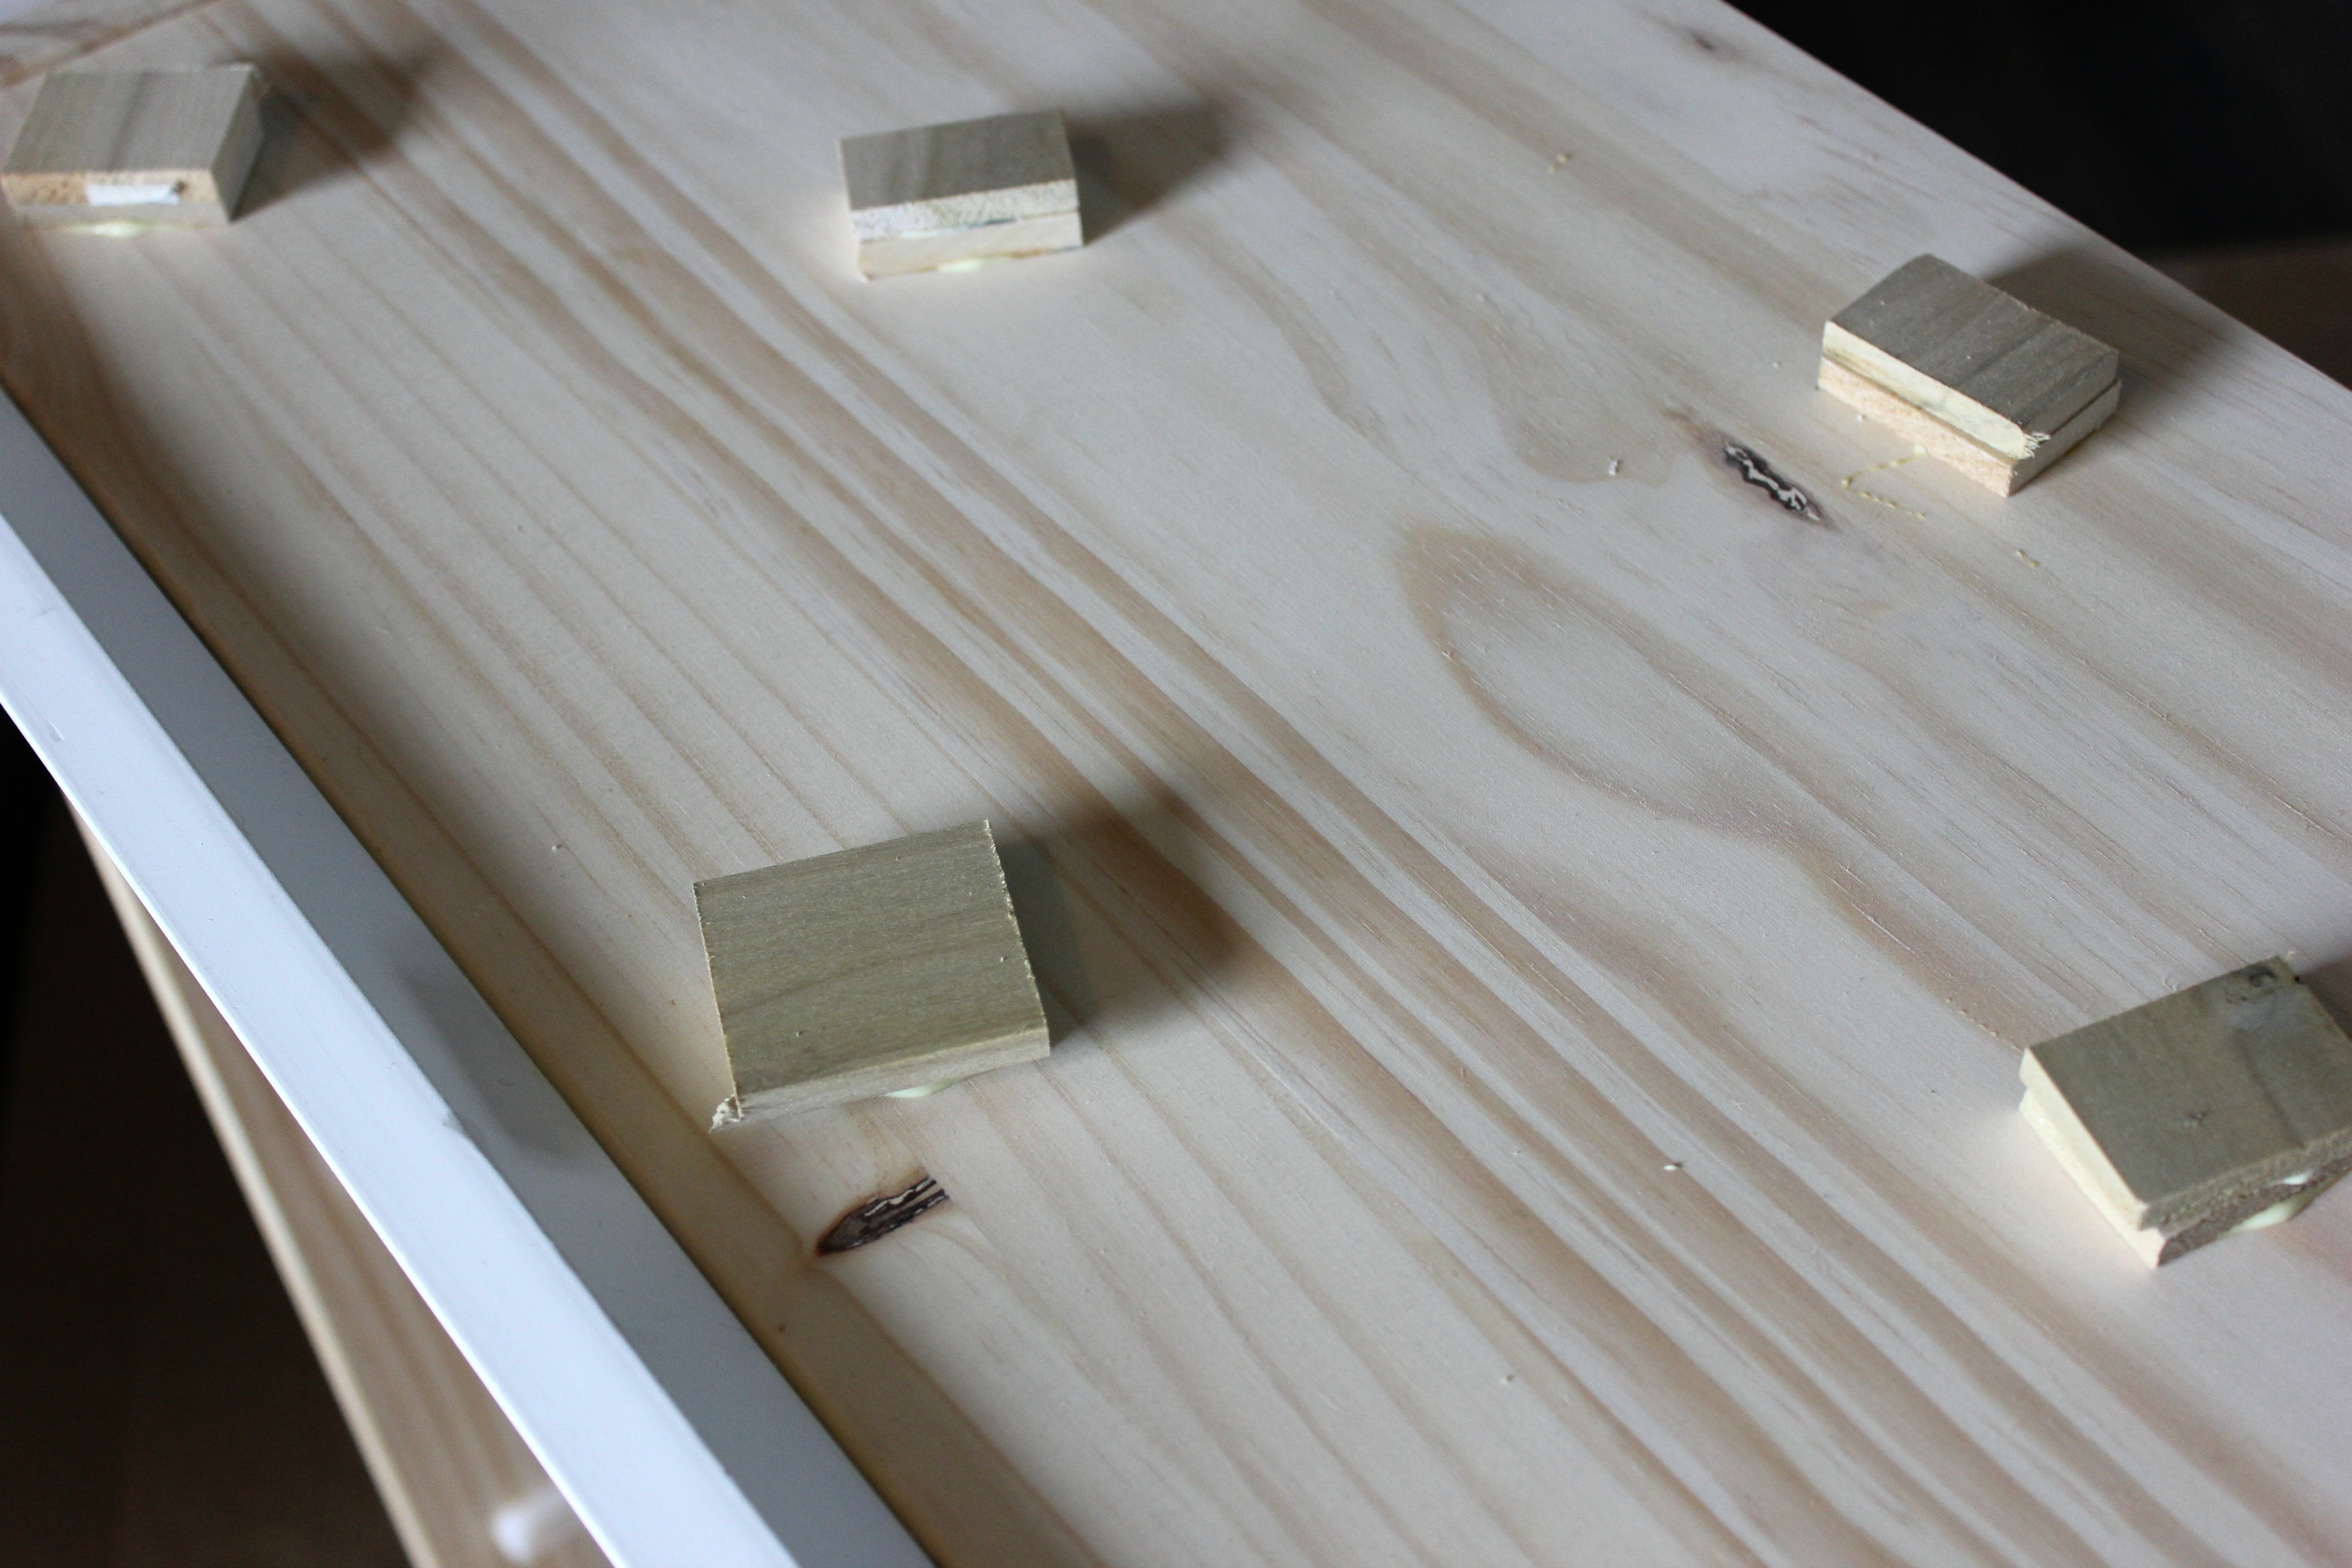
To fill in this space, we used leftover pieces of the trim used for the drawers and sides of the dresser.
We stacked a few, glued them together and placed them on the top – for added stability when attaching the new dresser top board. The top board was attached using wood glue and finish nails.
Use what materials you have on hand to make it the way you want it to look. This may vary depending on your end goal, the look of your molding and what you have on hand.
Step 5: Frame out the front of the dresser
Next, we framed out the dresser fronts and sides with the 3/8″ pine project board. We just used wood glue to attach the cut pieces and secured them until the glue was dry. This helps give the drawer fronts a little extra depth and dimensions that they wouldn’t otherwise have.

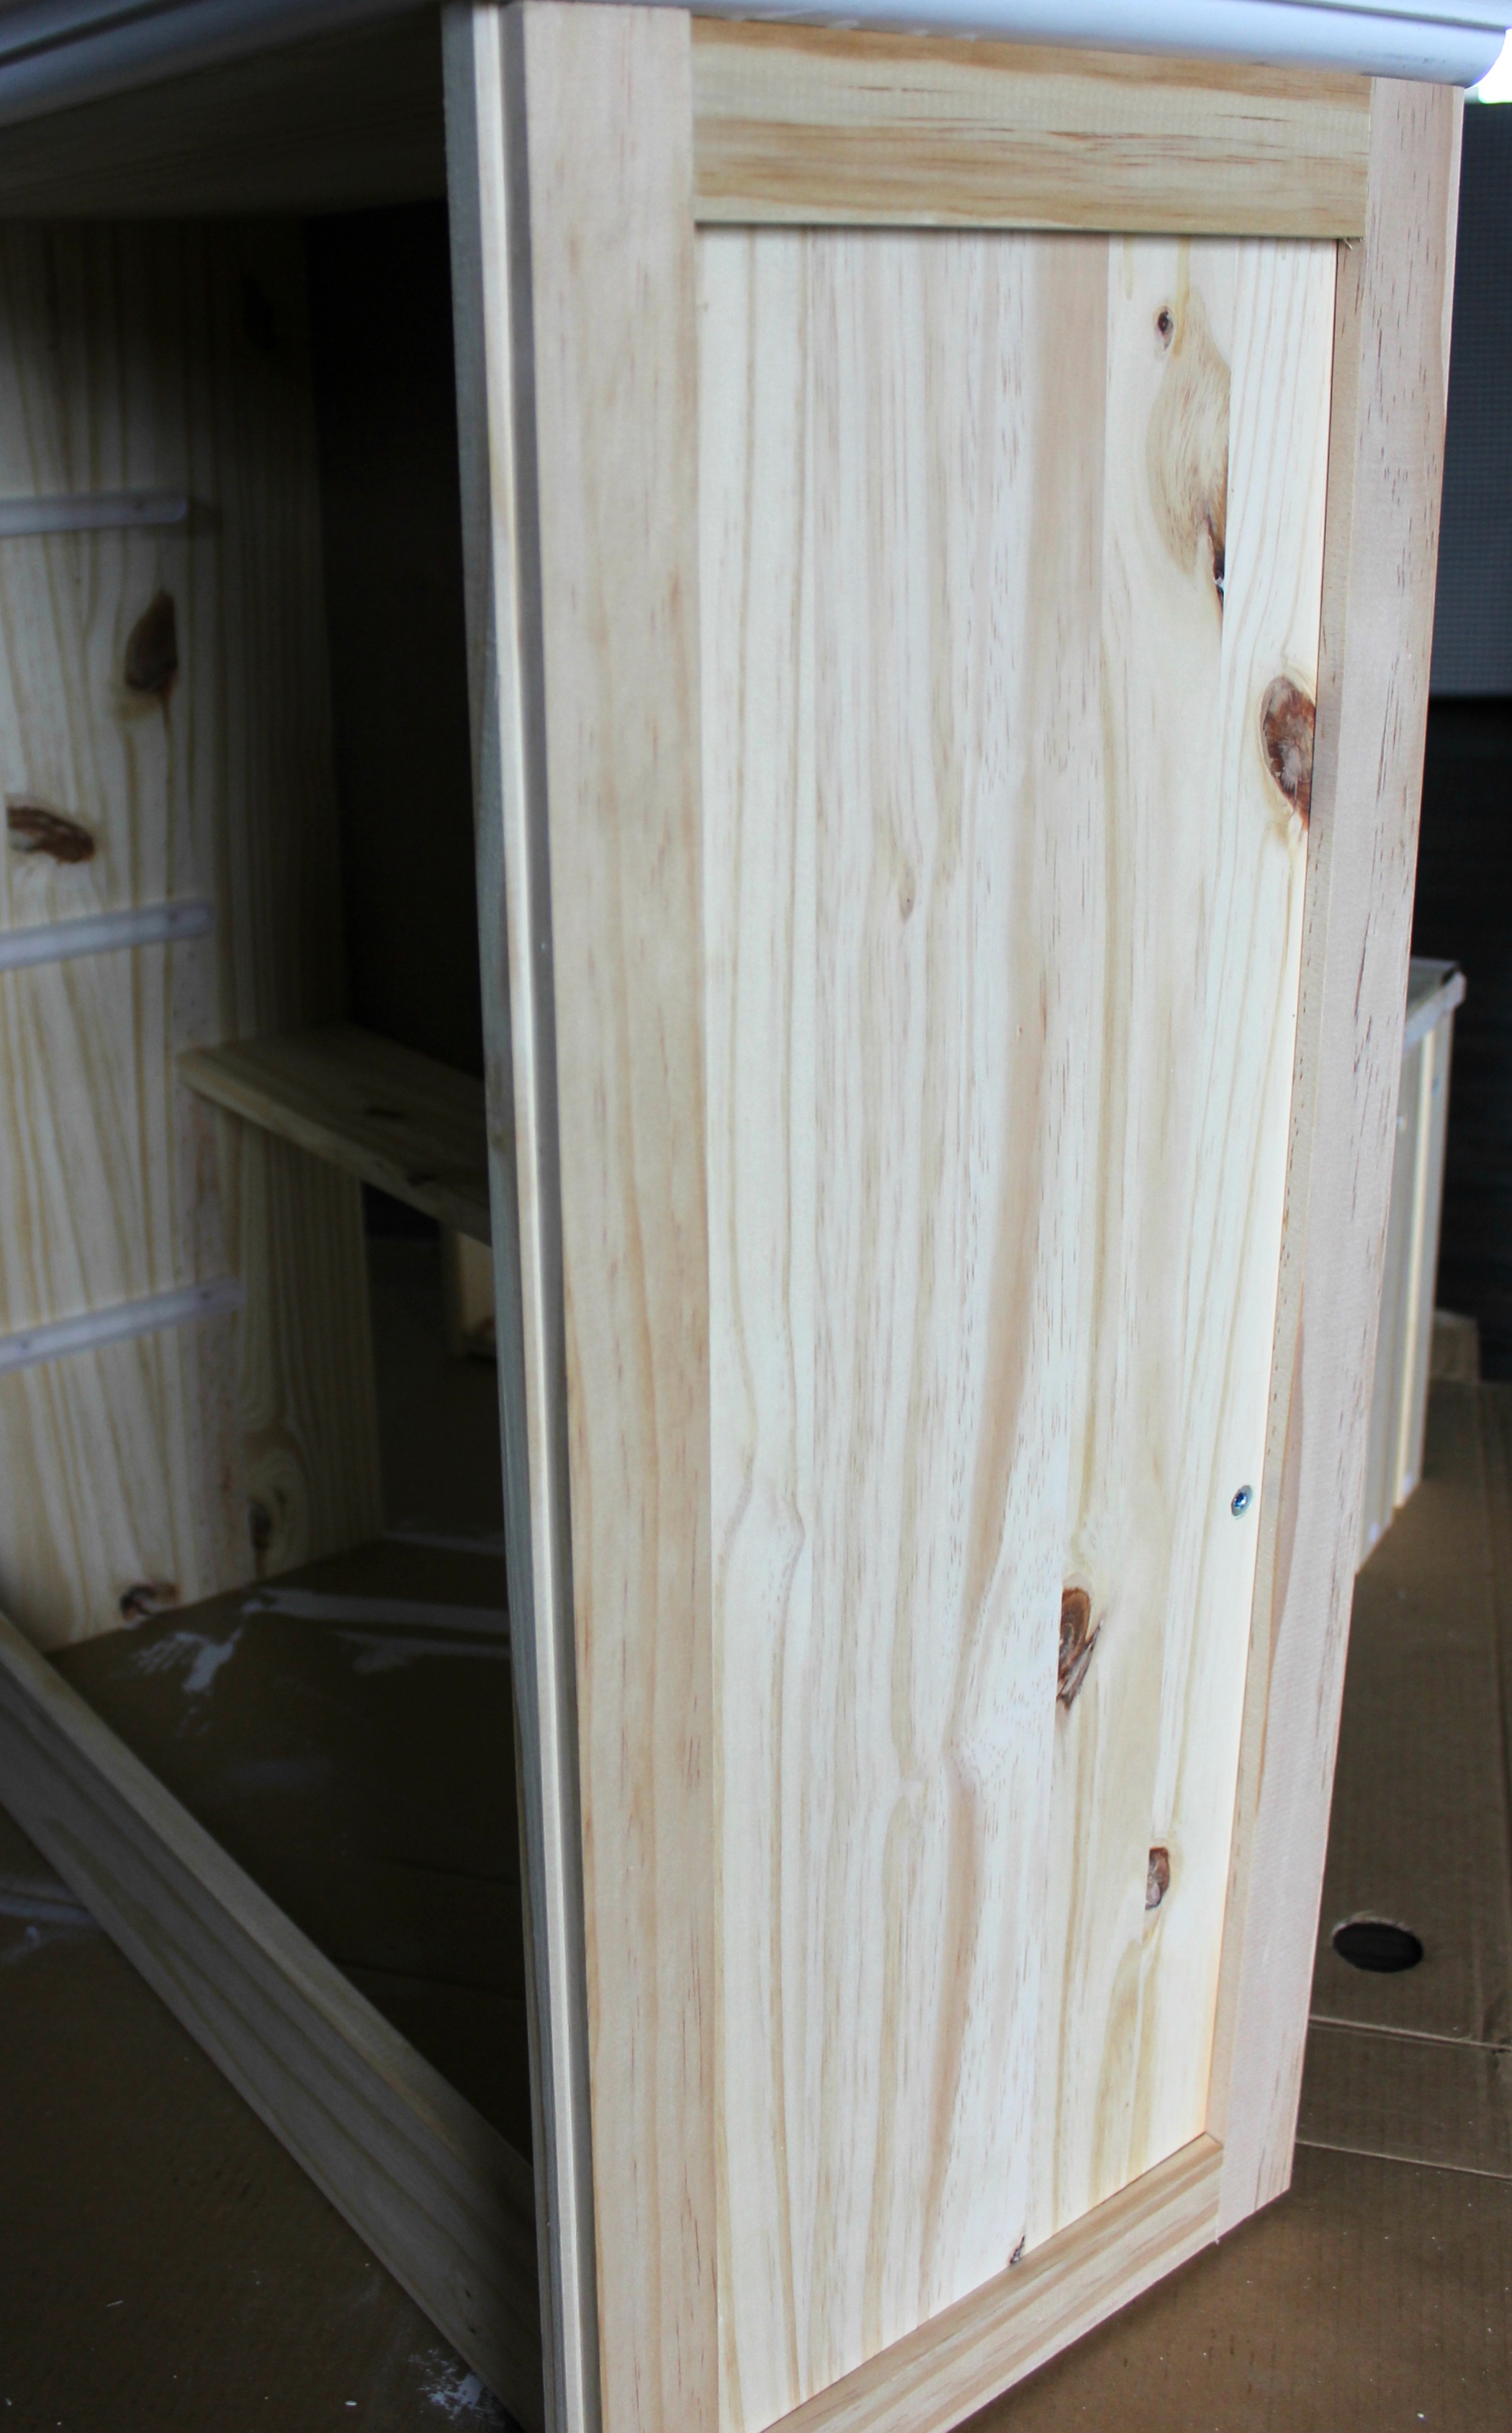
There are two screws on each side of the Rast when you put it together. I used wood filler and sanded it down to hide those two screw holes before painting.
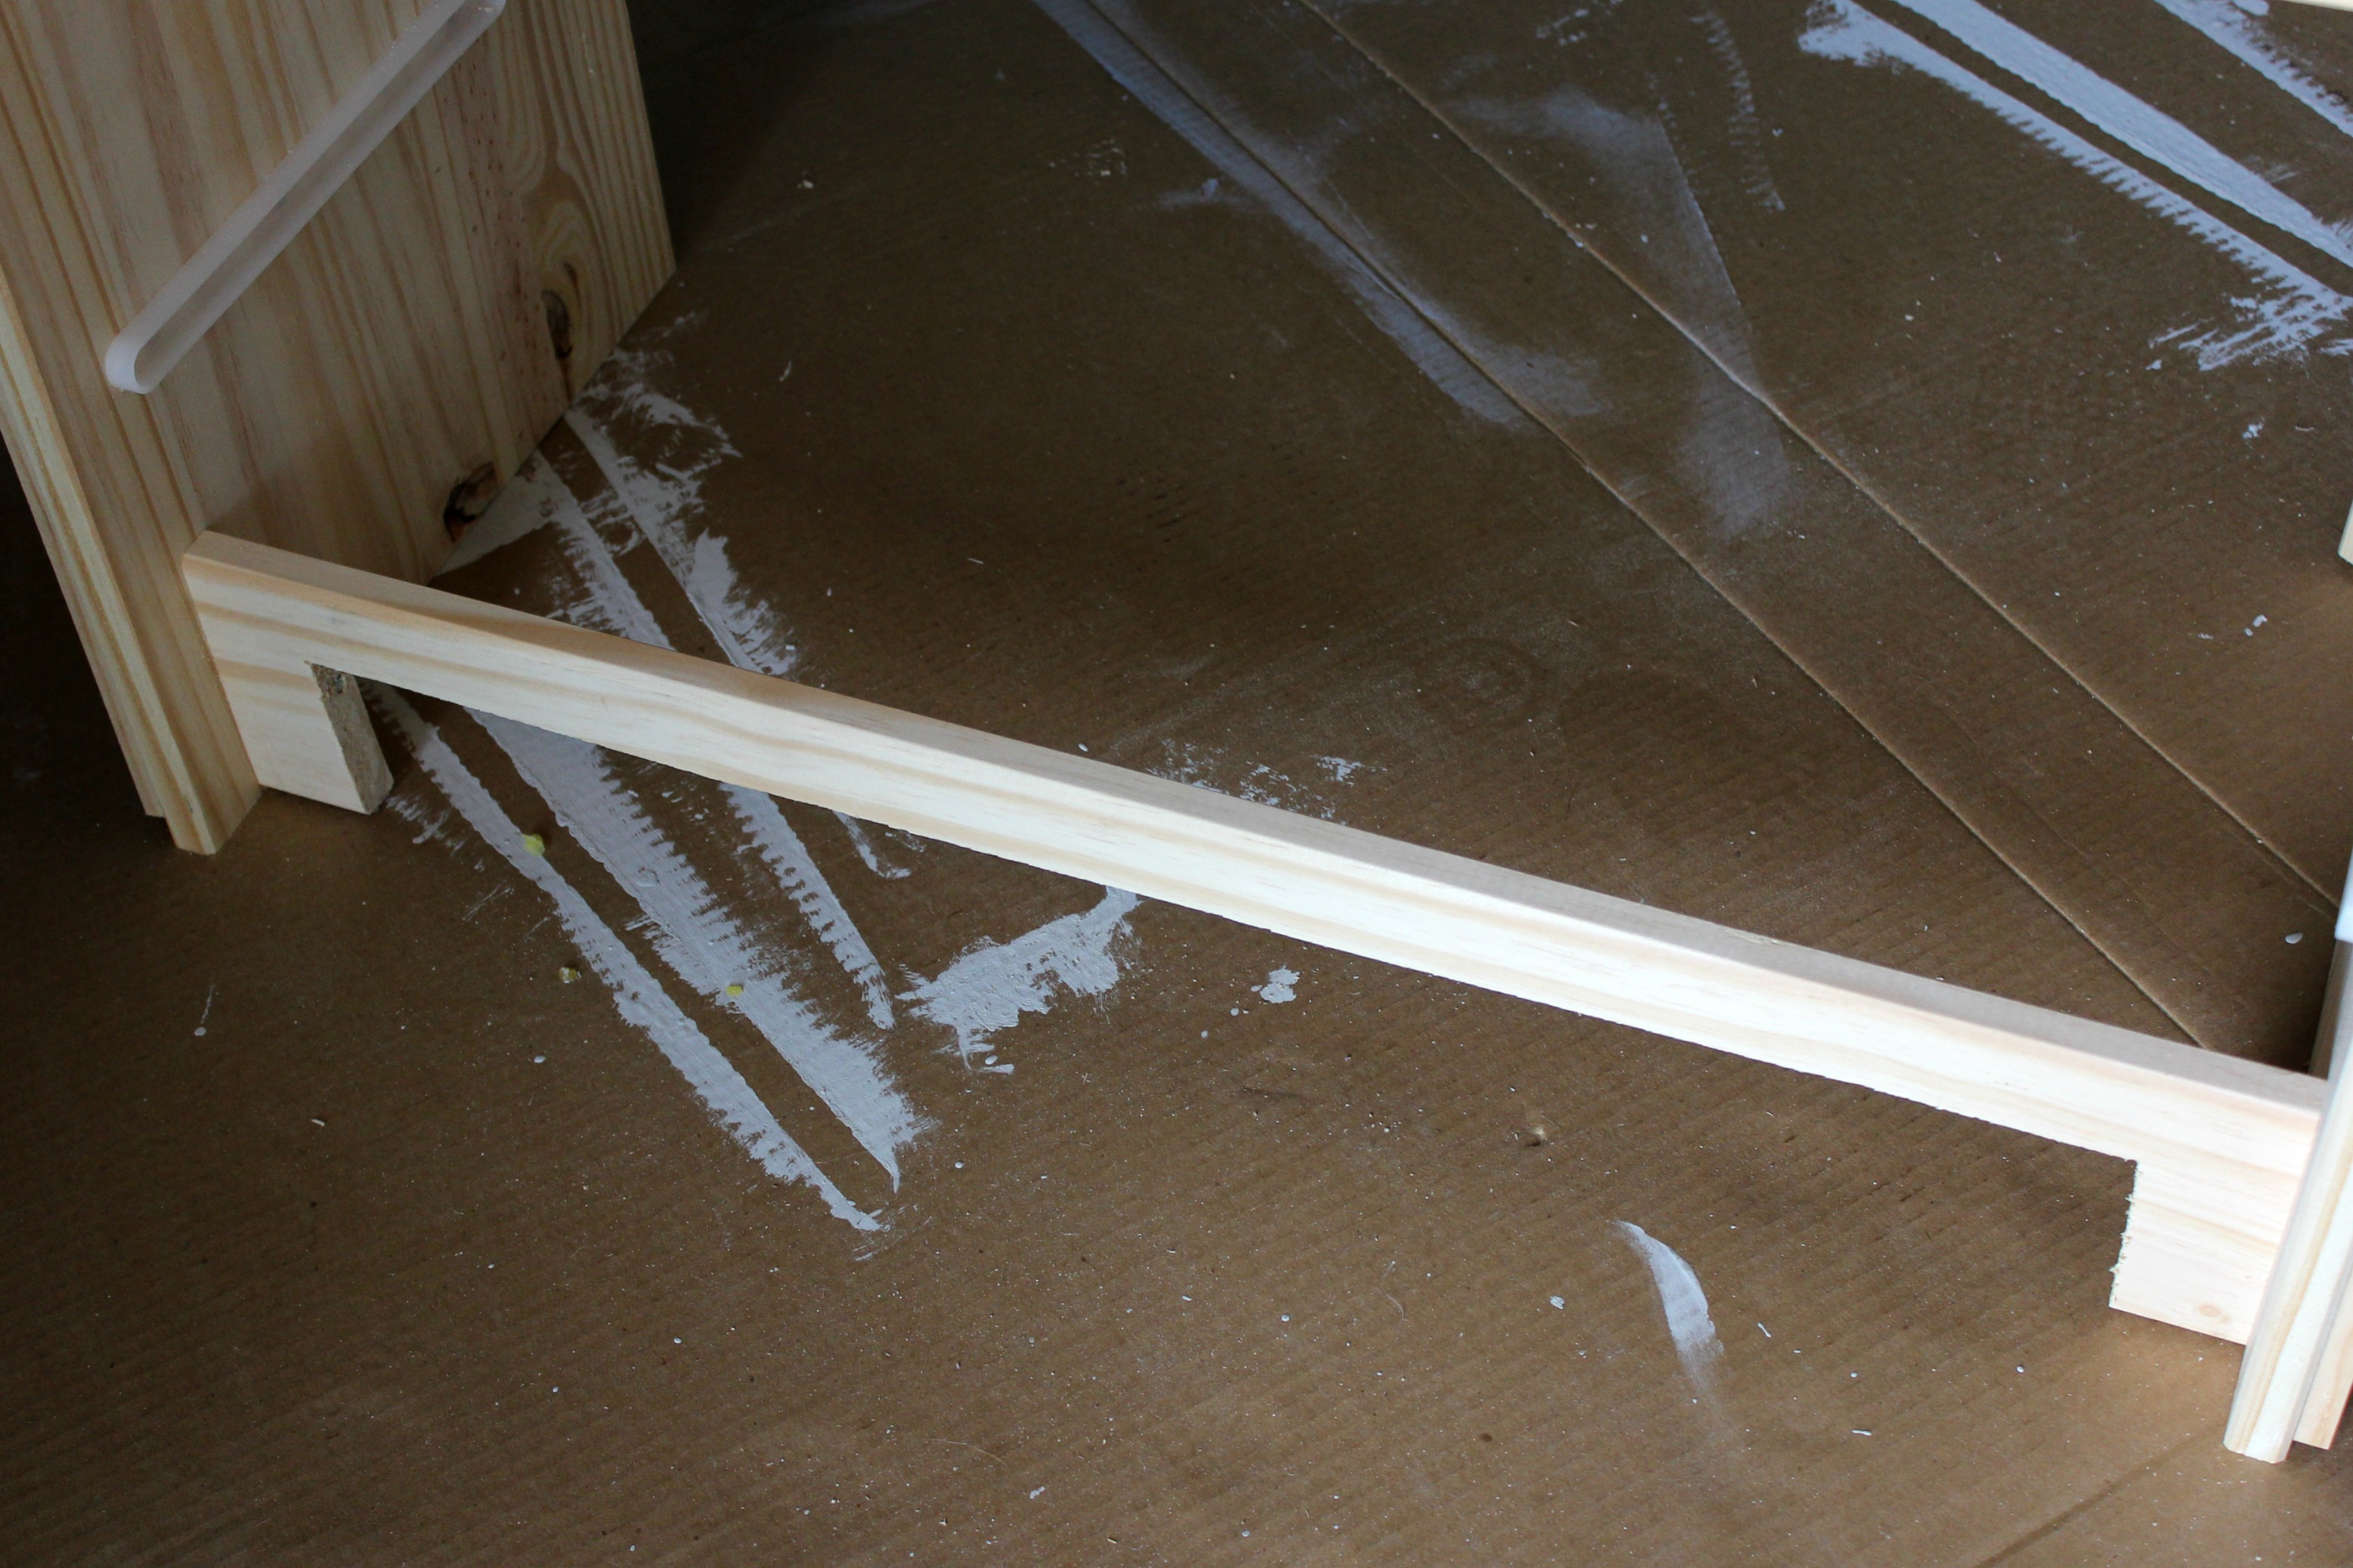
Step 6: Remove Trim Piece
At the very bottom of the Rast is a solid board running across. This board is set in.
We used a jig saw to cut out this piece – as shown above. This was done because the trim piece going over this is also cut out.
Below is the paper template I used for the bottom decorative piece.
You can print this, cut out the template, trace around it on your 5″ x 2 ft. pine board, flip it over and trace the other side. Using a template is the perfect solution to ensuring that you get the project done properly and it’s an easy way to trace things out.
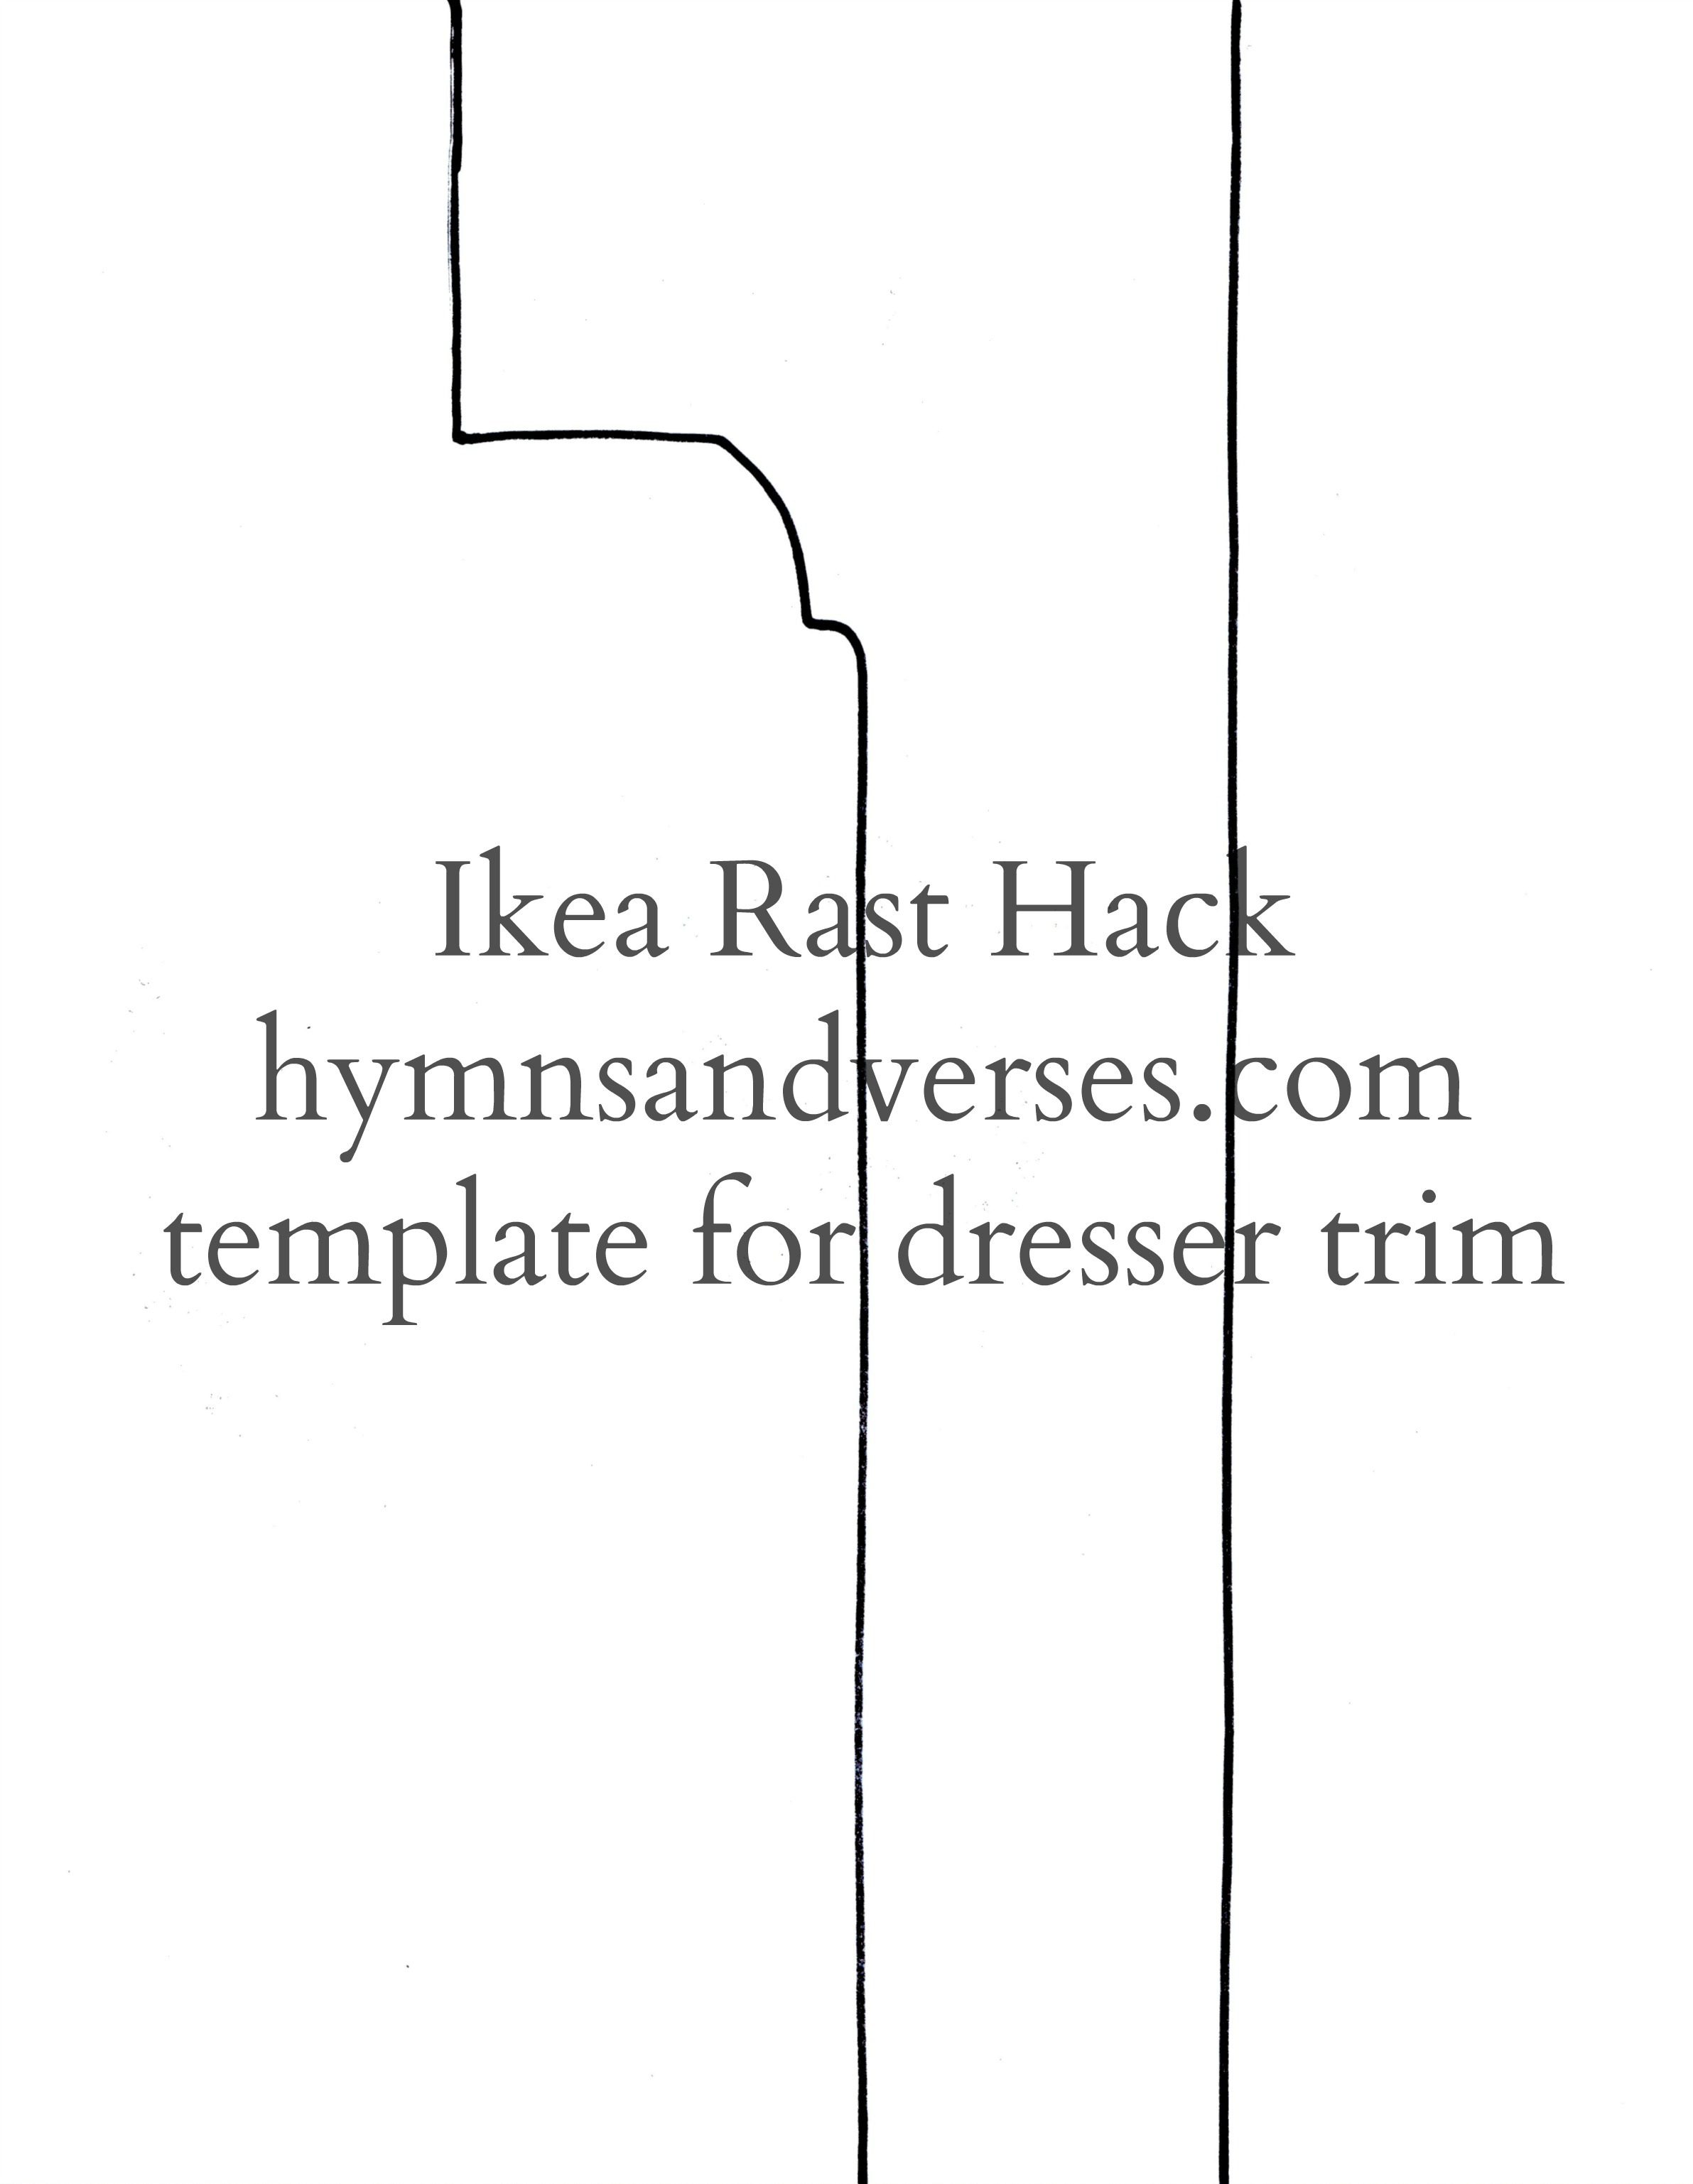
Once the pattern was traced onto the pine board, we again used a jig saw to cut this out. Then I sanded it smooth. To attach this piece to the bottom of the dresser, we again needed to build up the sides to attach it securely.
We used the extra pieces of wood from the drawer and side panels for this. See below.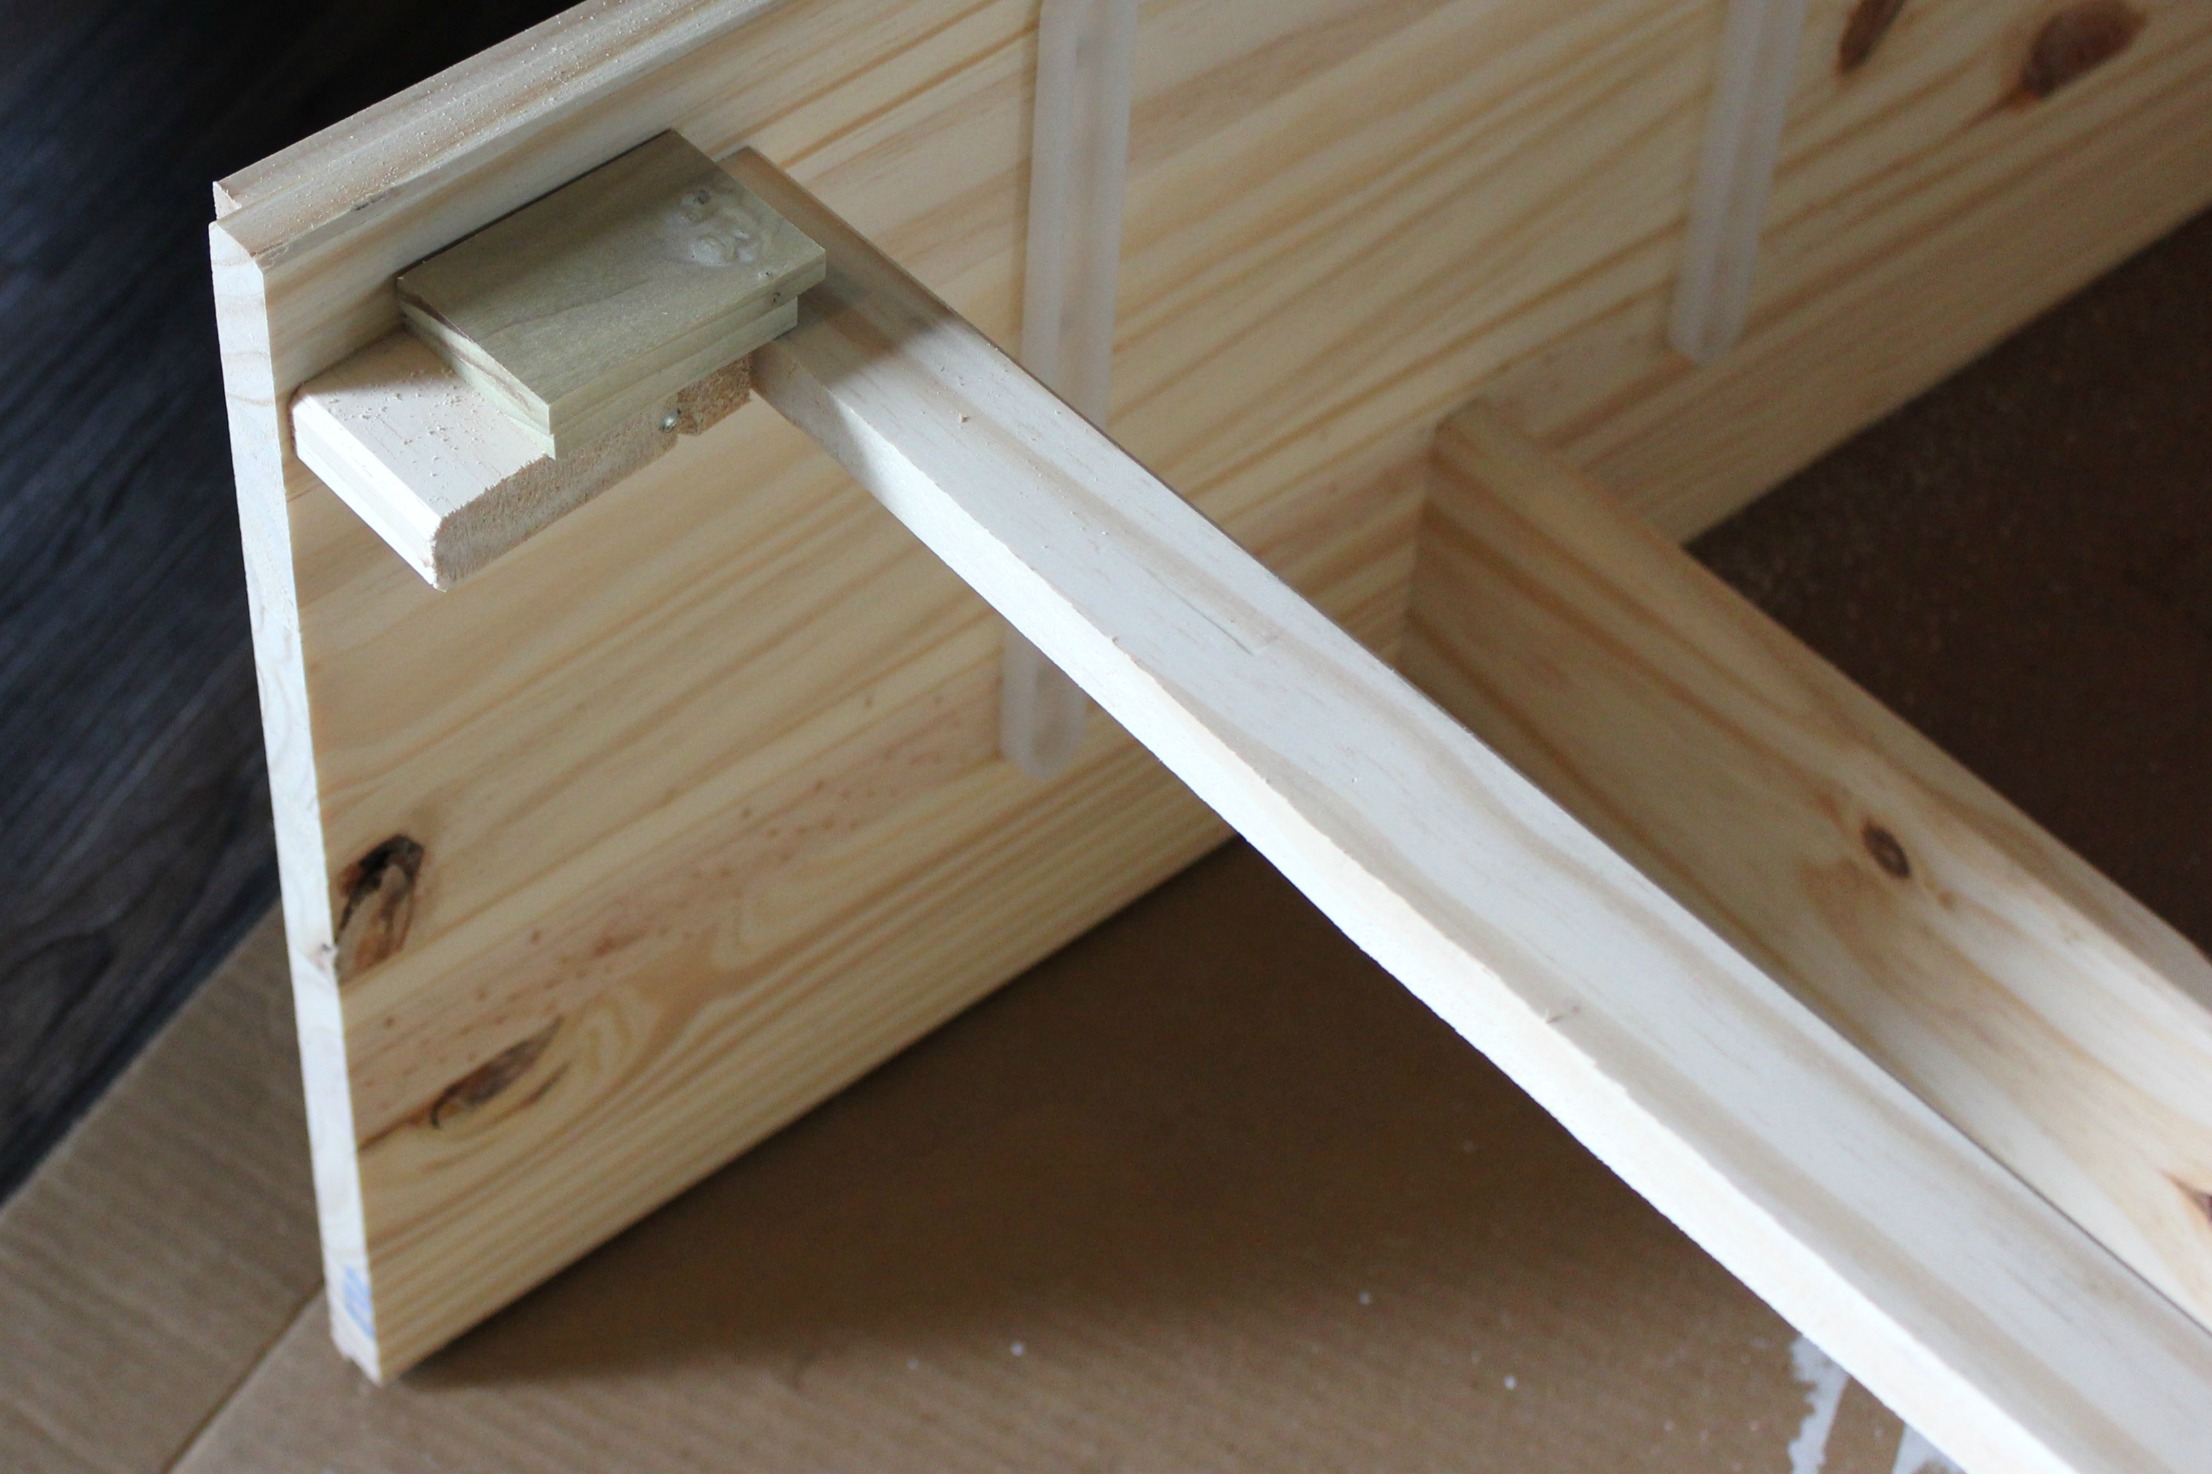
Then we attached the trim piece with wood glue and finish nails. Below you can see the gap between the front piece and the original set in piece and why you need to fill in this gap.
Step 7: Add your new hardware or drawer pulls
Since I used one drawer pull instead of the two knobs that came with the Rast, I filled in the predrilled holes on each drawer with wood filler, sanded, and then we drilled the holes for the drawer pulls. I purchased the pulls I used from Lowe’s. They came in a set of six and were very reasonably priced.
Step 8: Paint or stain the entire dresser
Before painting, I sanded all the rough edges, used wood filler to fill in any gaps in the attached trim, and when dry, sanded those areas until smooth.
You can use wood stain or paint all over the solid wood to turn it a different color and give it whatever unique look you are going for.
As a reminder, here is what the Ikea Rast chest looks like when assembled.
Ikea Rast Hack Painting and Finishing Tips
And, here is our finished Ikea Rast Hack using these building plans. I painted the piece with Maison Blanche Vintage Furniture Paint in Silver Mink and used a tiny bit of Miss Mustard Seed Antiquing Wax on the front trim pieces to provide a slight contrast. I waxed the entire piece with Maison Blanche Clear Antique Wax.

I hope these plans are easy to follow. Just like that, with this awesome Ikea hack, we turned this into a beautiful piece of work! Please feel free to ask any questions you have and I’ll try to help.
If you liked this easy Ikea Rast Hack, stick around because we have more friendly DIY projects that can turn your regular home into what feels like a new home without breaking the bank!

If you like this post, you might also like these DIY posts.
Gloria
Wednesday 17th of February 2021
I haven't had bedroom furniture for about 7 years; nightstand over 30 years. I've been looking @ YouTube for bed frame & I saw lots of videos about ikea hacks & yours & another one I really like but I like yours better. I don't understand your instructions; I wish you had a video. The nightstand is Beautiful!! Excellent Job!!
Homepage
Wednesday 11th of November 2020
... [Trackback]
[...] Informations on that Topic: hymnsandverses.com/ikea-rast-hack-building-plans/ [...]
Lori Breukelman
Friday 9th of October 2020
THIS is exactly what I was looking for. Thank you!!! We grabbed 2 of these RAST's on a whim last night to use as bedside tables - 10 years of marriage and we're finally real adults with matching tables. Right away I knew I wanted to hack them like mad, but this shows my husband a visual what I'm seeing in my brains. I'll be sure to tag you when it's complete
Doreen Cagno
Friday 9th of October 2020
Oh, Lori! I'm so glad you like my hack! I totally get what you mean about husband's seeing what's in our heads! Mine is the same way!
17 Stunning IKEA Hacks that Make the Most of a Plain RAST Dresser – PushUP24
Monday 25th of May 2020
[…] of the RAST dresser makes it easy to add on additional details for a more elevated look. Blogger Doreen Cagno upgraded the various components of her dresser to make it more intricate, designing her own top, […]
IKEA Rast Nightstand Hack – My Dear Dwelling
Thursday 9th of May 2019
[…] Source | Hymns & Verses […]