• Skip to primary navigation
  • Skip to main content
  • Skip to primary sidebar
  • Skip to footer
Hymns and Verses
  • ABOUT
  • Decorating
    • Spring
    • Summer
    • Fall
    • Autumn
    • Christmas
  • Printable
  • Crafts & DIY
  • Recipes

Home

Easy and Inexpensive Hardwood Floor

August 12, 2015 by Hymns and Verses 9 Comments

I’m here today to bring you the final post on Seth’s bedroom.  This probably should have been the first post since it was one of the first things we did in the room – besides painting.  It’s the wood floor treatment we gave to this small space – an easy and inexpensive alternative hardwood floor.


Easy and Inexpensive Hardwood Floor

First, let me say, this is probably not for everyone.  If I was in a position to get hardwood floors for my entire home, I would not have done this. However, our upstairs hallway floor matches what we have on our main living floor; and we’re not quite ready to replace it.  So, I wanted something inexpensive, but still looked good and made a nice transition from the hallway floor.   The other big thing, this room had carpet and all carpet is getting the “heave ho” from our house!   I have horrible allergies and carpet just isn’t great for that reason.  So, here’s our solution!


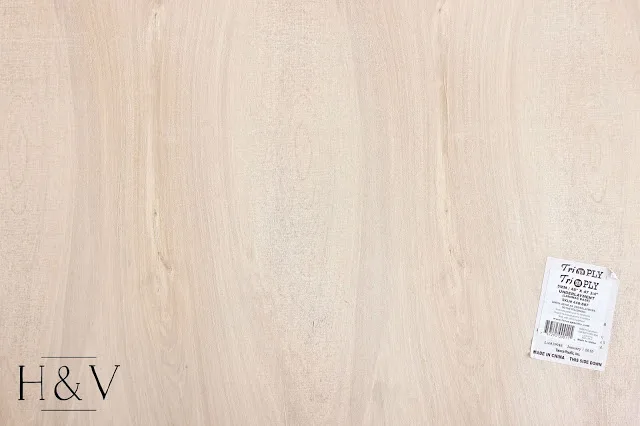
Tri Ply from Home Depot - inexpensive hardwood floor

Tri Ply from Home Depot

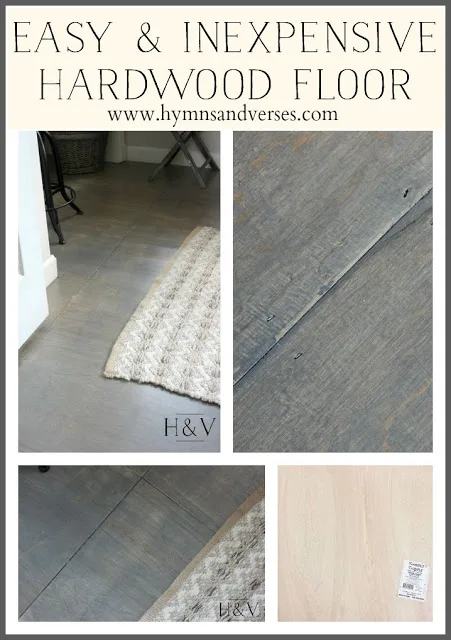
Okay – first off, this isn’t exact brand that we used, but I wanted to give you a source to buy your own product. This is called Tri Ply and comes in 4 ft. x 4 ft. x 1/4 in. sheets and you can find it at Home Depot.  It is sold by the sheet for $8.97 and you can order it online and pick it up at your local store.   My husband works in the flooring industry and had some of this same Tri-Ply in our garage.  The one side has a really beautiful grain and it is smooth.  You may remember that I painted the subfloor in our bedroom and that was my original thought for Seth’s room.  But, when I saw this in the garage, I knew it would look great stained for a more industrial look and it has a much nicer finish than regular subfloor.


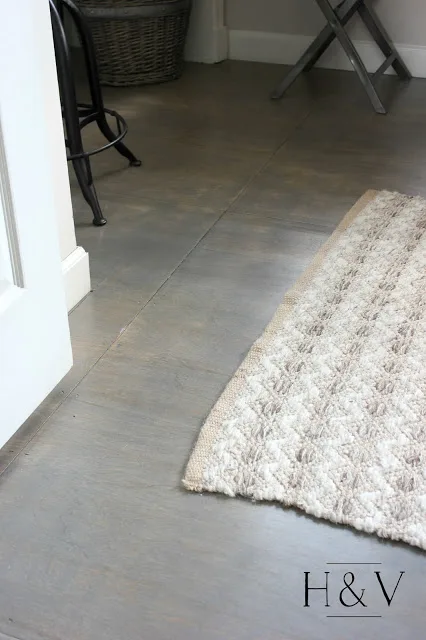
Finished hardwood floor


What we used was 4′ x 4′ x 1/4, but it also comes in 8′ x 4′ x 1/4″.   It is thin enough that you can even cut it with a sharp utility knife to get around corners, closets, etc.


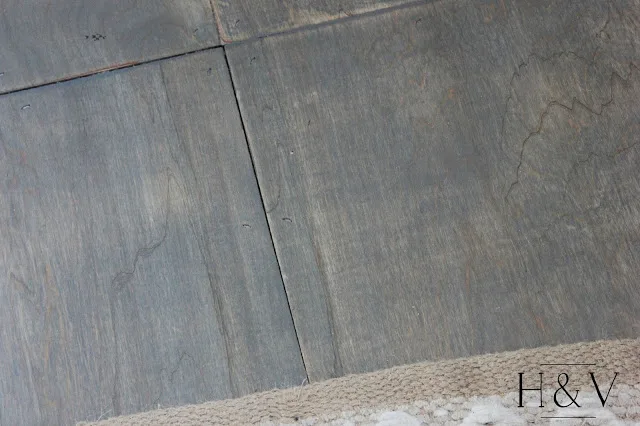
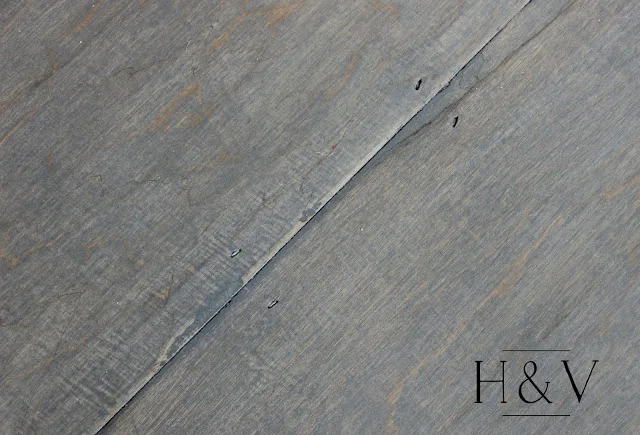
Gray stain hardwood floor


Mark used a pneumatic staple gun with 1/4″ crown staples to attach the Luan to the existing subfloor.  I didn’t fill in the staple holes or cracks in between boards because I wanted it to look rustic.  Again, the Tri-ply is really smooth, so it didn’t require any sanding.  Once the floor was all installed, we stained it with Minwax Classic Grey stain – just one coat.  Then sealed the floor with two coats of poly.


Inexpensive Hardwood Floor


I love how this hardwood floor turned out and  it was free – because we had everything needed right in the garage!  You can’t get better than that – right?  Here are some of the spaces I’ve shared previously in Seth’s room.  You can click each picture to take you to the corresponding post.
 

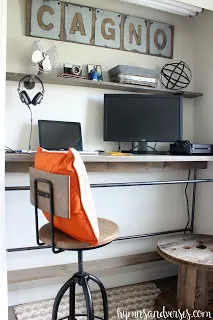
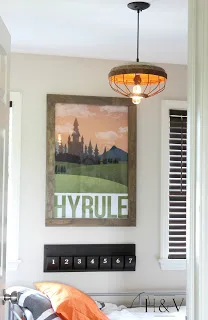
Built-in Closet Industrial Desk


Chicken Feeder Pendant Light

Sign Up Form

Sharing today at:
Remodelaholic
Pin15
Share
Tweet
15 Shares

More Decorating

  • Golden Christmas Home Decor
  • Botanical Design Christmas Tree
  • 2022 Best of Target Christmas Decor
  • Moody Autumn Table for Thanksgiving

Reader Interactions

Comments

  1. Kim @ Savvy Southern Style

    August 12, 2015 at 7:49 pm

    Great idea for the floor and it looks so good.

    Reply
  2. Tarnished Royalty

    August 12, 2015 at 10:27 pm

    I am impressed! That really looks great. I pinned it to my guest bedroom ideas board! ~Ann
    Tarnished Royalty

    Reply
  3. marty (A Stroll Thru Life)

    August 13, 2015 at 1:13 am

    Genius. I love the look and what a great color too.

    Reply
  4. Debbie Huffaker

    August 13, 2015 at 2:33 am

    It looks great. Oh, how I would LOVE hardwood throughout our house, too. But, alas, that will have to wait for several more years!

    Reply
  5. Ellen Ross | Ask Away

    August 13, 2015 at 11:33 am

    Wow I love that and it looks great!!!!! Hardwood is awesome isn't it?!
    Love your blog!
    XO Ellen from Ask Away
    http://www.askawayblog.com

    Reply
  6. Cindy

    August 15, 2015 at 1:36 pm

    What a great idea! And it looks awesome! Thanks for sharing!:)

    Reply
  7. Eleanor Bruce

    January 21, 2016 at 12:39 am

    I’ve been wondering if you could fake the look of a typical wood floor by cutting the luan plywood into strips 8′ long x 3″ wide and install them butted up against each other. Then you could stain it and seal it like you did. My fear is that the veneer or top ply of wood might chip and peel. How have your edges held up?

    Reply
    • Doreen Cagno

      January 21, 2016 at 3:02 am

      Hi, Eleanor. The edges of mine have held up well. We’ve now used this technique in two of our bedrooms. No splinters, etc. Cutting the wood into strips might cause more splintering?

      Reply

Trackbacks

  1. Top 10 DIY's of 2015 - Hymns and Verses says:
    December 29, 2015 at 7:05 am

    […] EASY & INEXPENSIVE HARDWOOD FLOOR […]

    Reply

Leave a Reply Cancel reply

Your email address will not be published. Required fields are marked *

Primary Sidebar

LET’S CONNECT

  • Facebook
  • Instagram
  • Pinterest
  • Twitter
  • YouTube

Welcome to Hymns & Verses, your source for inspiration for your home and life.  Whether it be decorating tips, recipes, or daily life you will find something to brighten your day here.

READ MORE .  .  .  

Archives

Footer

Amazon Affiliate Disclosure

Hymns and Verses/Doreen Cagno is a participant in the Amazon Services LLC advertising program designed to provide a means for sites to earn fees by linking to Amazon.com and affiliated sites.  As an Amazon Associate, I earn from qualifying purchases . See Disclosure Statement.

copyright

All images and text on this site are property of Hymns and Verses.  Please contact [email protected] for all photo requests.  Please do not take my images without first obtaining written permission from me.  All free printables offered are for personal use only.  Pinning is always welcome and appreciated.  Copyright 2012 – 2020

as seen in

Copyright © 2023 · captivating theme by Restored 316

This website uses cookies to improve your experience. We'll assume you're ok with this, but you can opt-out if you wish. Cookie settingsACCEPT
Privacy & Cookies Policy

Privacy Overview

This website uses cookies to improve your experience while you navigate through the website. Out of these cookies, the cookies that are categorized as necessary are stored on your browser as they are essential for the working of basic functionalities of the website. We also use third-party cookies that help us analyze and understand how you use this website. These cookies will be stored in your browser only with your consent. You also have the option to opt-out of these cookies. But opting out of some of these cookies may have an effect on your browsing experience.
Necessary
Always Enabled
Necessary cookies are absolutely essential for the website to function properly. This category only includes cookies that ensures basic functionalities and security features of the website. These cookies do not store any personal information.
Non-necessary
Any cookies that may not be particularly necessary for the website to function and is used specifically to collect user personal data via analytics, ads, other embedded contents are termed as non-necessary cookies. It is mandatory to procure user consent prior to running these cookies on your website.
SAVE & ACCEPT